Affiliate Disclosure: I earn commissions if you shop through the links below at no additional cost to you.
Last Updated on April 13, 2025 by Jeremy
Imagine setting up camp in the wilderness, completely off-grid, with all the comforts of your RV—no noisy generators, no worrying about electrical hookups. That’s the beauty of solar power. With the right setup, you can enjoy unlimited energy straight from the sun, giving you true freedom on the road.
Brands like Renogy, BougeRV, All Powers, Lion Energy, and Redodo offer reliable, user-friendly solar kits designed specifically for RVs. Whether you’re a weekend warrior or a full-time traveler, harnessing the sun’s energy is one of the best investments you can make.
🔗 Want to dive deeper? Check out our complete Solar Power Hub for FAQs, a solar calculator, and energy-saving tips!
Why Install Solar Panels on Your RV?
Switching to solar power isn’t just about going green—it’s about saving money, increasing freedom, and reducing your reliance on shore power or generators.
Here’s what makes solar an essential upgrade for RVers:
✅ Energy Independence: No more depending on campgrounds for hookups.
✅ Cost Savings: Once installed, solar energy is 100% free.
✅ Silent Operation: No more noisy generators ruining the peace of nature.
✅ Eco-Friendly: Reduce your carbon footprint while enjoying the great outdoors.
✅ Long-Term Investment: A well-maintained system lasts 10+ years.
Modern high-efficiency solar panels from brands like Redodo, AllPowers, and Renogy are more powerful than ever, making it easier to stay off-grid longer.
Choosing the Right Solar Panel System for Your RV
Before buying a solar panel system, consider the three types of panels available:
1️⃣ Monocrystalline Panels
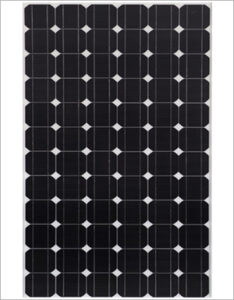
🔹 Most efficient (great for small roof spaces)
🔹 Higher cost but lasts longer
🔹 Best for full-time RVers
Popular Brands: Renogy, Zamp Solar, BougeRV
2️⃣ Polycrystalline Panels
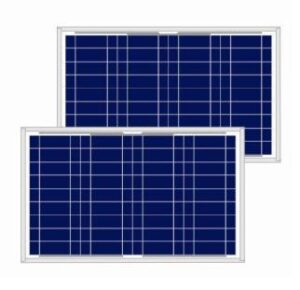
🔹 More affordable but less efficient
🔹 Require more space for the same output
🔹 Good for occasional campers
Popular Brands: HQST, Rich Solar
3️⃣ Thin-Film Panels
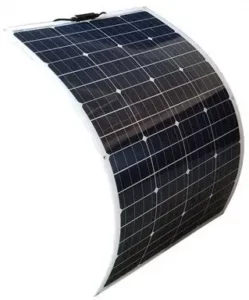
🔹 Lightweight & flexible (great for curved RV roofs)
🔹 Lower efficiency, so you’ll need more of them
🔹 Best for light power needs
Popular Brands: All Powers, Goal Zero
How Much Power Do You Need?
To calculate your power needs:
- List all your appliances & devices.
- Note their wattage.
- Estimate how many hours per day you use each item.
- Total your daily watt-hours.
For example, if you run a 12V fridge (40W) for 8 hours per day, it will consume 320Wh per day. Your solar system should generate at least this amount daily. Visit our Solar Power Hub page to use our Calculator!
Essential Components of an RV Solar Installation
A complete RV solar setup requires more than just panels. Here’s what you’ll need:
1️⃣ Solar Panels
🔹 The primary energy source—available in 100W, 200W, 300W+ sizes
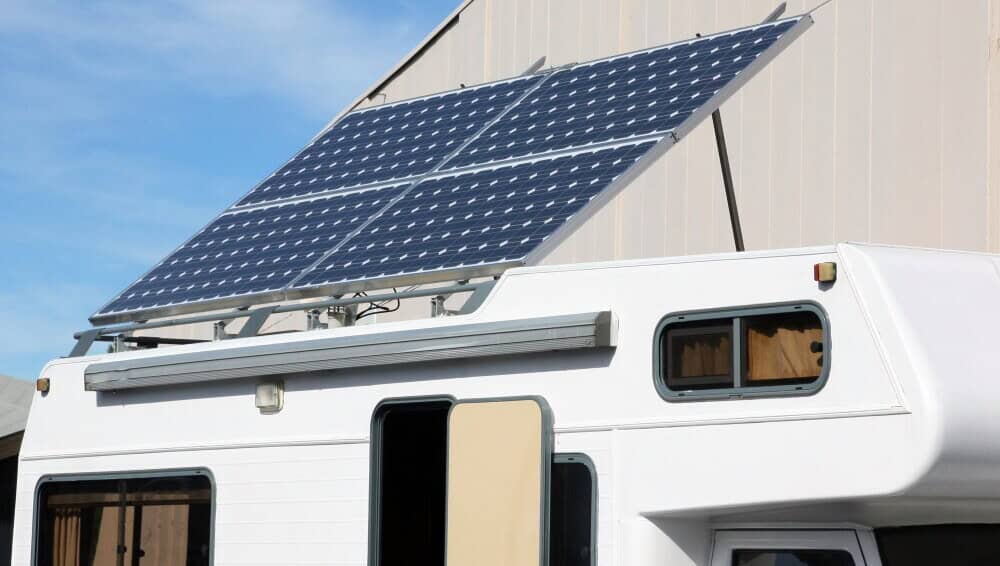
🔹 Mount on your RV roof or use a portable setup
🔹 Brands to Consider: Renogy, BougeRV, All Powers
2️⃣ Charge Controller
🔹 Regulates power flow from panels to batteries
🔹 Prevents overcharging & damage
🔹 MPPT controllers are the most efficient option
Recommended Brands: Victron Energy, EPEver
3️⃣ Batteries (Energy Storage)
🔹 Stores excess energy for use at night
🔹 Lithium batteries are lightweight & last longer
🔹 Lead-acid batteries are cheaper but heavier
Recommended Brands: Redodo, Battle Born, Lion Energy
4️⃣ Inverter
🔹 Converts DC power from batteries into AC power
🔹 Needed for running appliances like microwaves & TVs
Recommended Brands: Victron Energy, Go Power!, Renogy
5️⃣ Wiring & Mounting Hardware
🔹 High-quality MC4 connectors ensure a safe, weatherproof setup
🔹 Proper brackets & tilt mounts help maximize sunlight exposure
Pre-Installation Prep: Getting Your RV Ready for Solar
Before mounting your panels, follow these steps to prep your RV:
✅ Inspect Your Roof: Ensure it’s clean, damage-free, and strong enough for panels.
✅ Plan Your Panel Layout: Avoid shaded spots from vents & AC units.
✅ Gather Your Tools: Have drills, screwdrivers, sealant, wiring, and mounting brackets ready.
✅ Choose a Battery Storage Location: Find a ventilated, dry space inside your RV.
✅ Measure Wire Lengths: Reduce power loss by keeping wires short between components.
Step-by-Step Installation Guide
🛠️ Time Required: 5–10 hours (depending on RV size and experience)
⚙️ Skill Level: Intermediate–Advanced (basic electrical knowledge recommended)
Step 1: Plan Your System Layout
Before anything touches your roof, you need to know what you’re installing and why.
☑ Key Considerations:
-
How many watts do you need? (Estimate daily power usage first)
-
Are you wiring panels in series or parallel?
-
Where will the charge controller, inverter, and battery bank go?
-
How will you route wires safely and weatherproof them?
🔦 Pro Tip: Use painter’s tape to outline where each panel and wire will go. This helps visualize the setup before committing.
Step 2: Mount the Solar Panels on the Roof
What You’ll Need:
-
Solar panels
-
Mounting brackets (Z-brackets or tilt mounts)
-
Butyl tape or adhesive sealant (like Dicor or Sikaflex)
-
Stainless steel screws
-
Drill with appropriate bits
-
Optional: aluminum angle for custom framing
Steps:
-
Clean the area of your RV roof where panels will sit.
-
Apply butyl tape or sealant beneath each bracket to prevent leaks.
-
Drill pilot holes, if needed, and screw down your brackets.
-
Seal all screws and bracket edges with self-leveling sealant.
-
Double check angle and orientation—south-facing is ideal if parked long-term, but flat-mount is simplest for travel.
Step 3: Run Wires from Panels to the RV Interior
What You’ll Need:
-
MC4 extension cables
-
Waterproof cable entry gland (or junction box)
-
Wire strippers, heat shrink tubing, zip ties
Steps:
-
Connect MC4 cables to your panels.
-
Run the wires toward your entry gland (usually a rooftop passthrough near the fridge vent or plumbing chase).
-
Drill a hole slightly smaller than the entry gland, feed wires through, and seal up tight with waterproofing.
-
Use zip ties and adhesive mounts to tidy wires along the roof.
⚠️ Label your positive and negative cables clearly to avoid mix-ups later.
Step 4: Install the Charge Controller
Where: As close to the batteries as possible to reduce voltage drop.
Types: MPPT (more efficient) or PWM (cheaper, but not ideal for big setups)
Steps:
-
Mount the charge controller on a wall with ventilation.
-
Connect solar panel wires to the input side (through an inline fuse).
-
Connect battery wires to the output side (with another fuse or breaker).
-
Use the correct wire gauge (typically 8–10 AWG or heavier for longer runs).
-
Secure all wires with clamps or conduits.
Step 5: Connect Batteries and Inverter
What You’ll Need:
-
Deep-cycle or lithium batteries (12V or 6V)
-
Bus bars (optional but helpful for clean wiring)
-
Battery cables (4 to 0 AWG depending on load)
-
Inverter (pure sine wave for sensitive electronics)
Steps:
-
Connect the charge controller’s battery output to your battery bank (positive to positive, negative to negative).
-
Install fuses or breakers between all major components.
-
If you’re using an inverter, connect it directly to the batteries using proper gauge wire.
-
Ground your system to your RV chassis or a dedicated ground bus.
🔋 Make sure your battery venting is adequate if using lead-acid or AGM batteries.
Step 6: Test and Power Up
Steps:
-
Double-check all connections are tight and polarity is correct.
-
Turn on the charge controller first—this should show voltage from the panels.
-
Then connect the inverter and test an AC appliance.
-
Monitor voltage and amperage to ensure the system is charging and discharging correctly.
✅ BONUS TIPS
-
Add a battery monitor like a Victron BMV or Renogy shunt to track real-time usage.
-
Label everything—especially if you’re boondocking with others who might need to troubleshoot your setup.
-
Fuse everything—it’s not overkill, it’s smart. Every wire should be protected from overloads.
-
Protect against shading—shade on just one panel can drop performance big time.
Your Solar System is Live 🔋
Congratulations! You’ve now got clean, quiet power pumping into your RV batteries straight from the sun. No noisy generators, no scrambling for hookups, and a lot more independence.
Maintaining Your RV Solar System
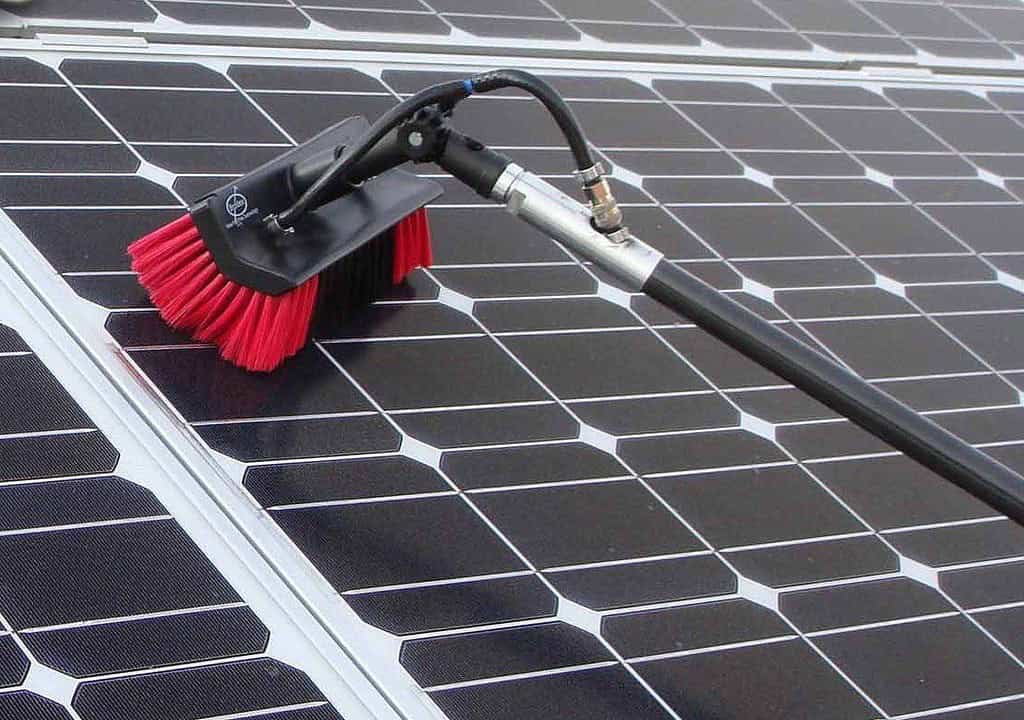
To keep your solar system running at peak efficiency, follow these maintenance tips:
🔹 Clean your panels every 2-3 months to remove dirt & dust
🔹 Check wiring connections for looseness or corrosion
🔹 Monitor battery voltage to prevent deep discharges
🔹 Inspect charge controller & inverter for error messages
🔹 Reposition panels in winter to maximize sunlight exposure
If you notice low power output, check for:
🚨 Shade or debris blocking sunlight
🚨 Loose wiring connections
🚨 Aging batteries that may need replacement
💡 Need more troubleshooting tips? Visit our Solar Power Hub for detailed guides!
Final Thoughts: Is RV Solar Right for You?
If you love boondocking, off-grid camping, or just want more energy independence, an RV solar system is one of the best upgrades you can make. While the upfront cost may seem high, the long-term savings & convenience make it worthwhile.
🔹 No more campground fees for hookups
🔹 No loud generators—just quiet, free energy
🔹 Sustainable power for years to come
For more solar gear, check out our Affiliate Brand Directory for the best panels, batteries, and accessories!
🔆 Ready to harness the power of the sun? Drop your questions below—I’d love to hear your thoughts!
Until next time, happy camping!


.jpg/:/cr=t:5.56%25,l:0%25,w:100%25,h:88.89%25/rs=w:1240,h:620,cg:true)


Leave a Reply