
Affiliate Disclosure: I earn commissions if you shop through the links below at no additional cost to you.
Last Updated on August 14, 2025 by Jeremy
Dreaming of the perfect outdoor RV kitchen? Cooking outside is one of those joys of camping that never gets old. Whether it’s flipping pancakes on a griddle, grilling burgers, or just brewing coffee in fresh morning air, a good outdoor kitchen makes every meal better. I’ve spent more than a few camping trips tinkering with my setup, trying different gear, and learning by trial and error.
There’s no single right way to do it, but if you’re looking for some friendly help building your own outdoor RV kitchen, I’ll walk you through tips and gear that have made all the difference for me. You’ll also find some real-life stories from the road, so you can get a feel for what really makes an outdoor camper kitchen shine.
An outdoor kitchen setup takes some planning, but the rewards are totally worth it: less mess inside your RV, less propane smell lingering indoors, and way more fun around the picnic table. Plus, you get to spend more time outdoors and less time cleaning up inside, which is a win in my book.
Step 1: Decide What Kind of Cooking You Love
Before picking up new gear or laying out your setup, spend a little time thinking about the kind of cooking you actually enjoy outdoors. Are you a camp chef who likes trying new recipes, or do you just want something simple to whip up a quick meal? Maybe you have a passion for hearty breakfasts cooked in the fresh morning air, or you simply look forward to grilling up a few burgers at sunset. The answer will help shape all your other decisions.
Questions to Help You Choose:
- Do you want to grill, use a stove, or have both ready?
- How many people do you usually cook for?
- Do you need to cook for special diets, like gluten-free or vegetarian?
- Will you need an oven, griddle, or just burners?
- How often do you want to cook outside versus indoors?
- Do you prefer meal prep to be elaborate or do you like quick fixes?
Example Setups in Action:
- I use a classic camp stove and a BBQ at each end of the picnic table. This lets me keep meats and veggies separate, plus it keeps the heat away from where we sit.
- Last year, I picked up a Blackstone All-in-One with a grill, flattop, and burners. It became a daily favorite, with super versatility and easy cleanup. (If you want to learn a bit more about those, check out my take on Blackstone Griddles for RVers.)
- A friend of mine prefers going oldschool, with just a portable charcoal grill and a cast iron skillet, which works great for everything from steaks to corn on the cob.
Having a clear vision for your outdoor kitchen makes it easier to build a setup you’ll actually use and love.
Step 2: Choose Your Core Cooking Gear
Your cooking gear is the backbone of your outdoor kitchen. The right mix depends on what you love to cook and how often you’ll use it.
The Most Popular Outdoor RV Cooking Tools:
- Camp Stove: Lightweight and portable, great for boiling water, sauteing veggies, or making simple meals.
- Propane Grill: Classic BBQ flavor in a compact package. Burgers, kebabs, and skewers are all up for grabs.
- Griddle: Great for breakfasts, stirfry, and anything that doesn’t work well on standard grill grates. The Blackstone Griddle is my pick, but there are lots of options.
- Portable Pizza Oven or Dutch Oven: Good if you want to go beyond basics. Pizza, cobbler, or sourdough bread over the fire is something special! You can even try baking cinnamon rolls or making casseroles for the whole crew.
Pro Tip:
Pack a windscreen for your camp stove or griddle if you cook in breezy spots. It saves fuel and keeps the heat even. Also, bring along extra fuel for longer trips, so you’re never caught without a way to cook dinner.
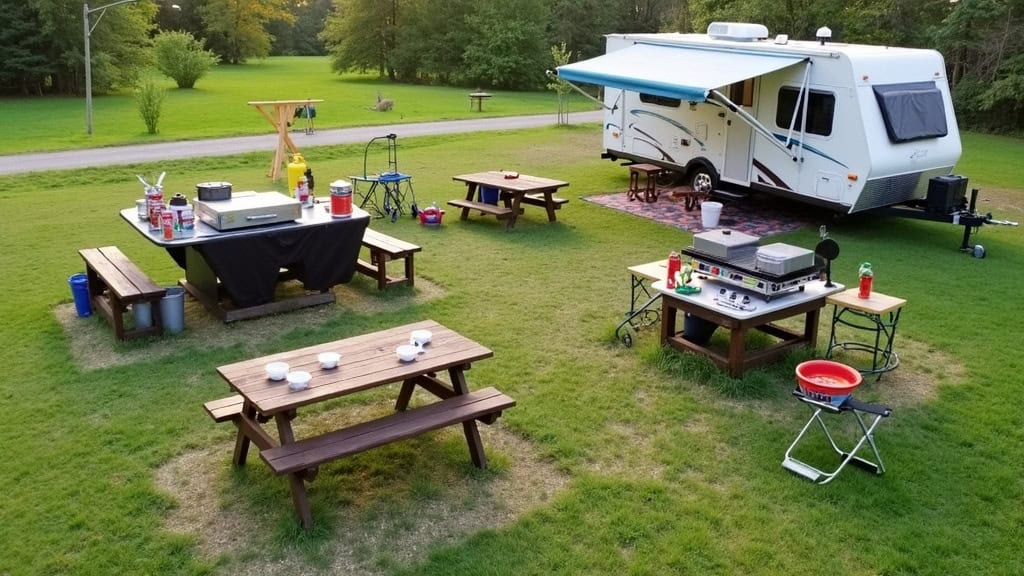
Step 3: Nail Your Kitchen Layout and Prep Space
No one likes cooking elbow to elbow or tripping over chairs and coolers. Having a clean, practical layout saves time and hassle, plus it’s just more enjoyable. Organizing your space ahead of time also keeps your cooking area safer for everyone involved.
Setting Up Your Cooking and Prep Stations:
- Put your main cooking gear at each end of your picnic table. (That’s what I do: camp stove at one end, grill at the other.)
- Keep at least half your table clear for prep space, snacks, and plates. A clutter-free area is key to easy meal prep.
- Bring a folding side table or small utility table if your RV doesn’t have an outdoor kitchen built-in. It’s super handy for setting down utensils and trays, and you can tuck it away when not in use.
- Organize frequently used gear in bins or drawers. A dedicated “kitchen bin” with spices, foil, utensils, and towels saves a ton of running back and forth.
- Add a hook or bungee for hanging a kitchen towel so you always have it close by.
Every family is different, but keeping things spaced out makes group meals smoother and safer. If you have young kids or pets, you can use collapsible fences or mats to set boundaries and keep little ones safe while you cook.
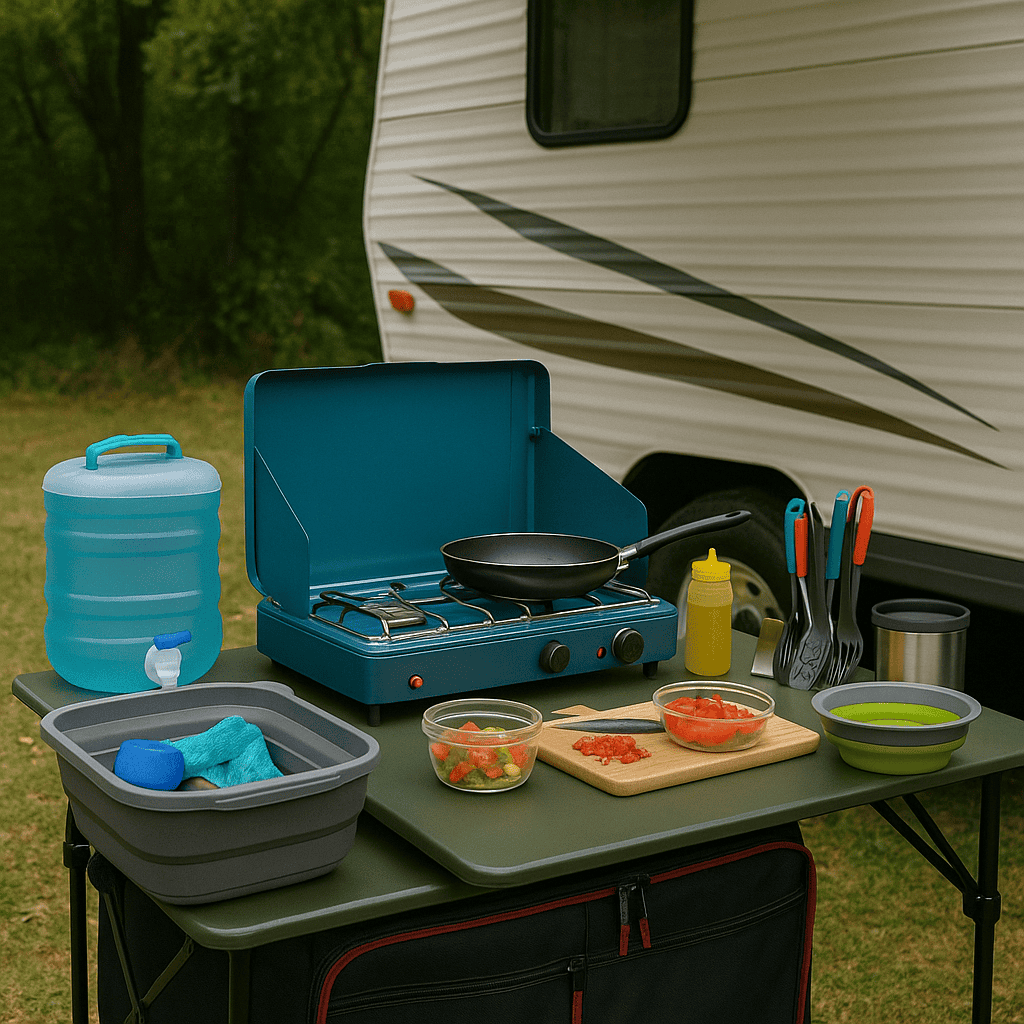
Step 4: Don’t Forget Water and Cleanup Solutions
Washing dishes and sticky hands tends to get less attention, but it’s one of those things that’ll grind your outdoor cooking to a halt if you don’t have a plan. My setup still relies on washing dishes inside the RV, but some folks like using a portable outdoor sink or collapsible wash bins. You can also bring extra towels and a simple soap dispenser for quick cleanup.
Simple Ways to Handle Water and Cleanup:
- Bring a couple of collapsible wash tubs or buckets for washing and rinsing outside. These tuck away easily when not in use.
- Have a water jug with a spigot nearby so you can rinse hands or fruit at any time.
- A small portable grey water tank or a catch bin (if you’re nowhere near a drain) keeps things tidy and follows campground rules.
- Designate a drying rack space, either with folding racks or mesh bags, so dishes dry quickly and are easy to put away.
- Use biodegradable soap for dishwashing outdoors—it’s easier on the environment and often required by campsites.
Cleanup outside means less mess in your RV and helps you enjoy the outdoor vibe longer after meals. It’s also a great idea to assign cleanup jobs to each person so things go quickly and nobody is stuck doing all the work.
Step 5: Power, Fuel, and Storage Tips
When cooking outside, you’ll have to plan your fuel and storage. Propane tanks, lighter fluid, or butane canisters all have their place, depending on your gear. Safe storage is really important here, especially with kids or pets around. Storing fuel safely keeps your trip both fun and worryfree.
How to Stay Powered Up and Organized:
- Keep a backup propane canister handy. If you cook outdoors a lot, you’ll be surprised how fast they run out.
- Store fuel out of direct sunlight and away from the fire or hot appliances. Safety comes first every time!
- Use clear bins or bags for seasonings, utensils, and nonperishable foods. Weather-proof options are nice if you leave them outside overnight.
- Label bins if you’re camping with others. No more hunting for spatulas or salt shakers.
- If you carry electrical appliances for food prep, bring outdoor-safe extension cords and always double-check connections before using them near water or rain.
Staying organized stops you from running in and out of your RV, so you get more chill time under the awning. It also helps prevent waste because you’ll be able to spot what you have quickly and keep everything within arm’s reach when you need it.
Step 6: Extra Creature Comforts and Safety Gear
Once you’ve got the basics set, there are a couple accessories that make outdoor RV cooking feel just like home—even better, honestly! A few favorites I always recommend make meal times smoother and turn regular cookouts into something special:
Gear Worth Checking Out:
- Clipon or magnetic lights for night cooking. They make it easy to see what you’re doing even after dark.
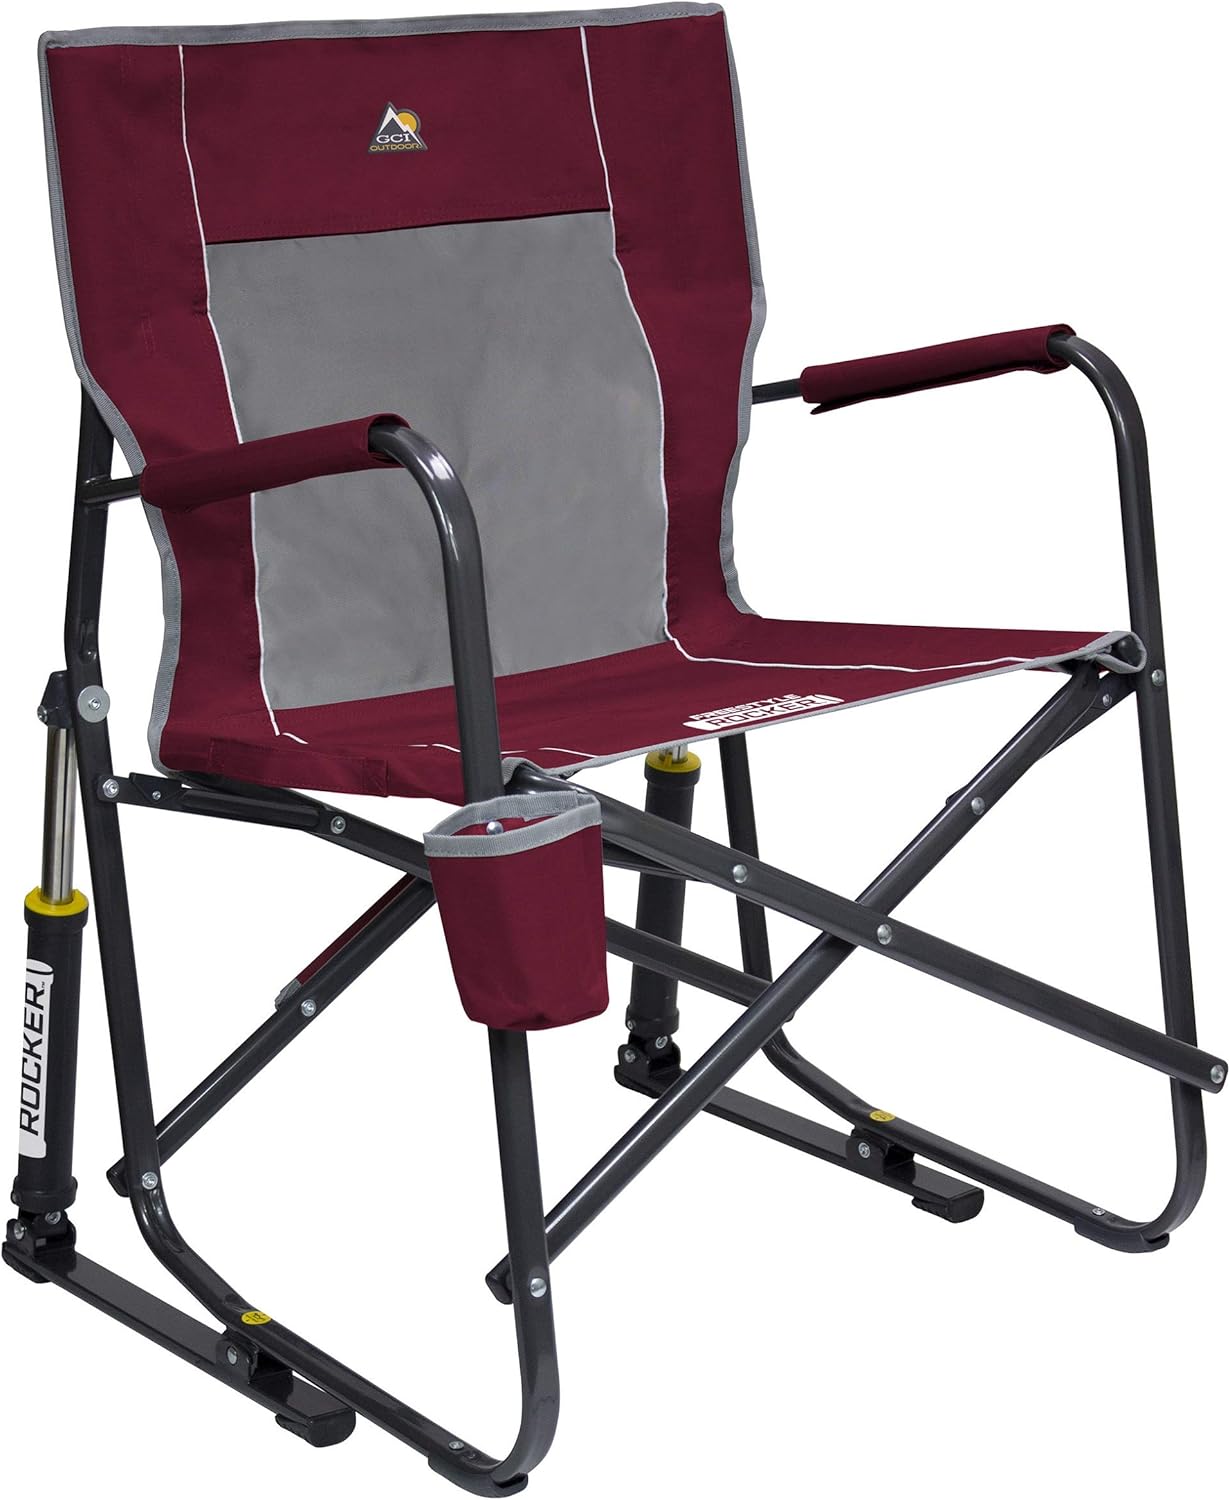
- Comfy camp chairs for the chef, or a little speaker for music if you want to set the mood.
- Portable fans or a small shade canopy on extra sunny days. Both help you beat the heat during long afternoons.
- Fire extinguisher, oven mitts, and a first aid kit nearby, just in case.
- Bug spray or a citronella candle if you cook near woods or water.
- Insulated drink tumblers to keep your beverages cold or hot, depending on the season.
It’s easy to think of comfort gear as “extras,” but sometimes it’s these touches that turn an evening meal into a true camping memory. Take a little time to throw a picnic blanket or your favorite mug into your kitchen kit, and suddenly every meal outside feels next-level cool.
Outdoor RV Kitchen FAQs and Troubleshooting
What’s the easiest outdoor RV kitchen for a beginner?
Even a simple camp stove and folding table will get you started. You don’t need every gadget. Start small, then add gear as you figure out what you really use. Even old favorites, like roasting marshmallows over a fire pit, can be a big hit without much fuss or expense.
How do I keep my outdoor kitchen clean between meals?
- Wipe down surfaces after every use with a damp cloth.
- Seal up leftovers and trash to keep critters away.
- Pack out everything that came with you, including scraps and wrappers; little things add up.
- Rinse utensils and dishes right after use so nothing sticks, especially if you’re eating outdoors multiple times a day.
How do I stay safe using propane or fire outdoors?
Check connections for leaks, never store propane canisters in direct sun, and keep grills far from awnings or RV walls to prevent accidents. If you have pets or kids running around, lay out clear safety zones, and keep your fire extinguisher in plain sight.
Next Steps for Creating Your Outdoor Kitchen
Planning and building an RV outdoor kitchen opens up a whole new world of campground cooking. By picking the gear you’ll actually use, organizing your stations, and thinking a bit about comfort and power, you’ll save yourself a ton of hassle in the long run. Don’t be afraid to try out new layout ideas on each trip and adjust as you go.
Action Steps to Try:
- Pick one area to upgrade: your grill, prep station, or cleanup kit. Even small changes, like adding a new set of utensils or a weatherproof storage bin, can have a big impact.
- Test your setup on a weekend campout. Keep notes on what worked and what drove you nuts. Sometimes the smallest things, like knife storage or more prep space, can make or break your kitchen comfort.
- Make one change each trip, and soon cooking outside your RV will feel as easy as at home.
Got a favorite outdoor cooking setup or a tip that makes camp meals easier? I’d love to hear what works for you below! Swapping ideas is the fastest way to make your next camp kitchen even better. Happy camping and tasty cooking!


.jpg/:/cr=t:5.56%25,l:0%25,w:100%25,h:88.89%25/rs=w:1240,h:620,cg:true)


Leave a Reply