

Affiliate Disclosure: I earn commissions if you shop through the links below at no additional cost to you.
Last Updated on February 24, 2025 by Jeremy
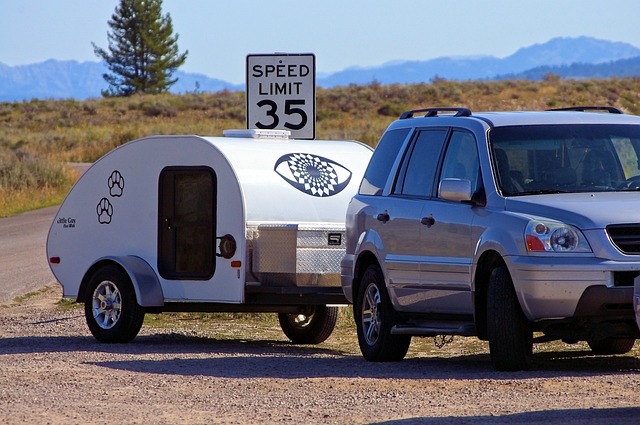
Imagine heading out on the perfect camping trip—your RV is packed, the destination is set, and the open road stretches ahead. But then, disaster strikes. Your trailer starts pulling to one side, and you catch a glimpse of smoke near the axle. A blown tire has just turned your dream getaway into an emergency stop.
Are you prepared?
Knowing how to change a tire on a travel trailer is a skill every RVer should have. Tires are one of the most overlooked maintenance items on an RV, yet they endure some of the toughest conditions—long miles, heavy loads, and exposure to extreme weather.
This guide will walk you through a step-by-step process for changing a trailer tire safely and efficiently. We’ll also discuss alternative solutions, common mistakes to avoid, and essential maintenance tips to help you stay ahead of tire trouble.
Step 1: Find a Safe Location
The moment you feel a tire failure, the first priority is to pull over safely. Ideally, aim for:
✅ Flat, level ground—Avoid slopes or uneven terrain that could cause instability.
✅ A safe distance from traffic—Rest areas, wide shoulders, or designated pullouts are ideal.
✅ Visibility markers—Use hazard lights, reflective triangles, or flares to alert other drivers.
💡 Pro Tip: If possible, avoid pulling over on soft gravel or mud, as this can make jacking up the trailer difficult.
Step 2: Gather the Necessary Tools
Before you start, you’ll need the right tools. Keep these in your RV’s pass-through storage or tow vehicle:
✔ Lug wrench or impact driver (Cordless impact wrenches save time)
✔ Trailer-rated jack (Hydraulic or scissor jacks work best)
✔ Wheel chocks (Prevent the trailer from rolling)
✔ Spare tire (Check pressure regularly)
✔ Gloves & knee pad (For comfort and safety)
✔ Reflective vest & road markers (For visibility at night or in low light)
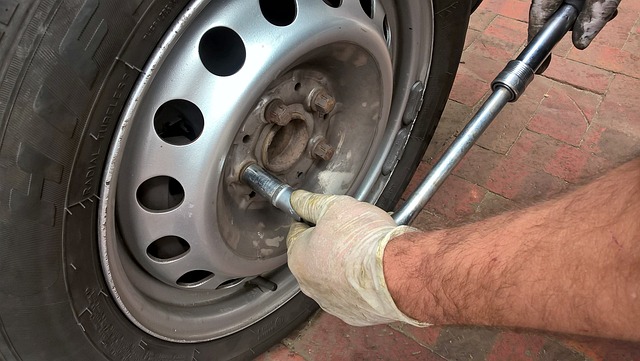
Step 3: Loosen the Lug Nuts

🔹 Before jacking up the trailer, use your lug wrench or impact driver to loosen (but not remove) the lug nuts.
🔹 This prevents the wheel from spinning once the trailer is lifted.
💡 Pro Tip: If the lug nuts are stuck, a breaker bar or penetrating oil can help loosen them.
Step 4: Jack Up the Trailer
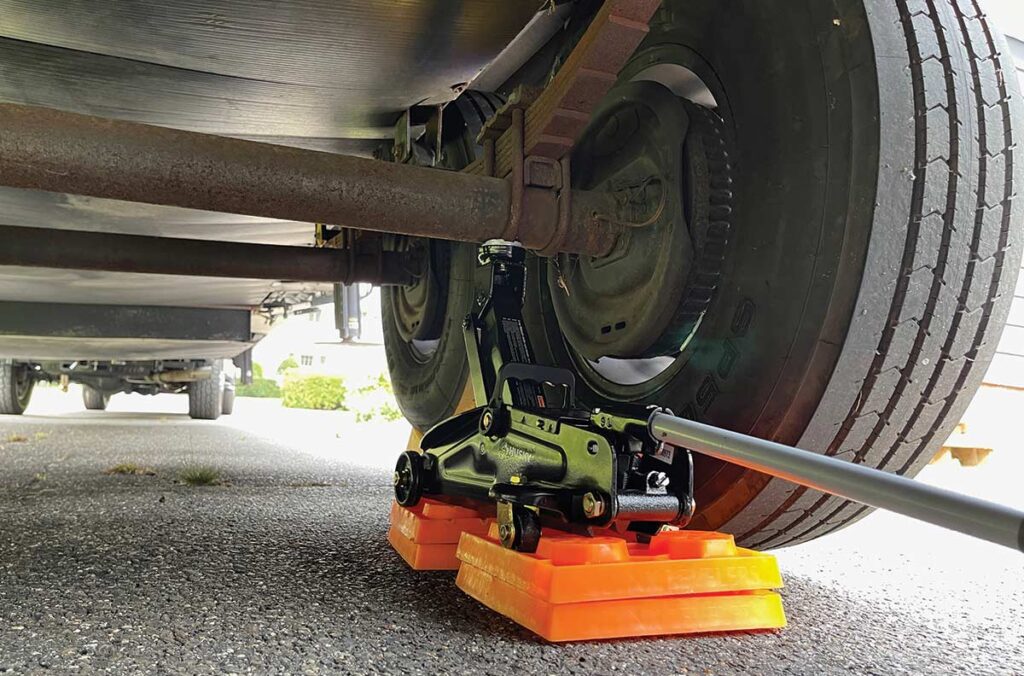
Now, position your jack securely under:
✔ The trailer’s frame, near the axle
✔ A reinforced jack point (avoid weak spots like stabilizer jacks)
🔺 DO NOT use stabilizer jacks or leveling blocks to lift the trailer—they aren’t designed to hold weight!
Raise the trailer until the flat tire is just off the ground.
Step 5: Remove the Flat Tire
🔹 Fully unscrew the lug nuts and carefully remove the flat tire.
🔹 If the wheel is stuck due to corrosion, a firm kick to opposite sides of the rim can help break it free.
🔹 Place the flat tire underneath the trailer—this acts as a safety measure in case the jack fails.
Step 6: Install the Spare Tire
✔ Align the spare tire with the wheel studs.
✔ Use your legs to help lift and adjust it—this prevents back strain.
✔ Hand-tighten the lug nuts in place.
💡 Pro Tip: If the tire doesn’t slide onto the studs easily, raise or lower the jack slightly until it aligns.
Step 7: Lower the Trailer & Tighten Lug Nuts
Once the trailer is back on solid ground:
🔹 Use a star-pattern tightening sequence to evenly distribute pressure across the wheel.
🔹 Torque each lug nut to manufacturer specifications (typically 90-120 ft-lbs for most travel trailers).
Here’s how the star pattern works:
⭐ 5-lug wheel: Tighten in a crisscross pattern.
⭐ 6-lug or 8-lug wheel: Follow an alternating sequence for even pressure.

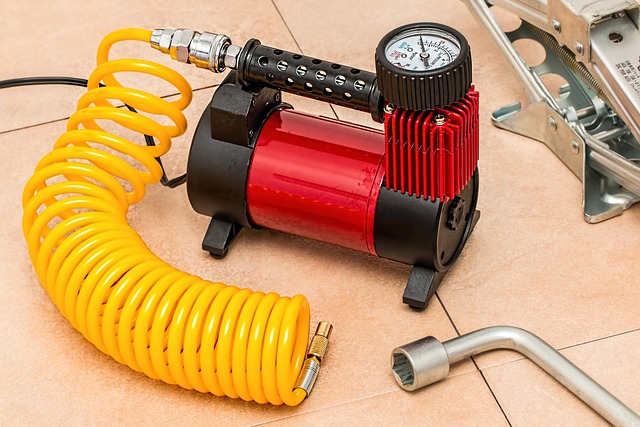
Step 8: Check Tire Pressure
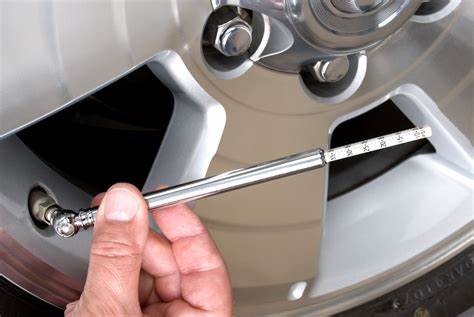
✔ Use a tire pressure gauge to ensure the spare tire is inflated to the recommended PSI.
✔ Trailer tires typically range from 50-80 PSI, depending on load rating.
If your spare is low on air, use a portable air compressor or drive cautiously to the nearest service station.
Step 9: Clean Up & Get Back on the Road
✔ Pack away all tools in a secure place.
✔ Double-check that all lug nuts are tight.
✔ Drive a short distance, then re-check lug nuts after 50 miles—this helps ensure everything stays secure.
🚀 You’re back on the road!
Other Scenarios & Alternatives
Scenario 1: Slow Leak? Plug the Tire Instead
If your tire is leaking air but isn’t completely flat, a tire plug kit can be a lifesaver.
✅ Step 1: Find the puncture (listen for a “hiss” or use soapy water to spot bubbles).
✅ Step 2: Use the reaming tool to clean out the hole.
✅ Step 3: Insert a tire plug using the included tool and trim excess material.
✅ Step 4: Inflate the tire to proper PSI and check for leaks.
💡 A plugged tire is a temporary fix! Get it professionally patched or replaced ASAP.
Scenario 2: No Spare Tire? Call for Assistance
If you don’t have a spare or feel unsafe changing the tire, consider:
🚛 Roadside Assistance: Many RV insurance policies include tire service.
📞 Good Sam Roadside Assistance or AAA RV Membership can tow you to a service center.
🛠 Mobile RV Techs can come directly to your location and replace the tire on-site.
Final Thoughts: Be Prepared, Stay Safe
Flat tires happen—but if you stay prepared, they don’t have to ruin your trip.
✔ Check your tire pressure before every trip.
✔ Inspect treads & sidewalls for wear, cracks, or bulges.
✔ Carry a well-inflated spare & essential tools.
🔹 Not sure which tires are best for your RV? Check out my guide on the 6 Best Rated Travel Trailer Tires to explore the top options for durability, longevity, and performance.
🔹 Need to replace your tires? Shop from trusted retailers:
- Tire Rack – A one-stop shop for high-quality tires, brakes, and suspension upgrades.
- Tire Mart – Reliable tire options for RVs, trailers, and off-grid setups.
💬 Have you ever had to change a trailer tire on the road? Drop your experience in the comments—I’d love to hear how you handled it!
🚀 Safe travels and happy camping!


.jpg/:/cr=t:5.56%25,l:0%25,w:100%25,h:88.89%25/rs=w:1240,h:620,cg:true)


Leave a Reply