
Affiliate Disclosure: I earn commissions if you shop through the links below at no additional cost to you.
Last Updated on March 9, 2026 by Jeremy
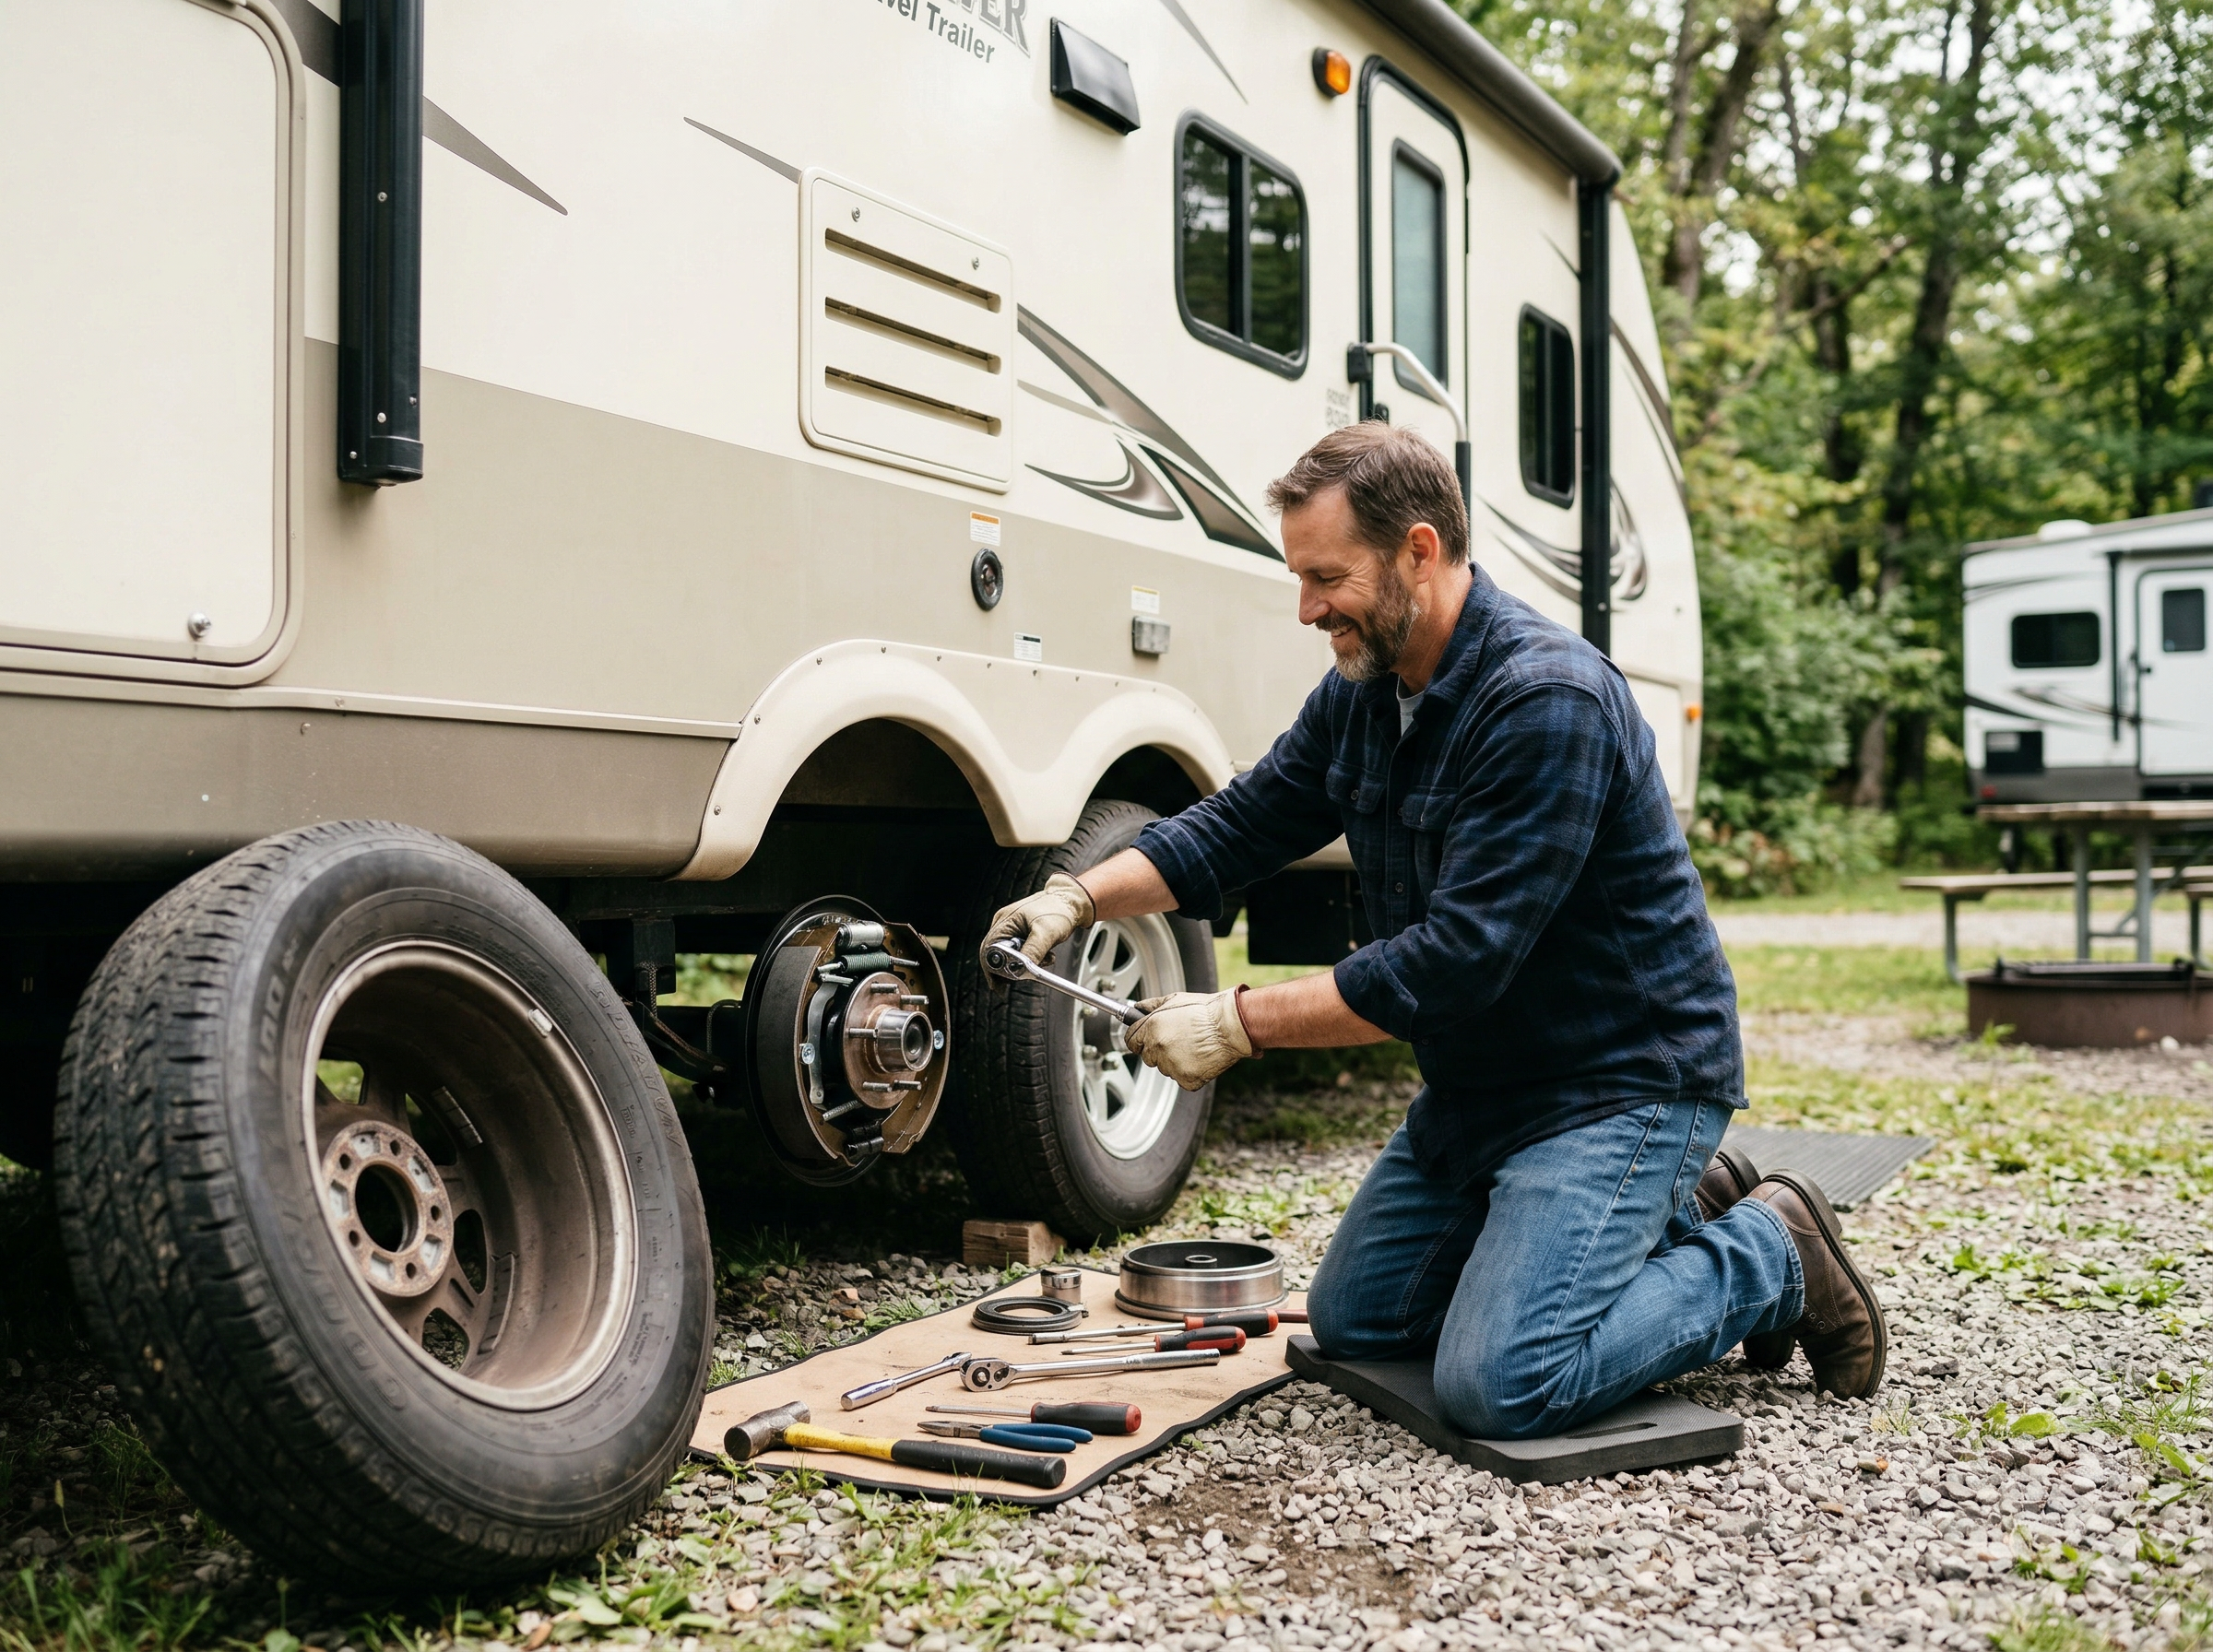
Trailer brakes are one of those components RV owners don’t think much about—until something feels off while towing. Maybe the trailer starts pushing the truck a little harder on downhill grades, or the brake controller suddenly needs more gain than usual. Those are usually signs that your travel trailer brakes are wearing out.
The good news is that replacing electric trailer brakes is one of the more manageable DIY repairs for RV owners who are comfortable working with basic tools. Most travel trailers use standard electric drum brake assemblies that can be replaced as a complete unit rather than rebuilding each component.
This guide walks through how travel trailer brakes work, how to know when they need replacement, and the step-by-step process for installing new brake assemblies so your trailer stops safely again.
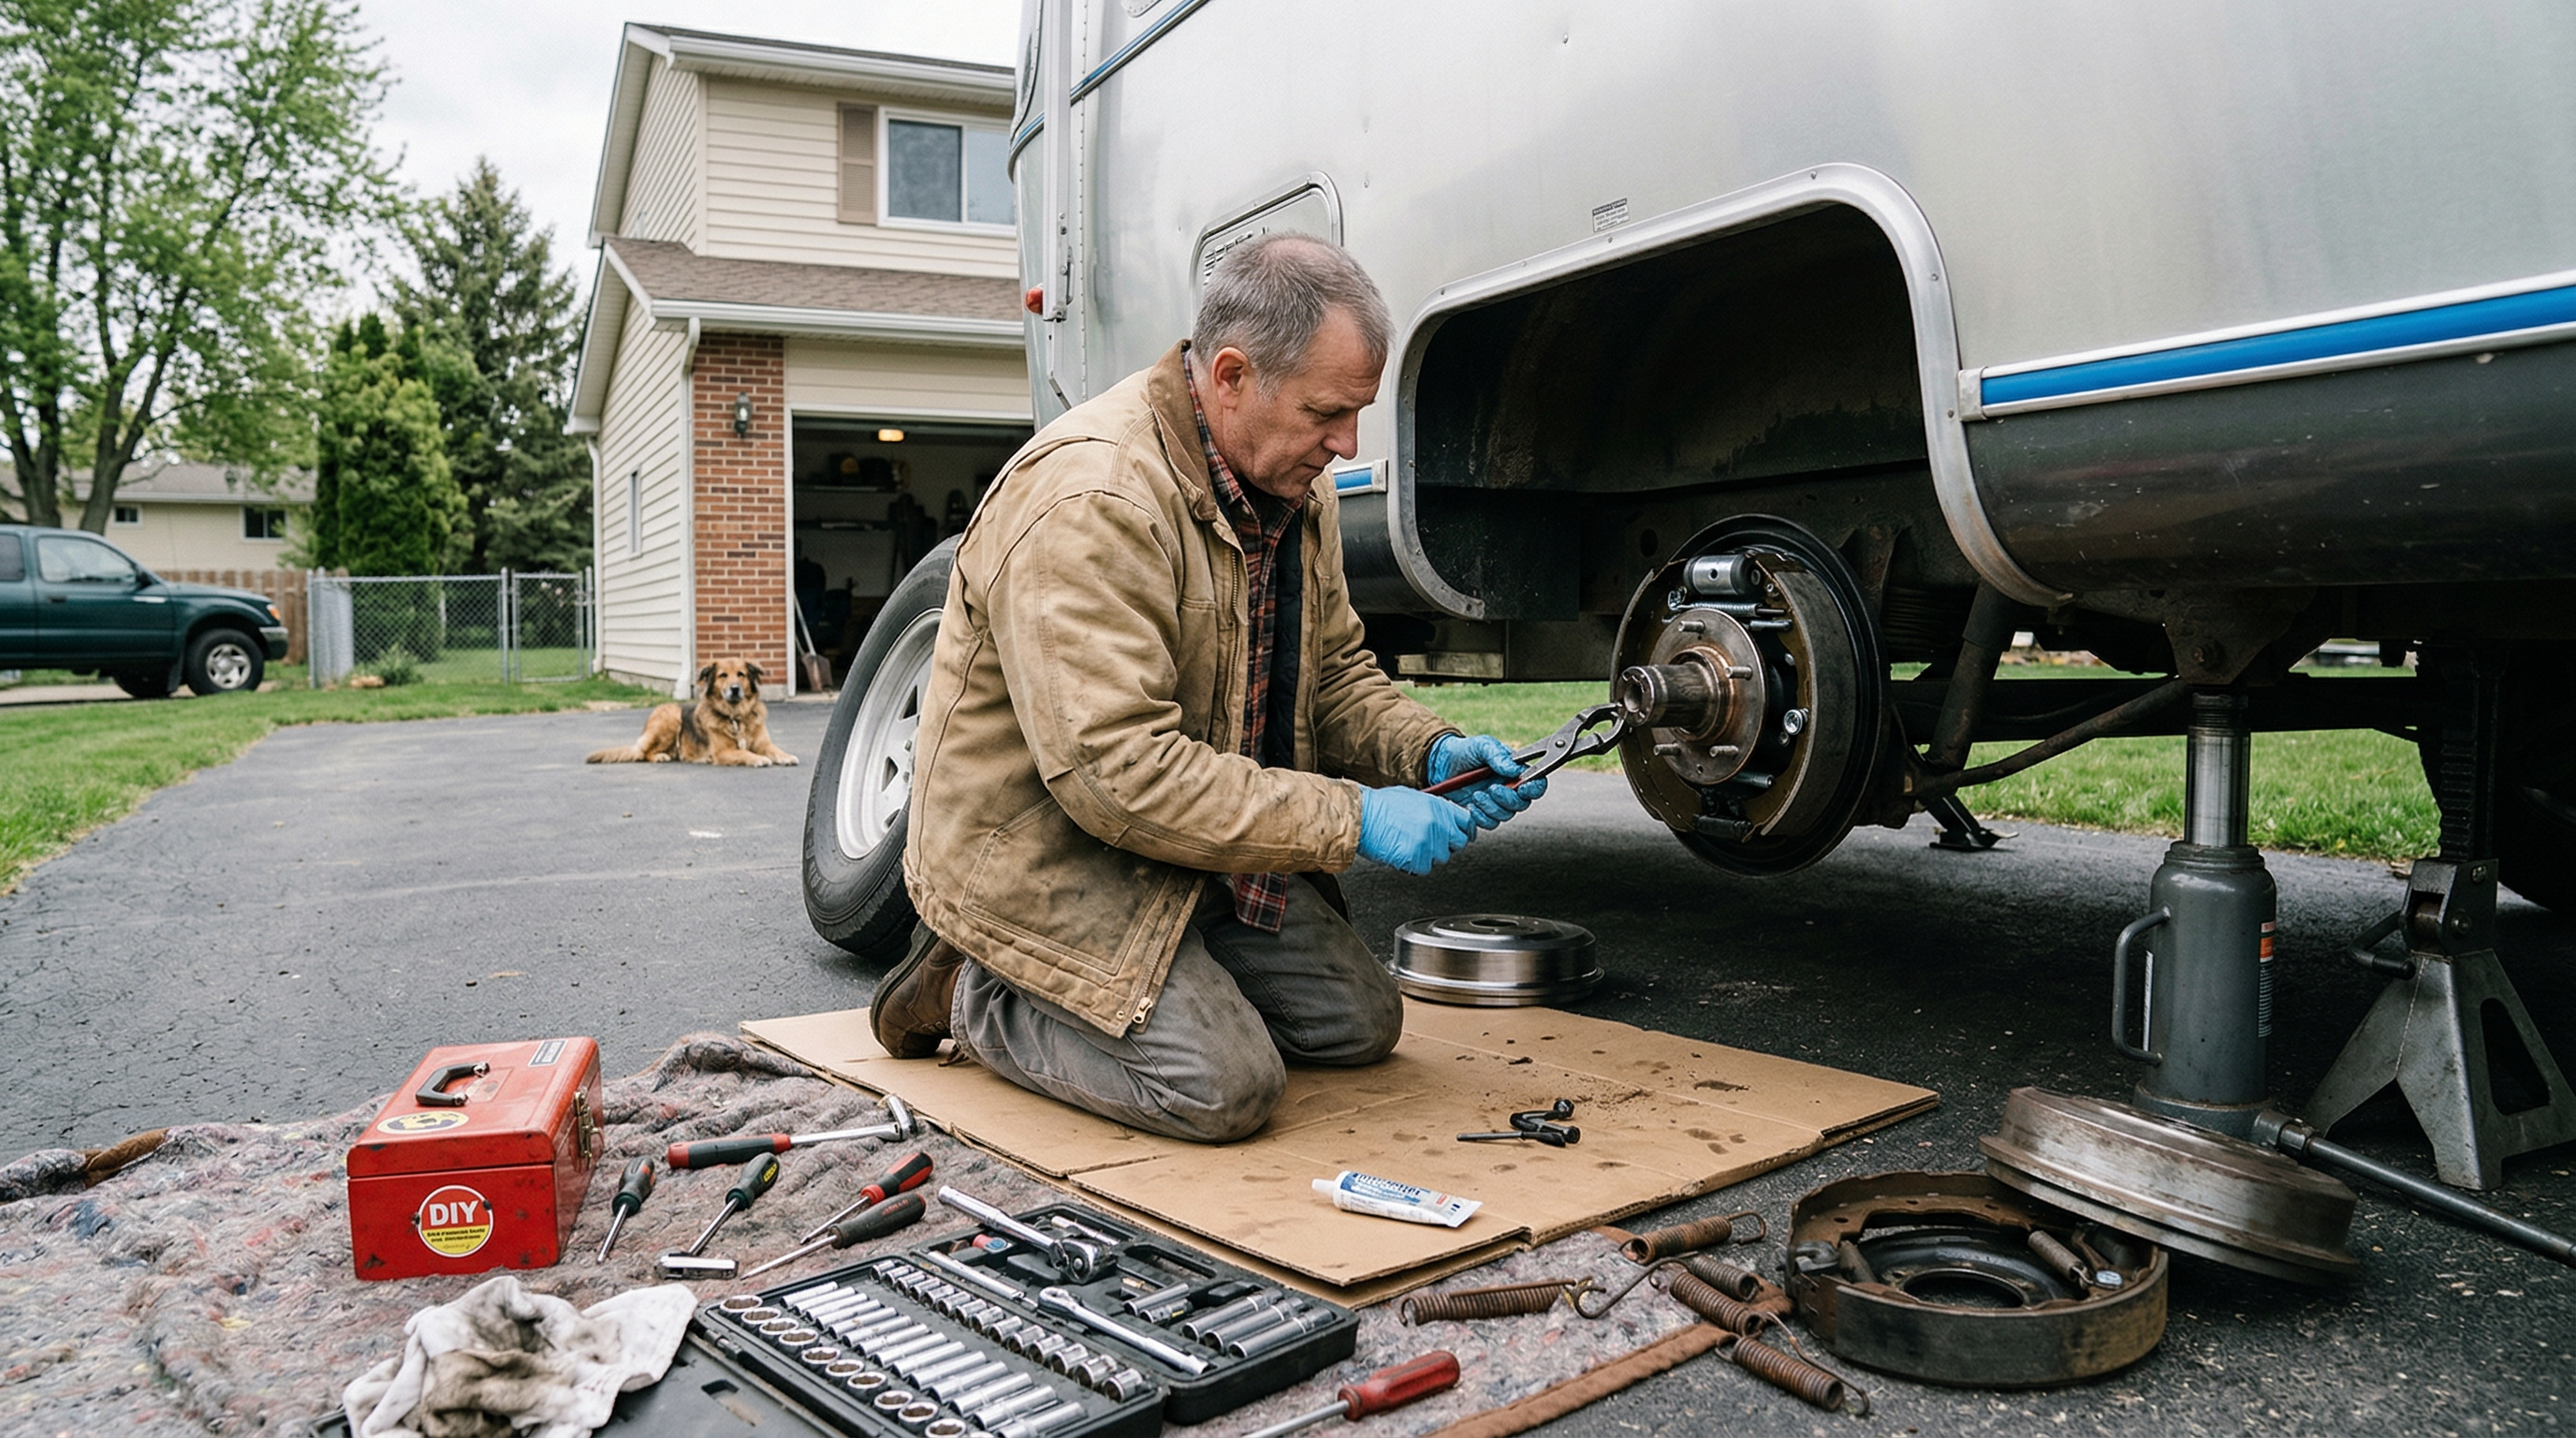
Image note: Some images in this guide are AI-generated visual aids used to illustrate the general process. Actual brake components, wiring layouts, and hardware may vary depending on your trailer’s axle manufacturer and brake system.
TL;DR
- Most travel trailers use electric drum brakes that wear out over time.
- Weak stopping power, grinding noises, or needing high brake controller gain can signal worn brakes.
- Replacing complete brake assemblies is often easier than rebuilding individual parts.
- Always inspect magnets, wiring, and drum condition during replacement.
Safety first before working on trailer brakes
Working on trailer brakes requires lifting the trailer and removing wheels, which means safety should come first. Always work on level ground and secure the trailer properly before starting any repairs.
- Use wheel chocks on the opposite axle.
- Lift the trailer with an appropriate jack rated for the trailer weight.
- Support the trailer with heavy-duty jack stands before removing wheels.
- Never rely solely on a hydraulic jack while working underneath or around the axle.
If you’re unsure about safely lifting your trailer or diagnosing brake issues, it’s best to consult a professional technician.
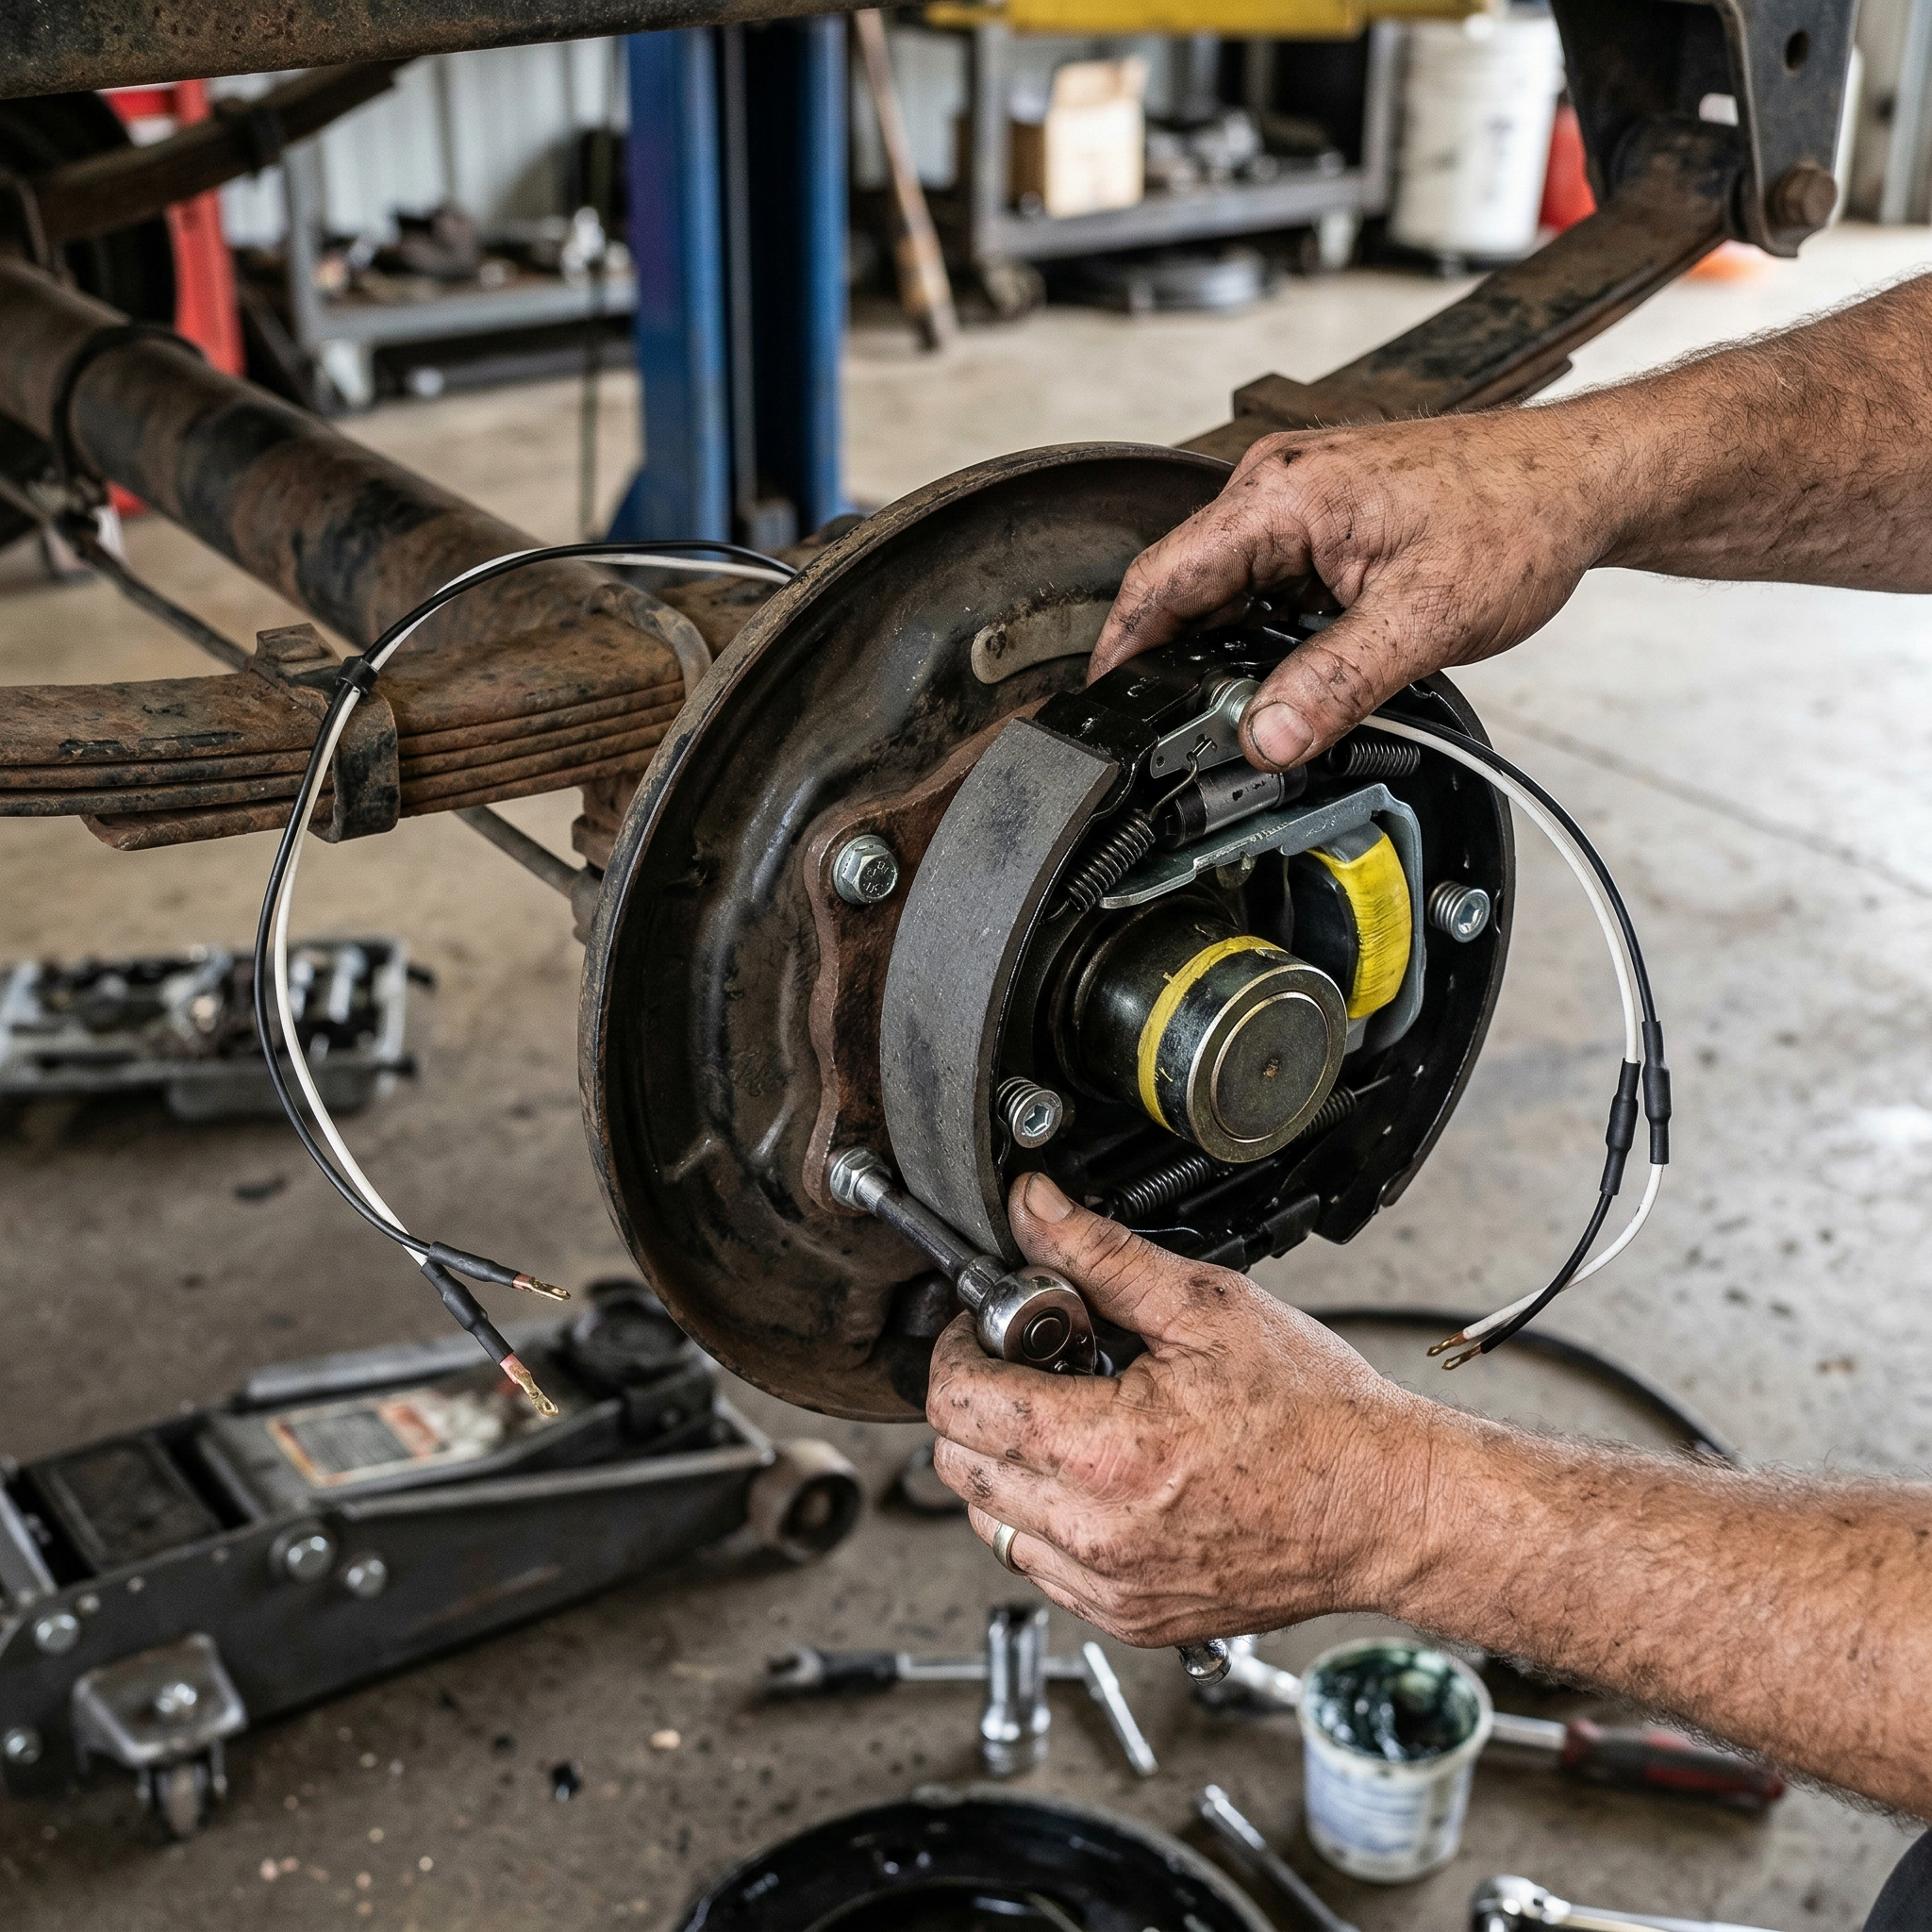
How travel trailer brakes work
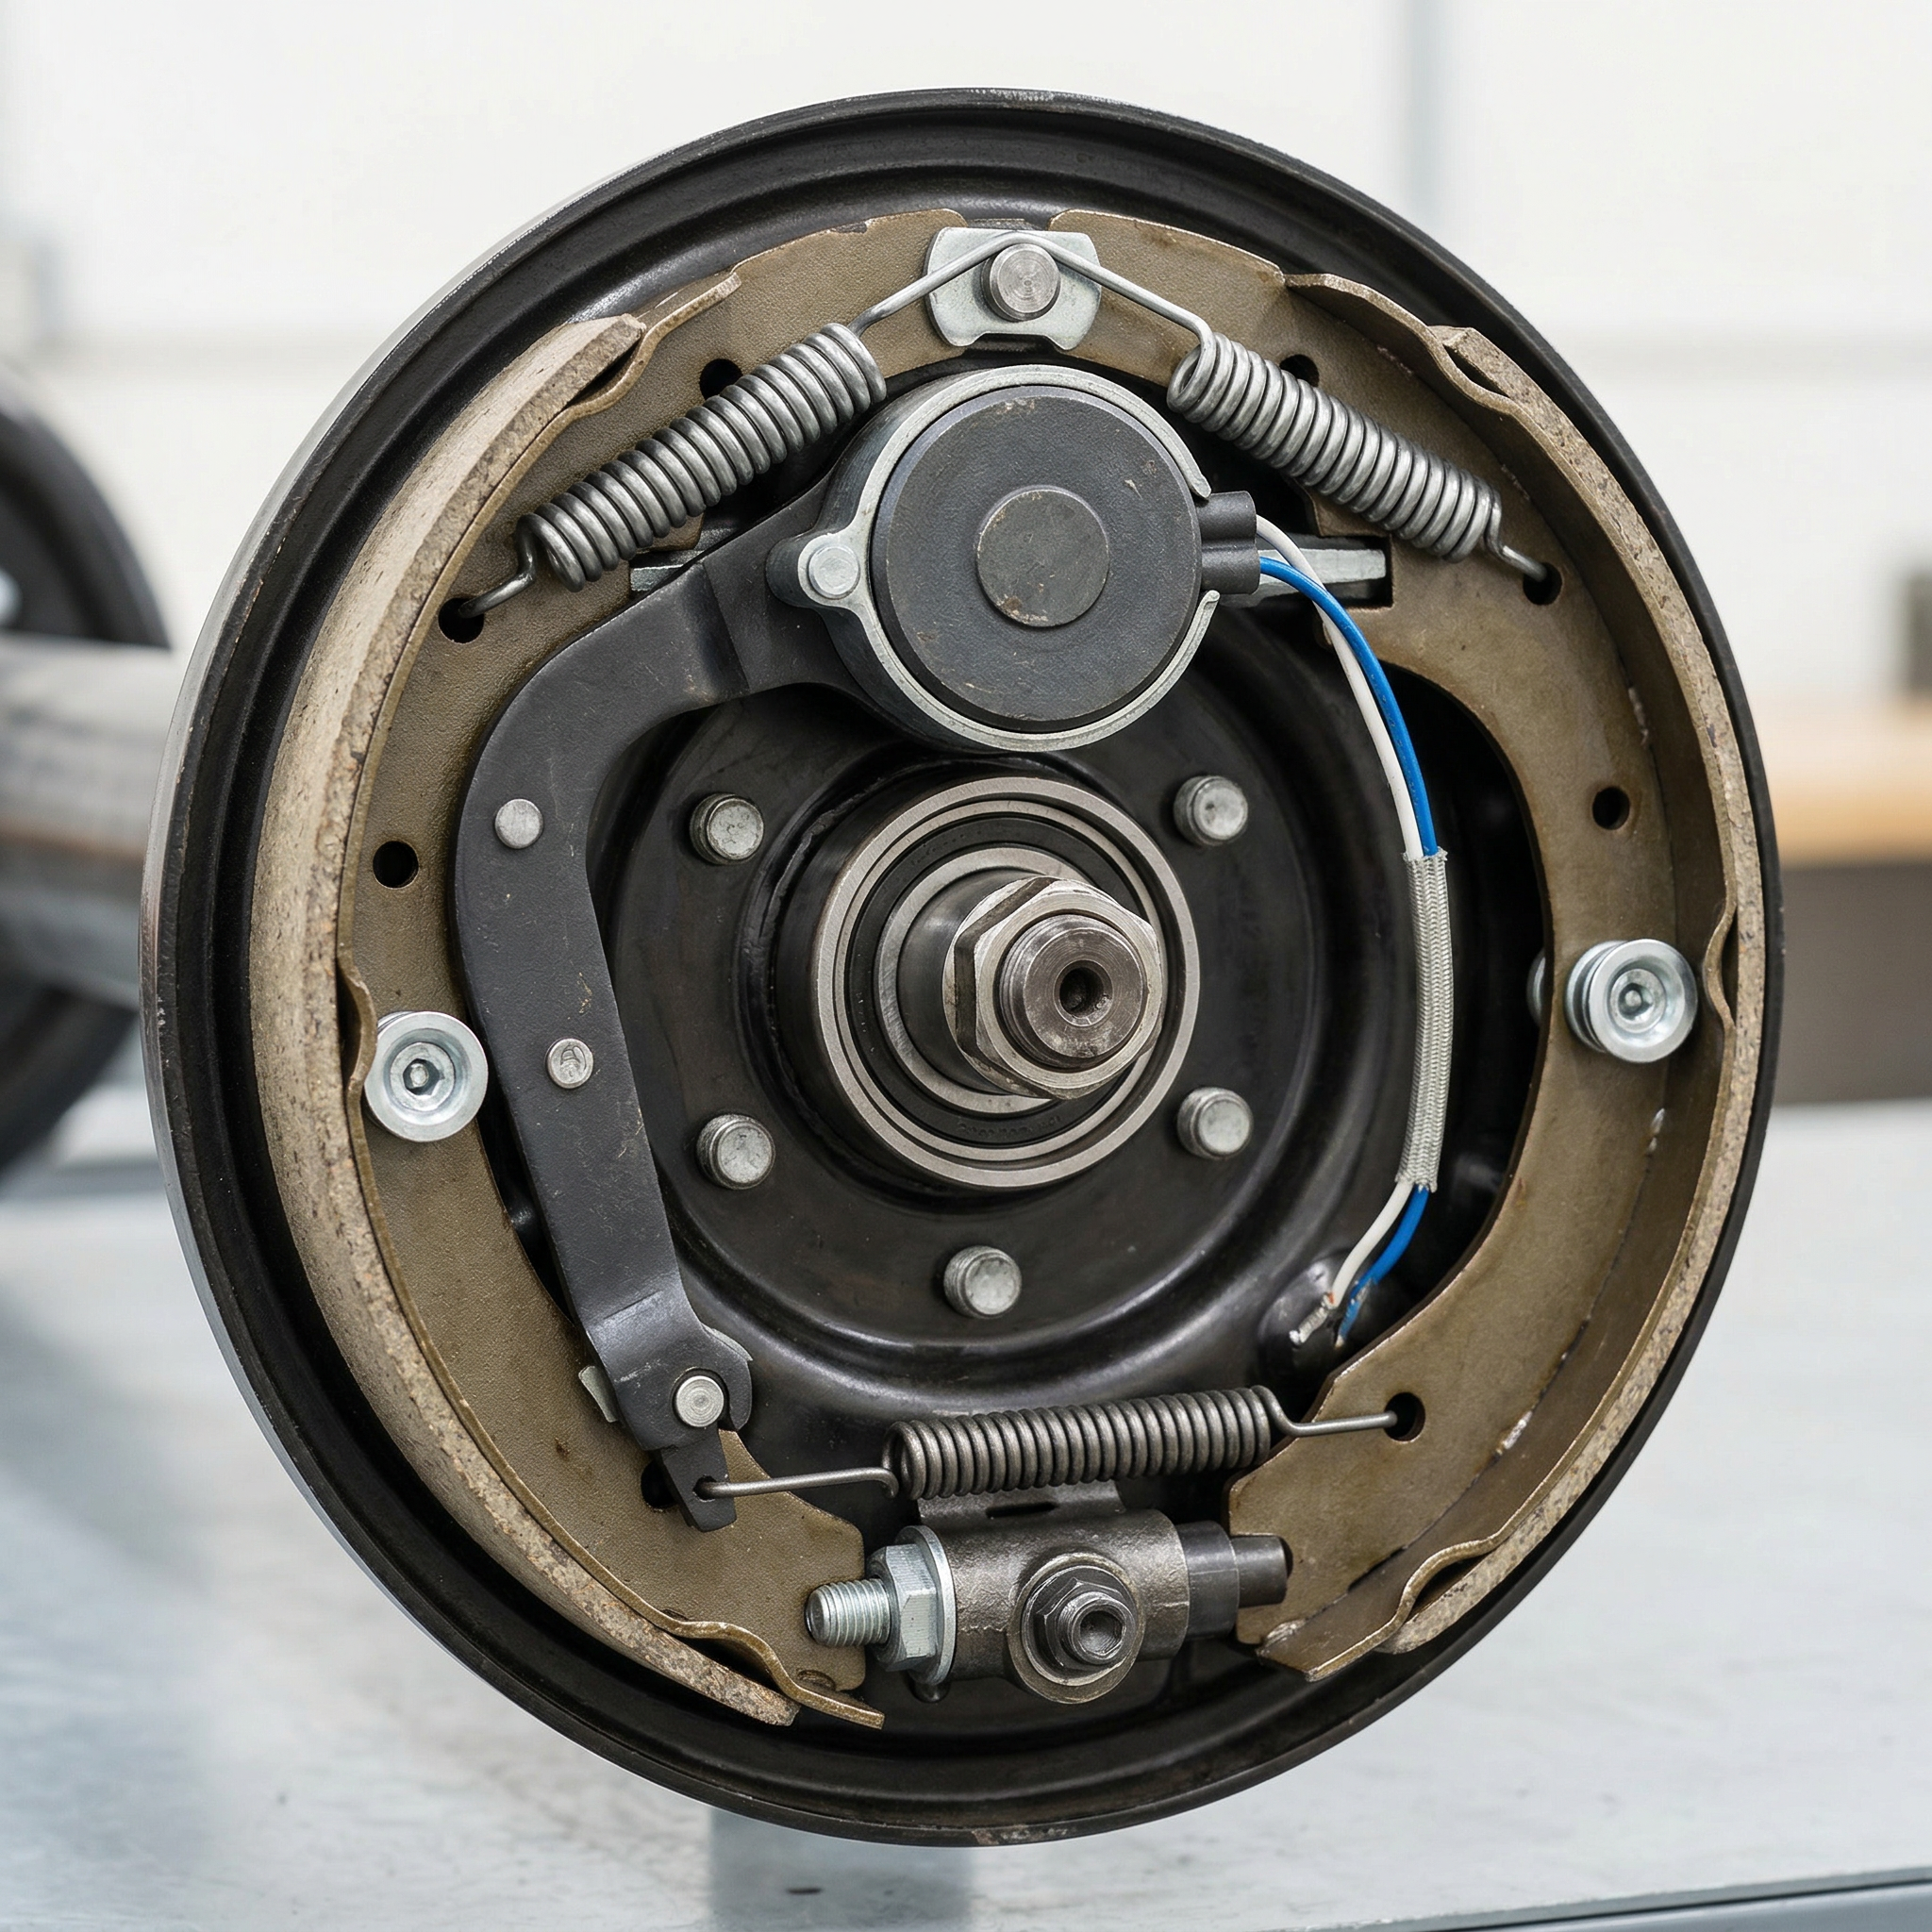
Most travel trailers use electric drum brake systems. When you apply the brakes in your tow vehicle, the brake controller sends an electrical signal through the trailer wiring to the brake assemblies.
Inside the drum, a magnet engages the spinning drum surface, which spreads the brake shoes outward. That friction slows the drum—and ultimately the wheel—helping the trailer stop smoothly alongside the tow vehicle.
- Brake controller in the tow vehicle
- Electrical wiring to the trailer brakes
- Brake magnet inside the drum
- Brake shoes and springs
Signs your travel trailer brakes need replacement
Trailer brakes gradually wear down over thousands of miles. Regular inspection can help you catch problems before they become safety issues.
- Trailer pushing the tow vehicle when braking
- Brake controller gain needing constant increase
- Grinding or squealing sounds from the wheels
- Uneven braking or trailer pulling to one side
Many RV owners inspect their trailer brakes every 10,000–12,000 miles or at least once per year, depending on towing conditions.
Tools you need to replace trailer brakes
Replacing trailer brake assemblies typically requires only basic mechanical tools.
- Floor jack and jack stands
- Lug wrench
- Pliers and screwdrivers
- Wire connectors
- Brake cleaner
- Replacement brake assemblies
Many RV owners choose to replace the entire brake backing plate assembly instead of individual components. This often saves time and reduces installation errors.
Step-by-step: how to replace travel trailer brakes
1. Lift the trailer and remove the wheel
Secure the trailer with wheel chocks, lift the axle with a jack, and place jack stands underneath before removing the wheel.
2. Remove the brake drum
The drum typically slides off once the wheel is removed, though sometimes the bearings and grease cap must also be removed.
3. Disconnect the old brake assembly
Cut or disconnect the two brake wires and remove the mounting bolts holding the brake assembly to the axle flange.
4. Install the new brake assembly
Align the new backing plate with the axle flange and secure it with the mounting bolts.
5. Connect the wiring
Reconnect the brake wires using heat-shrink connectors or approved wiring connectors.
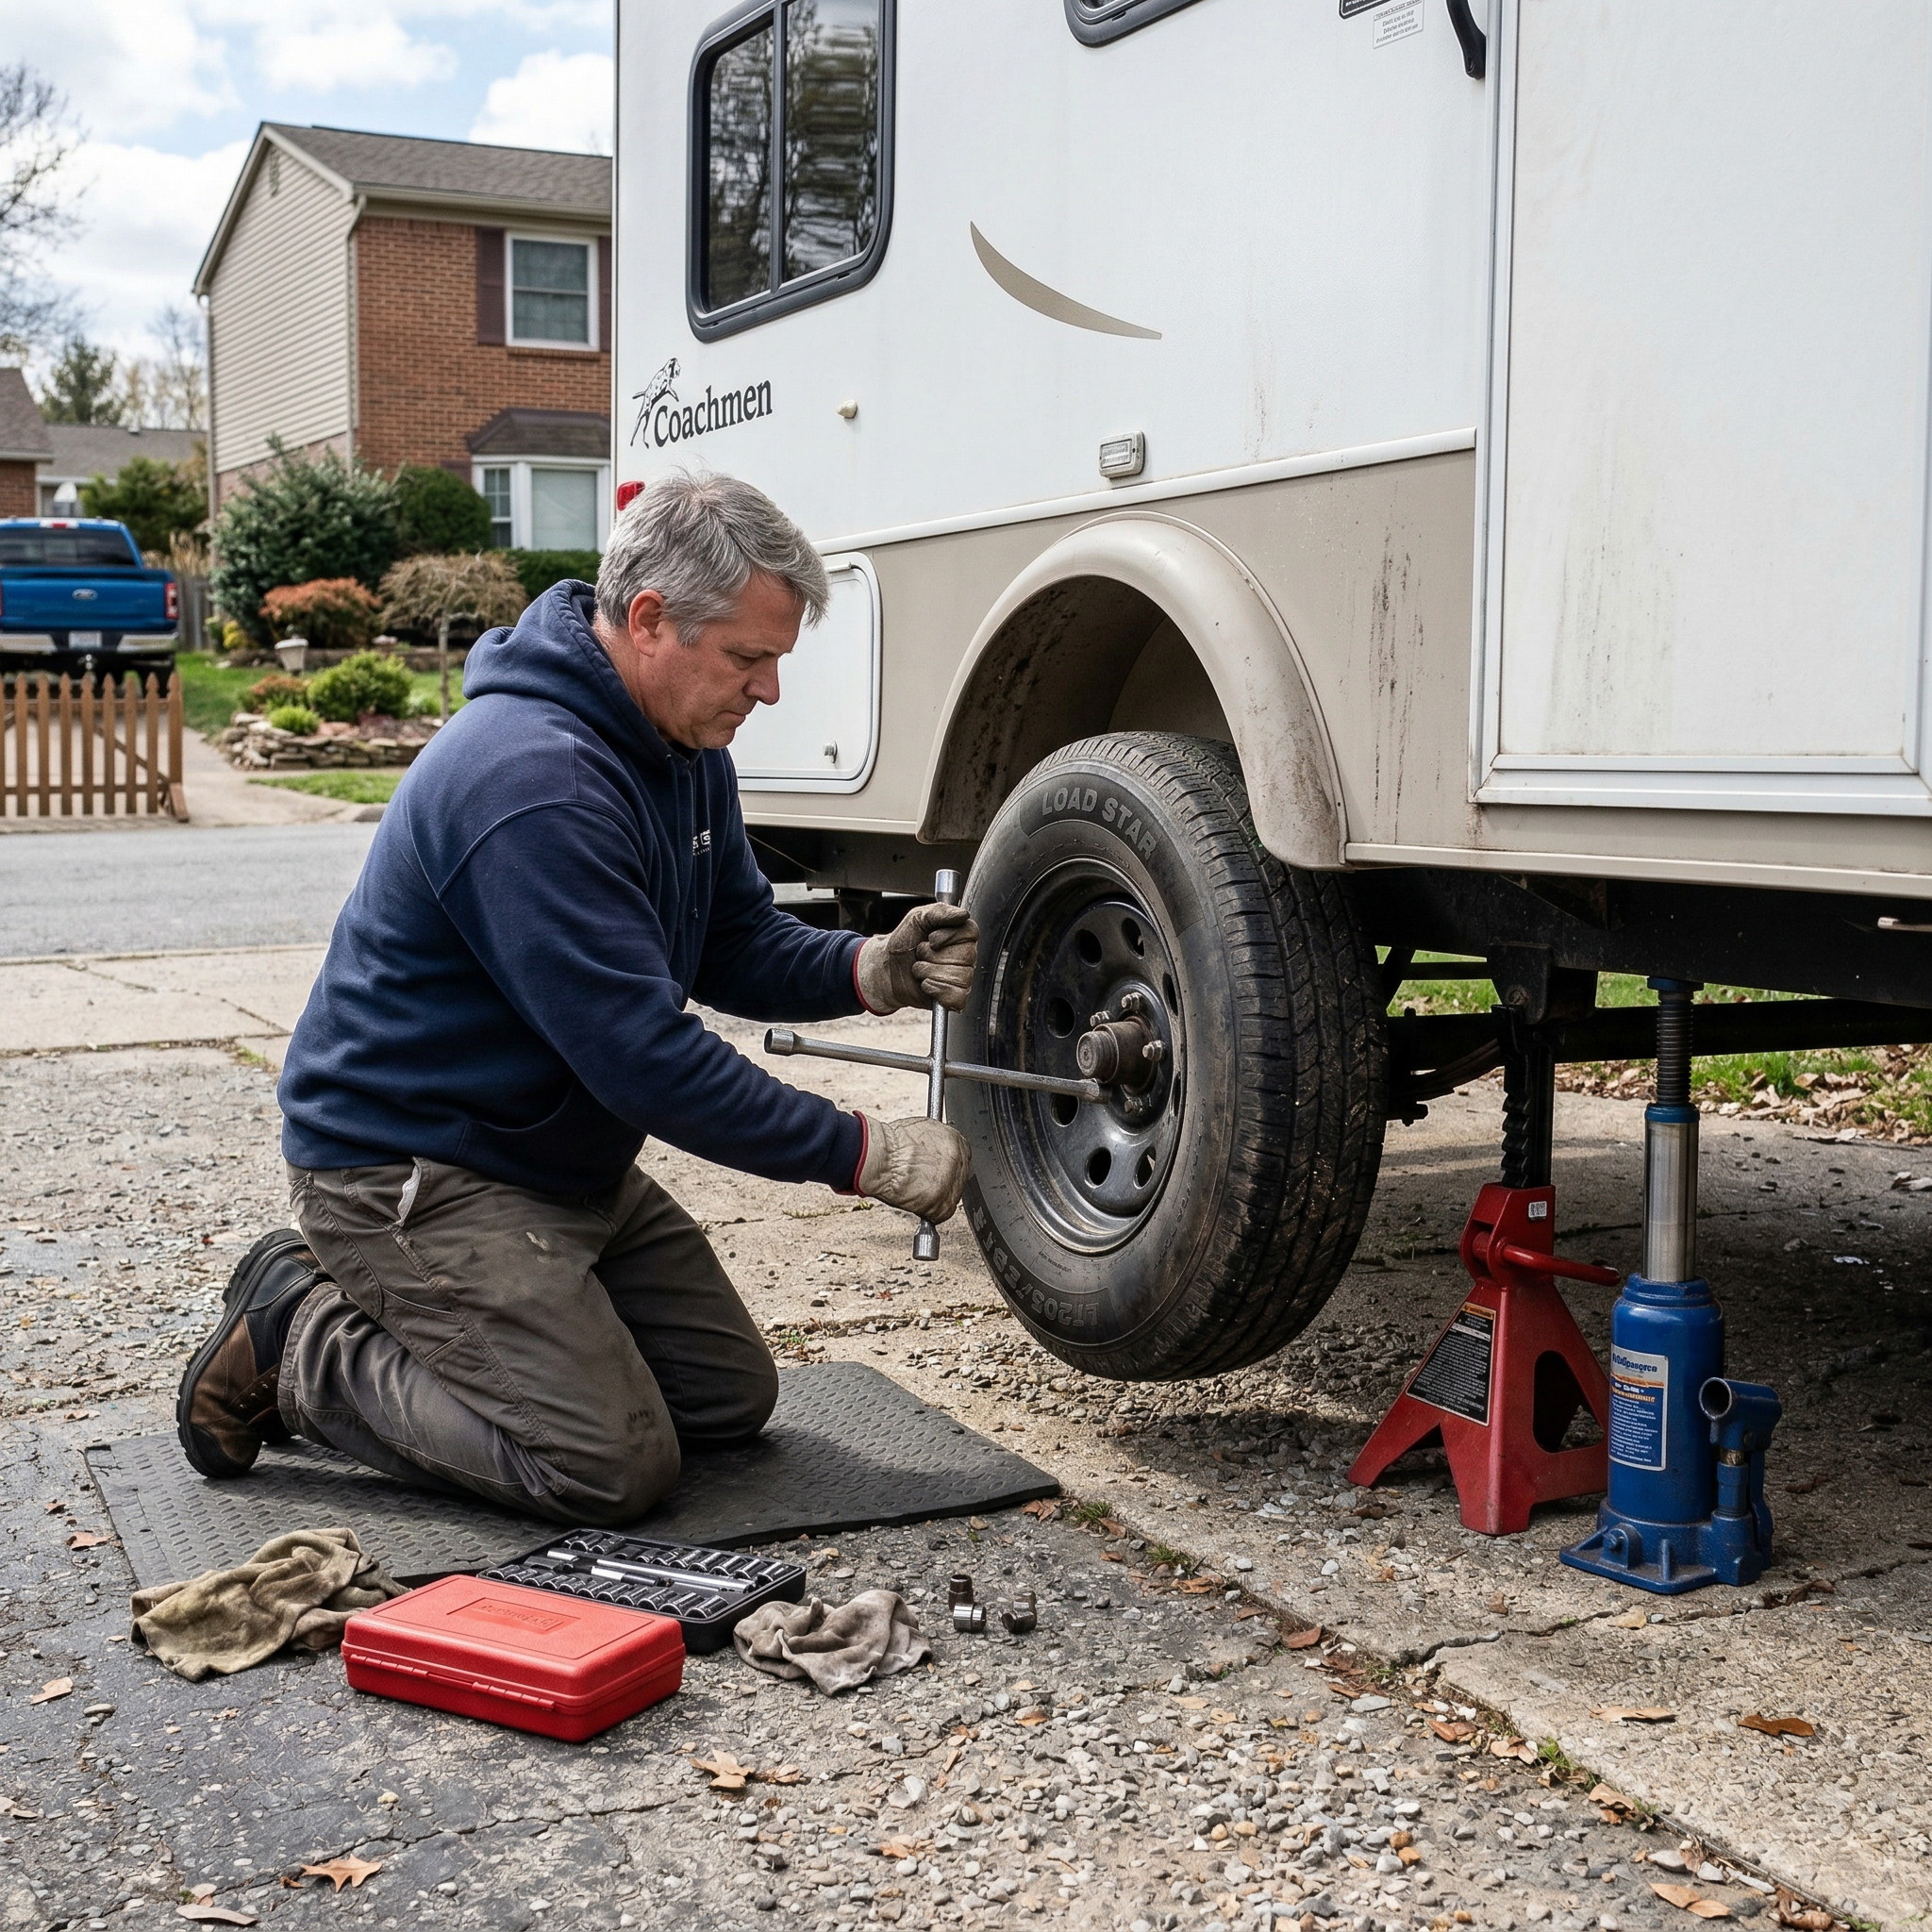
6. Reinstall the drum and wheel
Slide the drum back into place, reinstall the wheel, and torque the lug nuts to the manufacturer’s specifications.
Adjusting trailer brakes after replacement

After installing new brake assemblies, you must adjust them properly so they engage evenly.
- Rotate the star wheel adjustment until slight drag is felt.
- Repeat on each wheel for consistent braking.
- Test the trailer brake controller settings during a slow test drive.
Proper adjustment ensures balanced braking and helps prevent uneven brake wear.
Quick decision guide
- Replace brakes if shoes are worn thin or magnets show heavy wear.
- Inspect drums for scoring or heat damage.
- Check wiring if brakes feel weak or inconsistent.
- Test the brake controller after installation to ensure proper braking response.
If you’re looking for tools or replacement equipment for RV maintenance projects, check out: VEVOR.
Sources and further reading
FAQ
How often should travel trailer brakes be replaced?
Many trailer brake systems last between 10,000 and 20,000 miles depending on towing conditions, terrain, and driving style.
Can I replace travel trailer brakes myself?
Yes. Many RV owners replace brake assemblies themselves with basic tools. However, proper lifting equipment and safe work practices are essential.
How much does trailer brake replacement cost?
DIY replacement typically costs between $120 and $300 per axle, while professional service may range from $300 to $700 depending on labor and parts.
How do I know if my trailer brakes are worn out?
Common signs include weak braking, grinding noises, uneven stopping, or needing unusually high brake controller settings.
Do I need to adjust trailer brakes after installing new ones?
Yes. Electric drum brakes should be adjusted using the star wheel so the shoes lightly drag on the drum before testing the brake controller.


.jpg/:/cr=t:5.56%25,l:0%25,w:100%25,h:88.89%25/rs=w:1240,h:620,cg:true)


Leave a Reply