
Affiliate Disclosure: I earn commissions if you shop through the links below at no additional cost to you.
Last Updated on February 27, 2026 by Jeremy
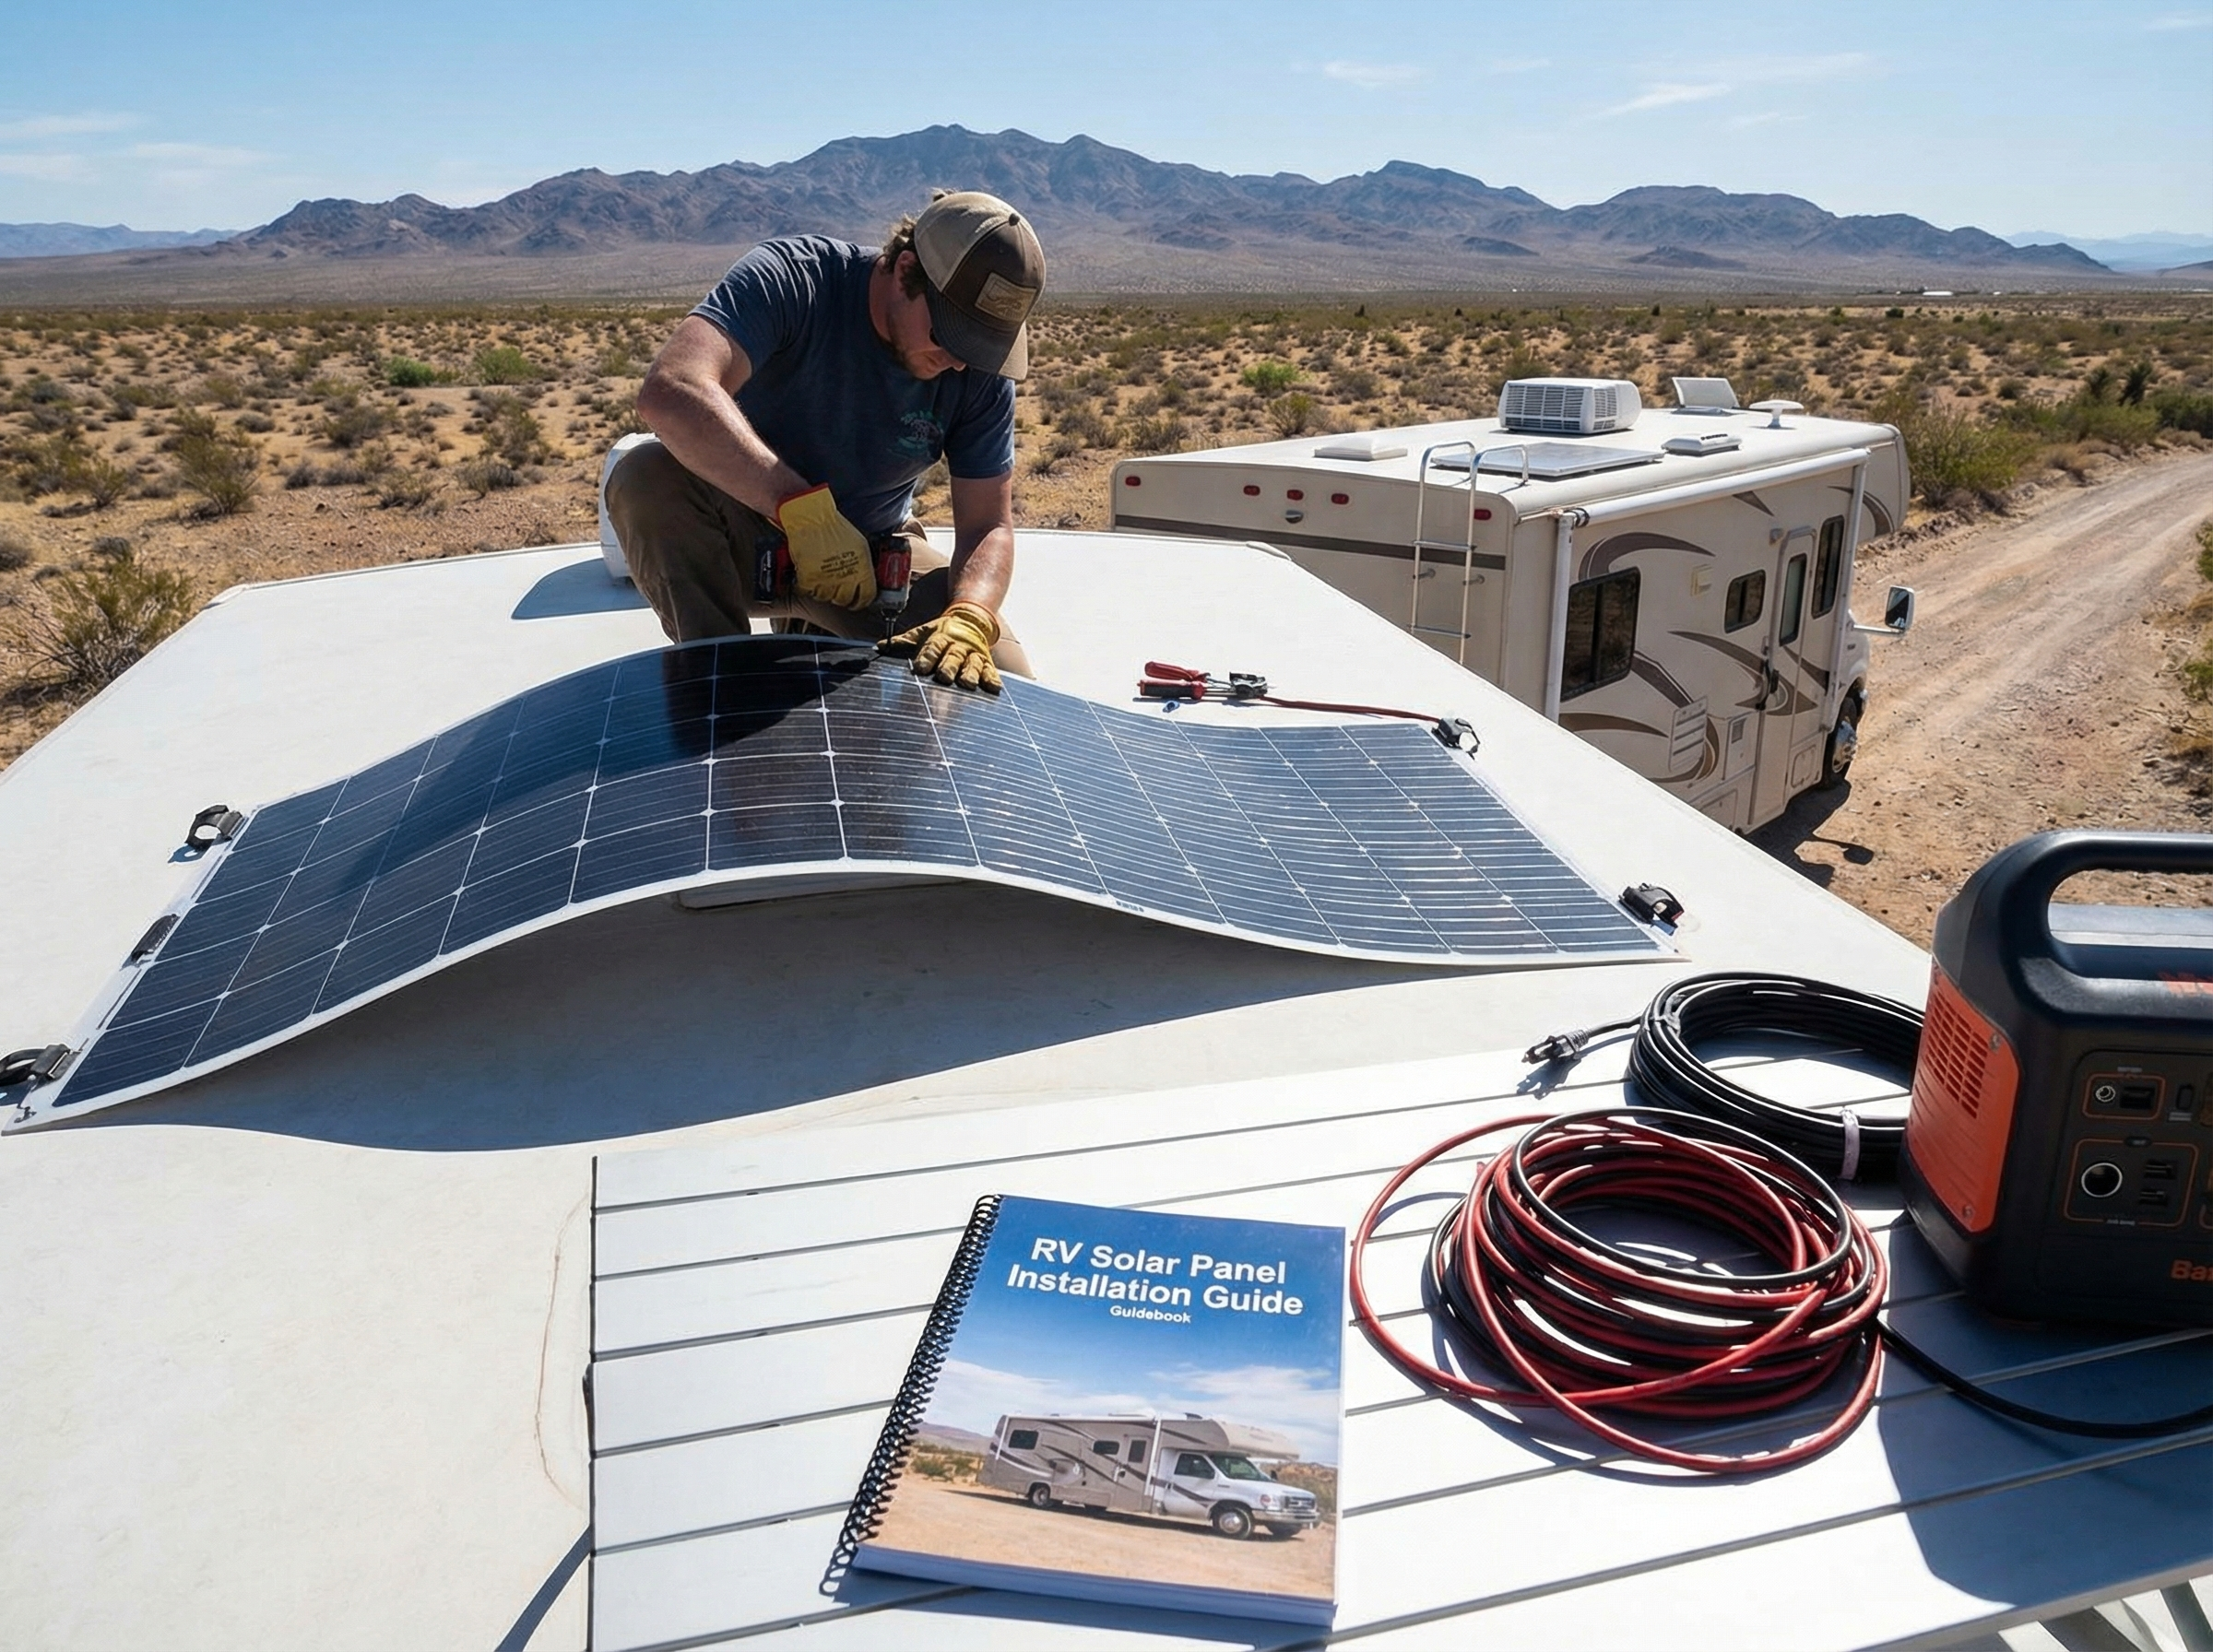
RV solar is one of those upgrades that sounds simple until you’re standing on your roof with a drill, three different wiring diagrams open, and that tiny voice in your head saying, “I hope I’m doing this right.”
The good news is this: a clean RV solar install isn’t magic. It’s planning, proper components, and not rushing the part where you figure out what you actually need to power.

- Weekend camping: usually 200–400W solar + a modest battery bank covers the basics.
- Frequent boondocking / long stays: often 600–1000W solar + more storage makes life easier.
- Running A/C on solar: possible, but it’s a system build, not a starter kit.
- Don’t guess: calculate your daily watt-hours first.
Before you buy anything, use the Solar Power Hub + RV Solar Calculator. It keeps your system realistic and prevents the classic overspend/undersize trap.
Why RV Solar Is Worth It (When It’s Sized Properly)
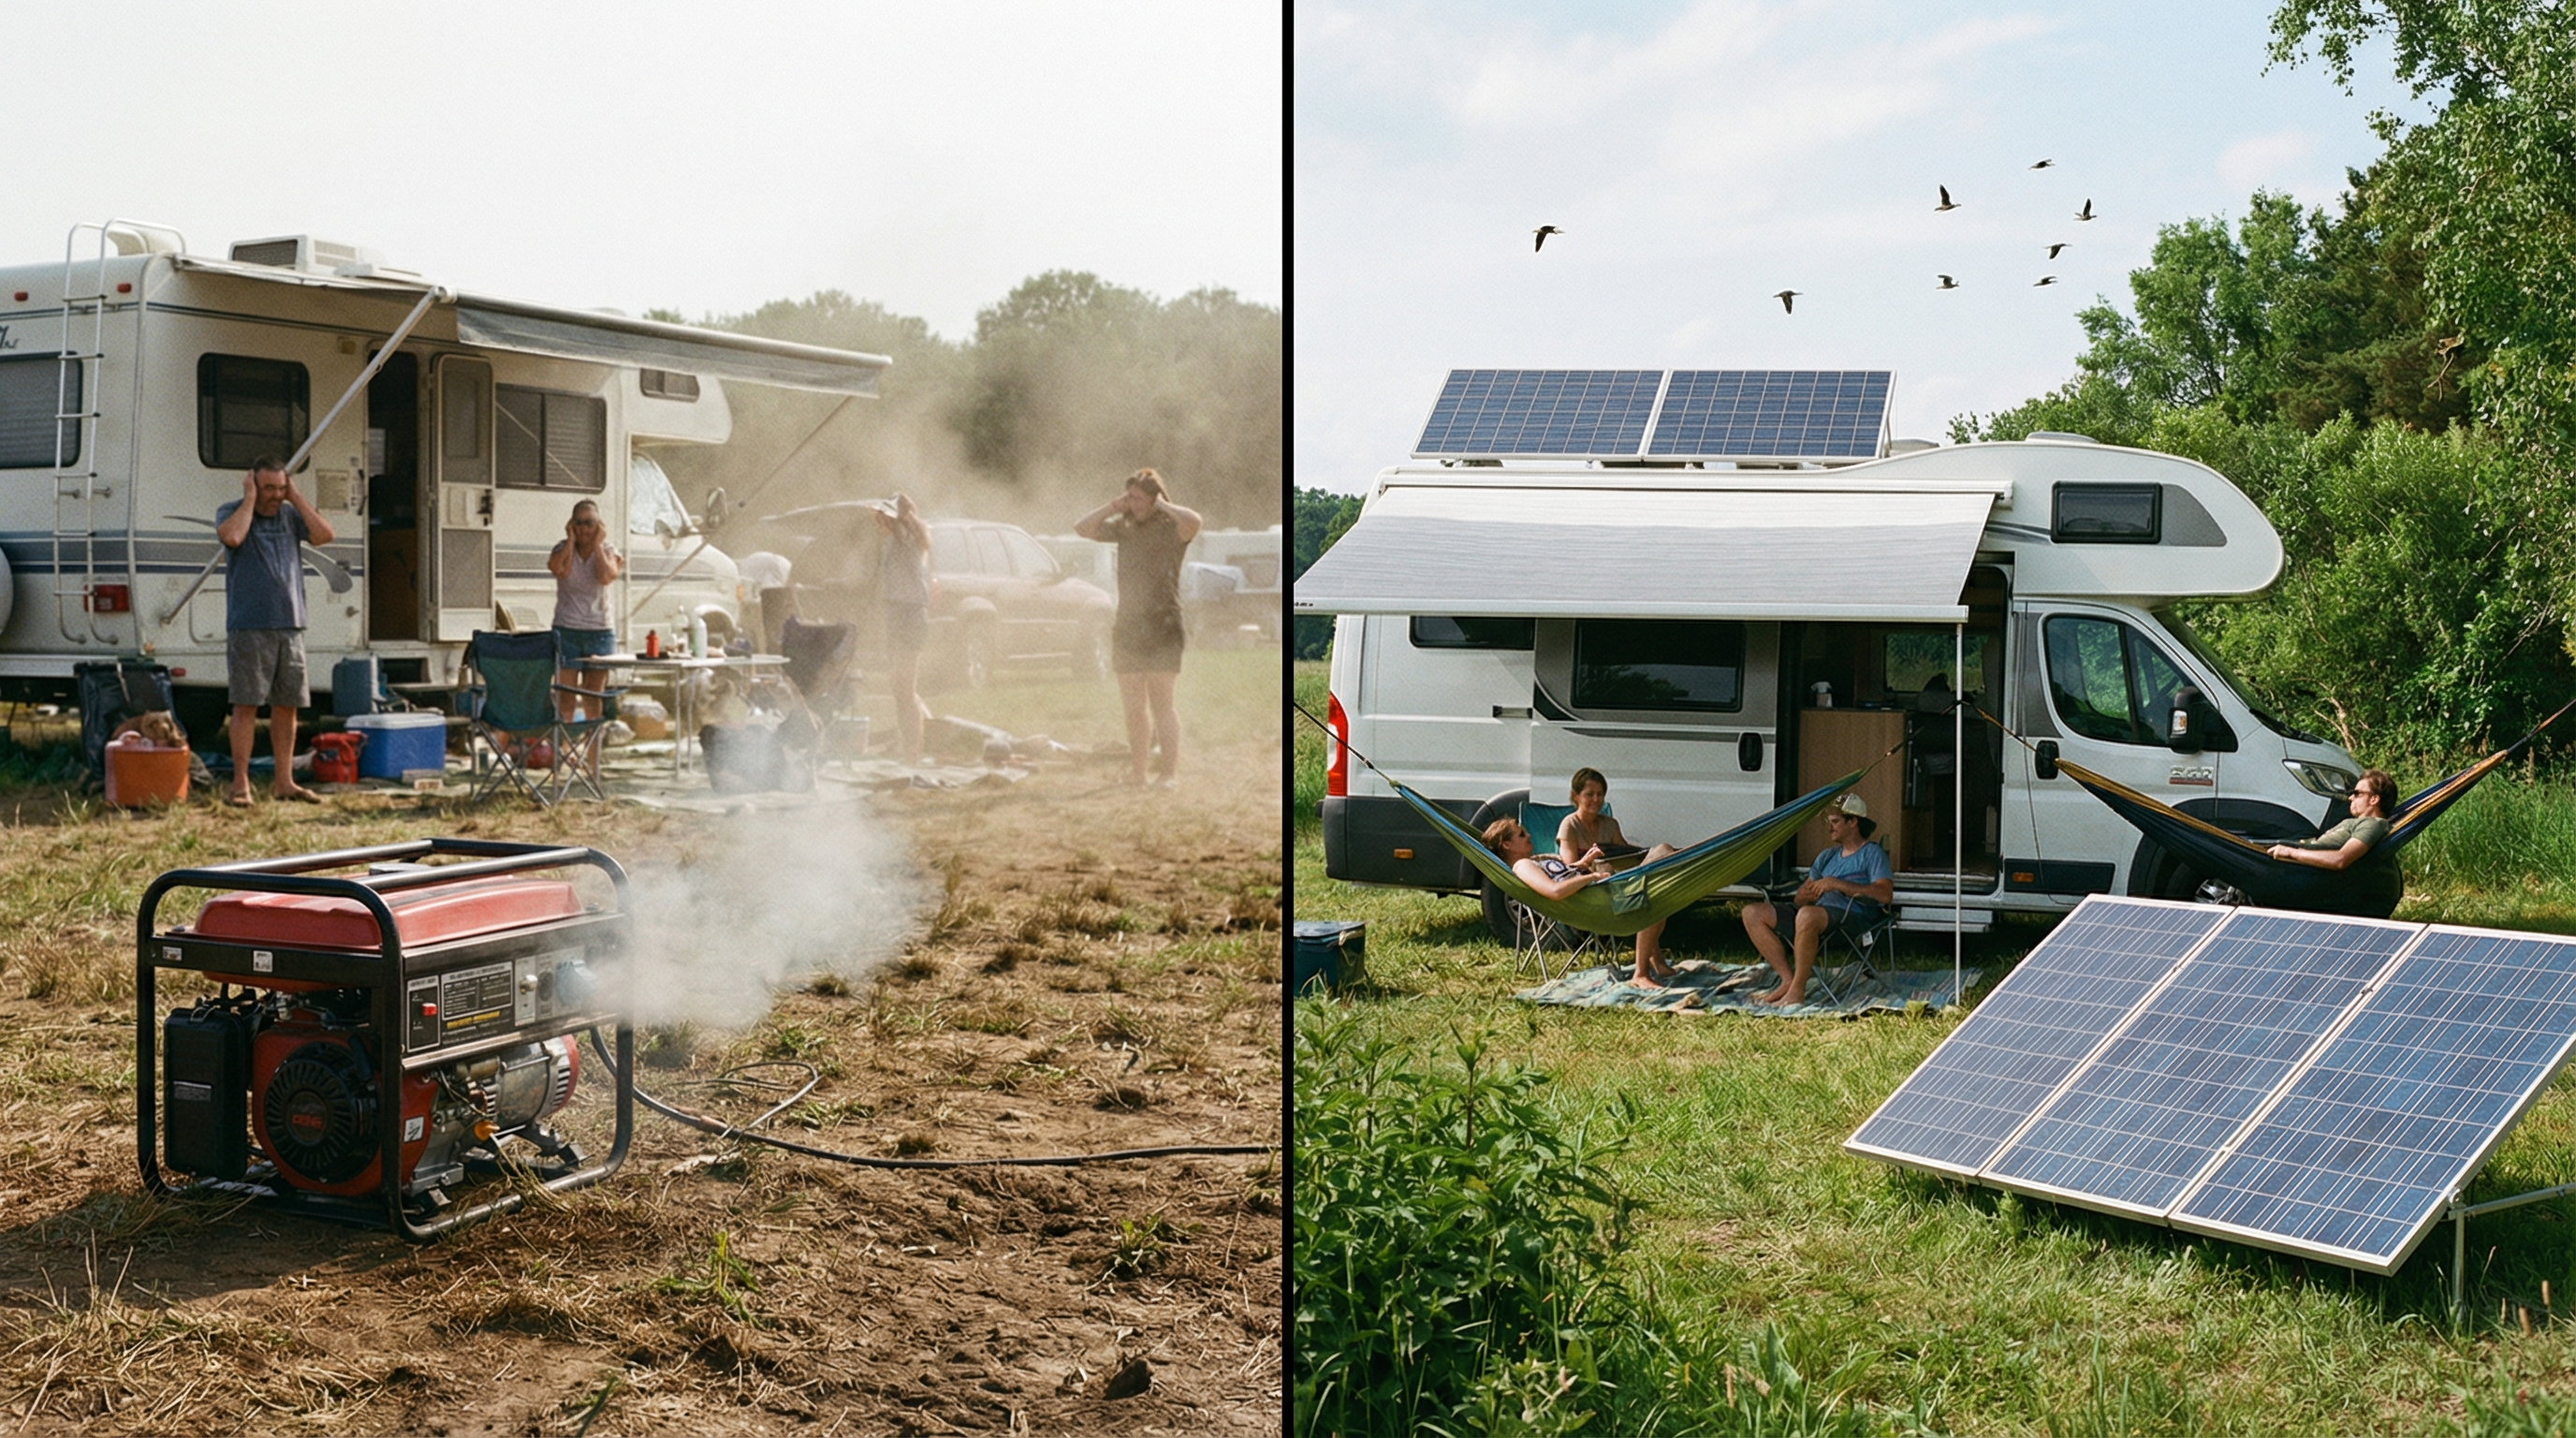
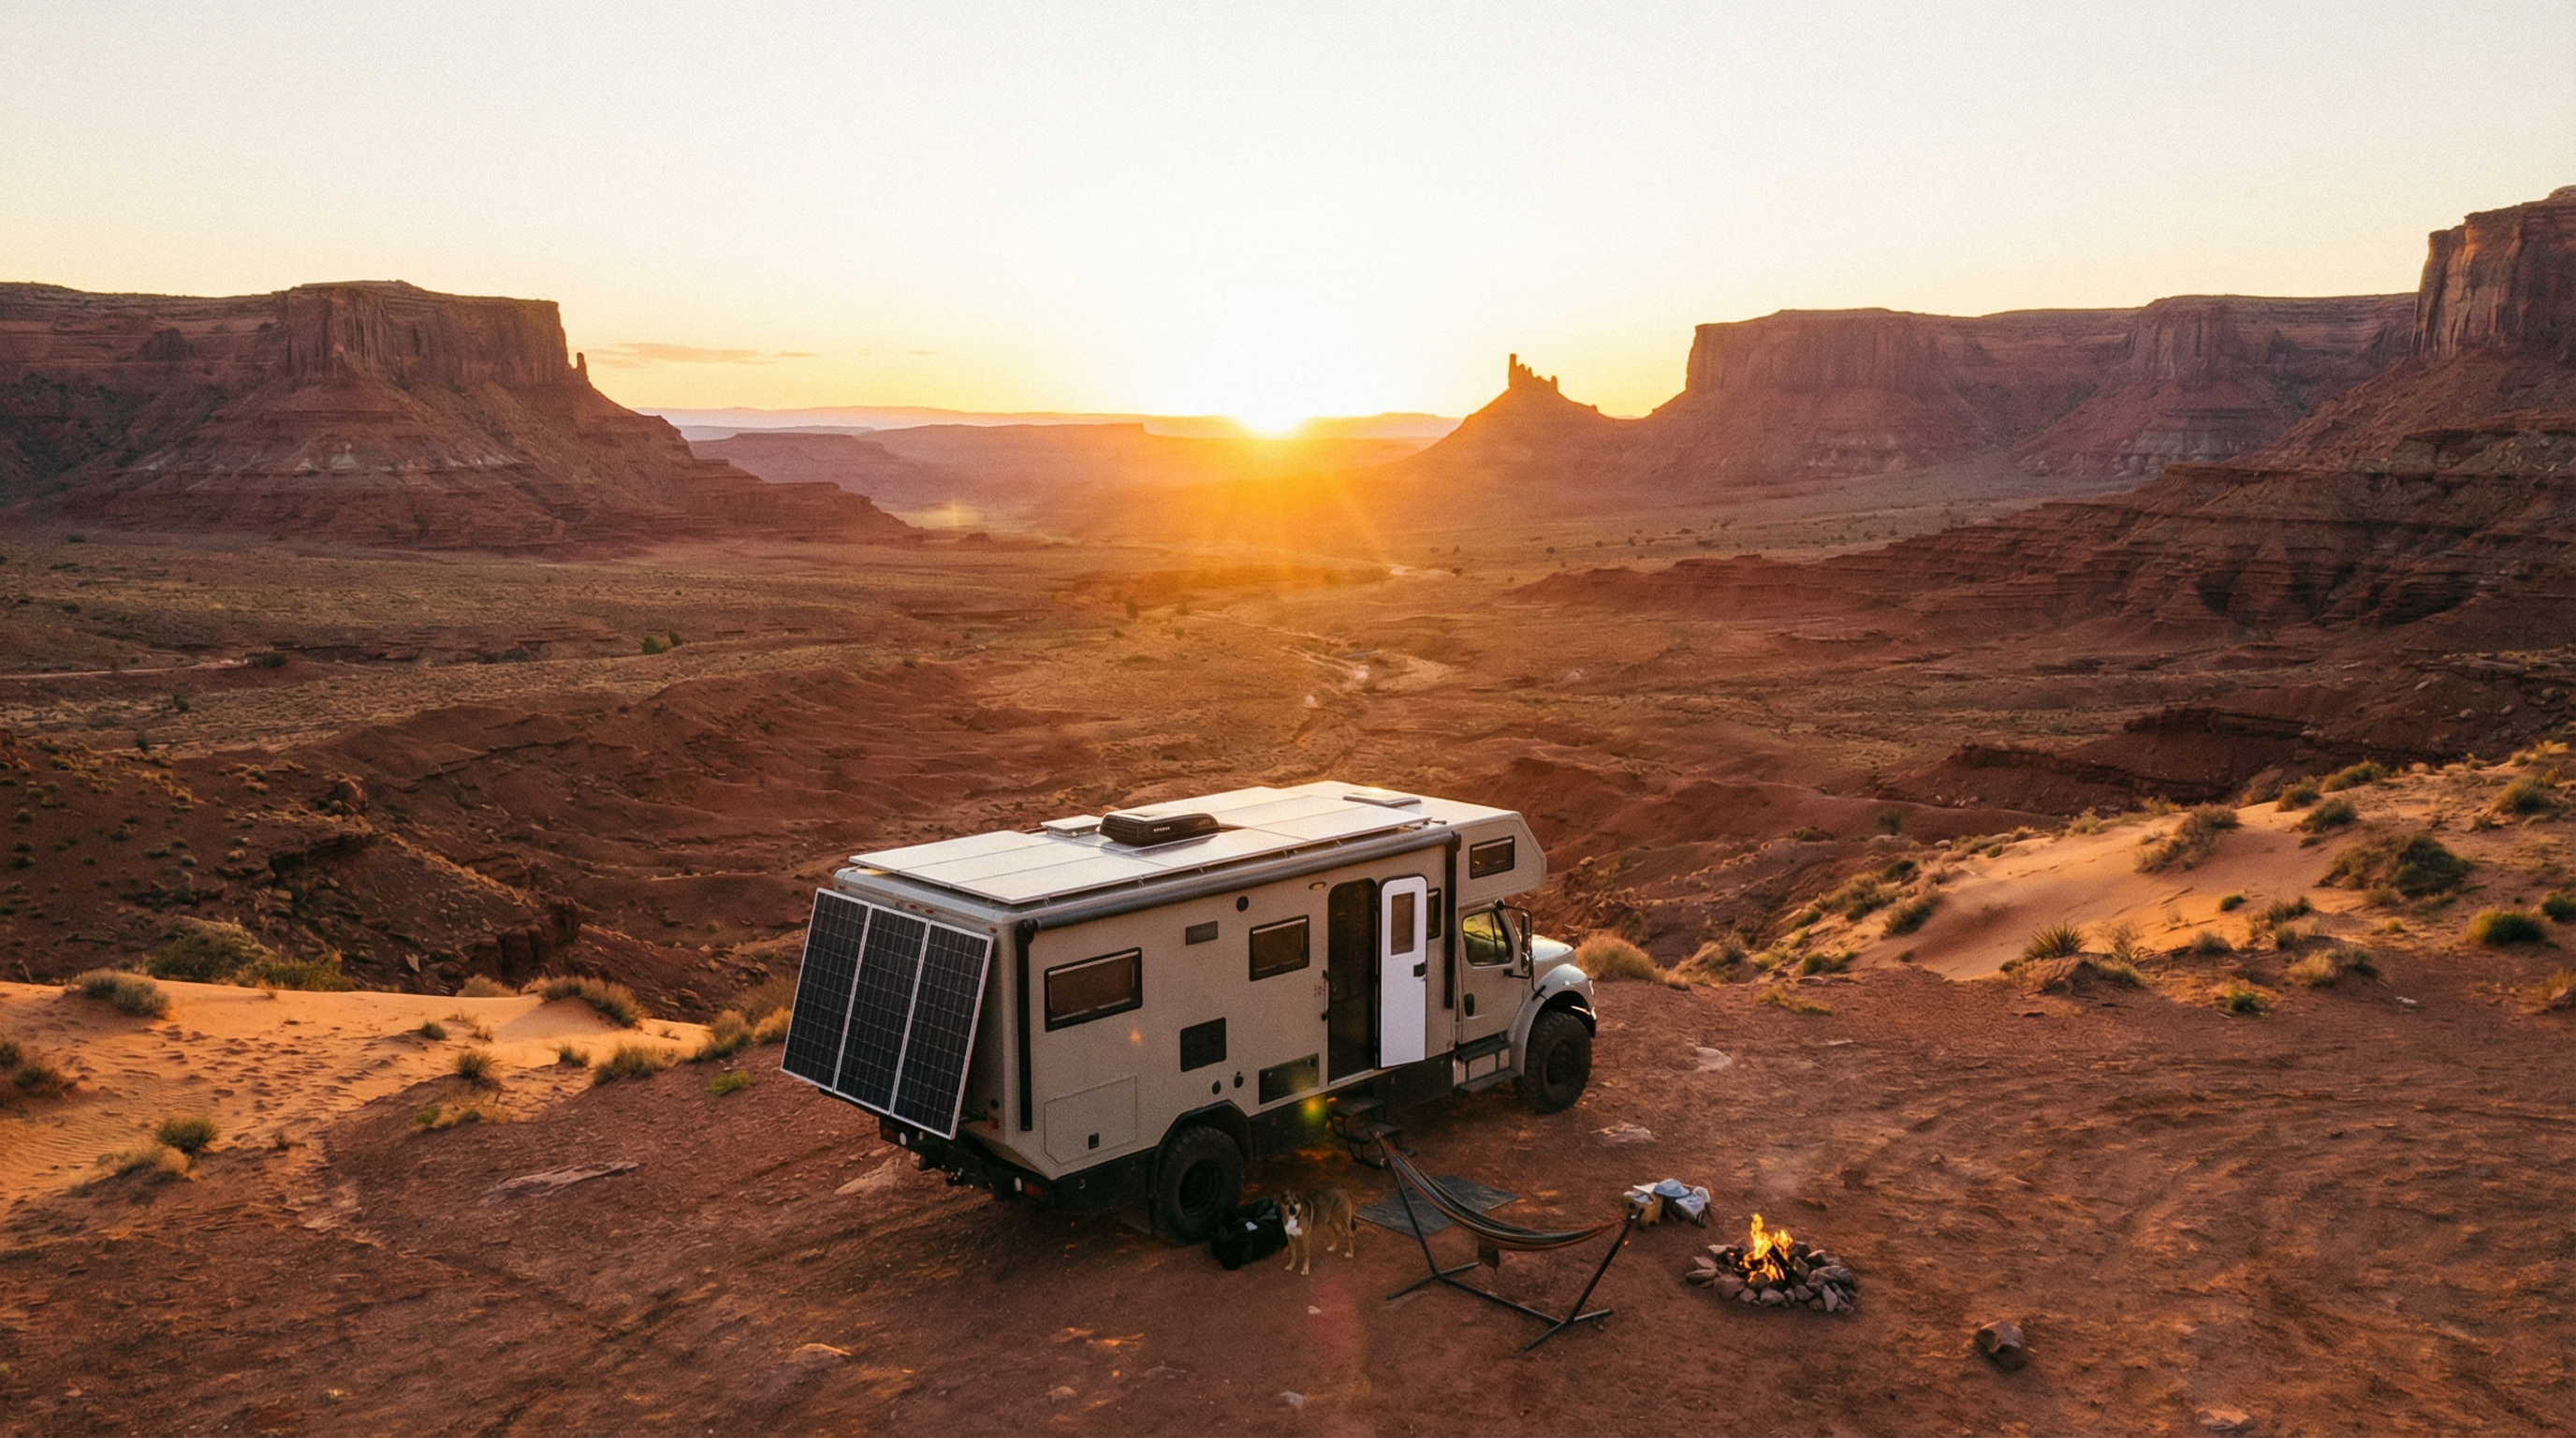
Solar isn’t just about “free power.” It’s about getting your independence back. No generator noise, less stress hunting hookups, and the ability to stay where you actually want to camp.
- Quiet power: no engine noise, no fumes, no fuel runs.
- More flexibility: boondock longer and choose campsites for views, not outlets.
- Long-term value: a well-built system can last for years.
- Better daily comfort: lights, fans, charging, fridge stability, and less “power anxiety.”
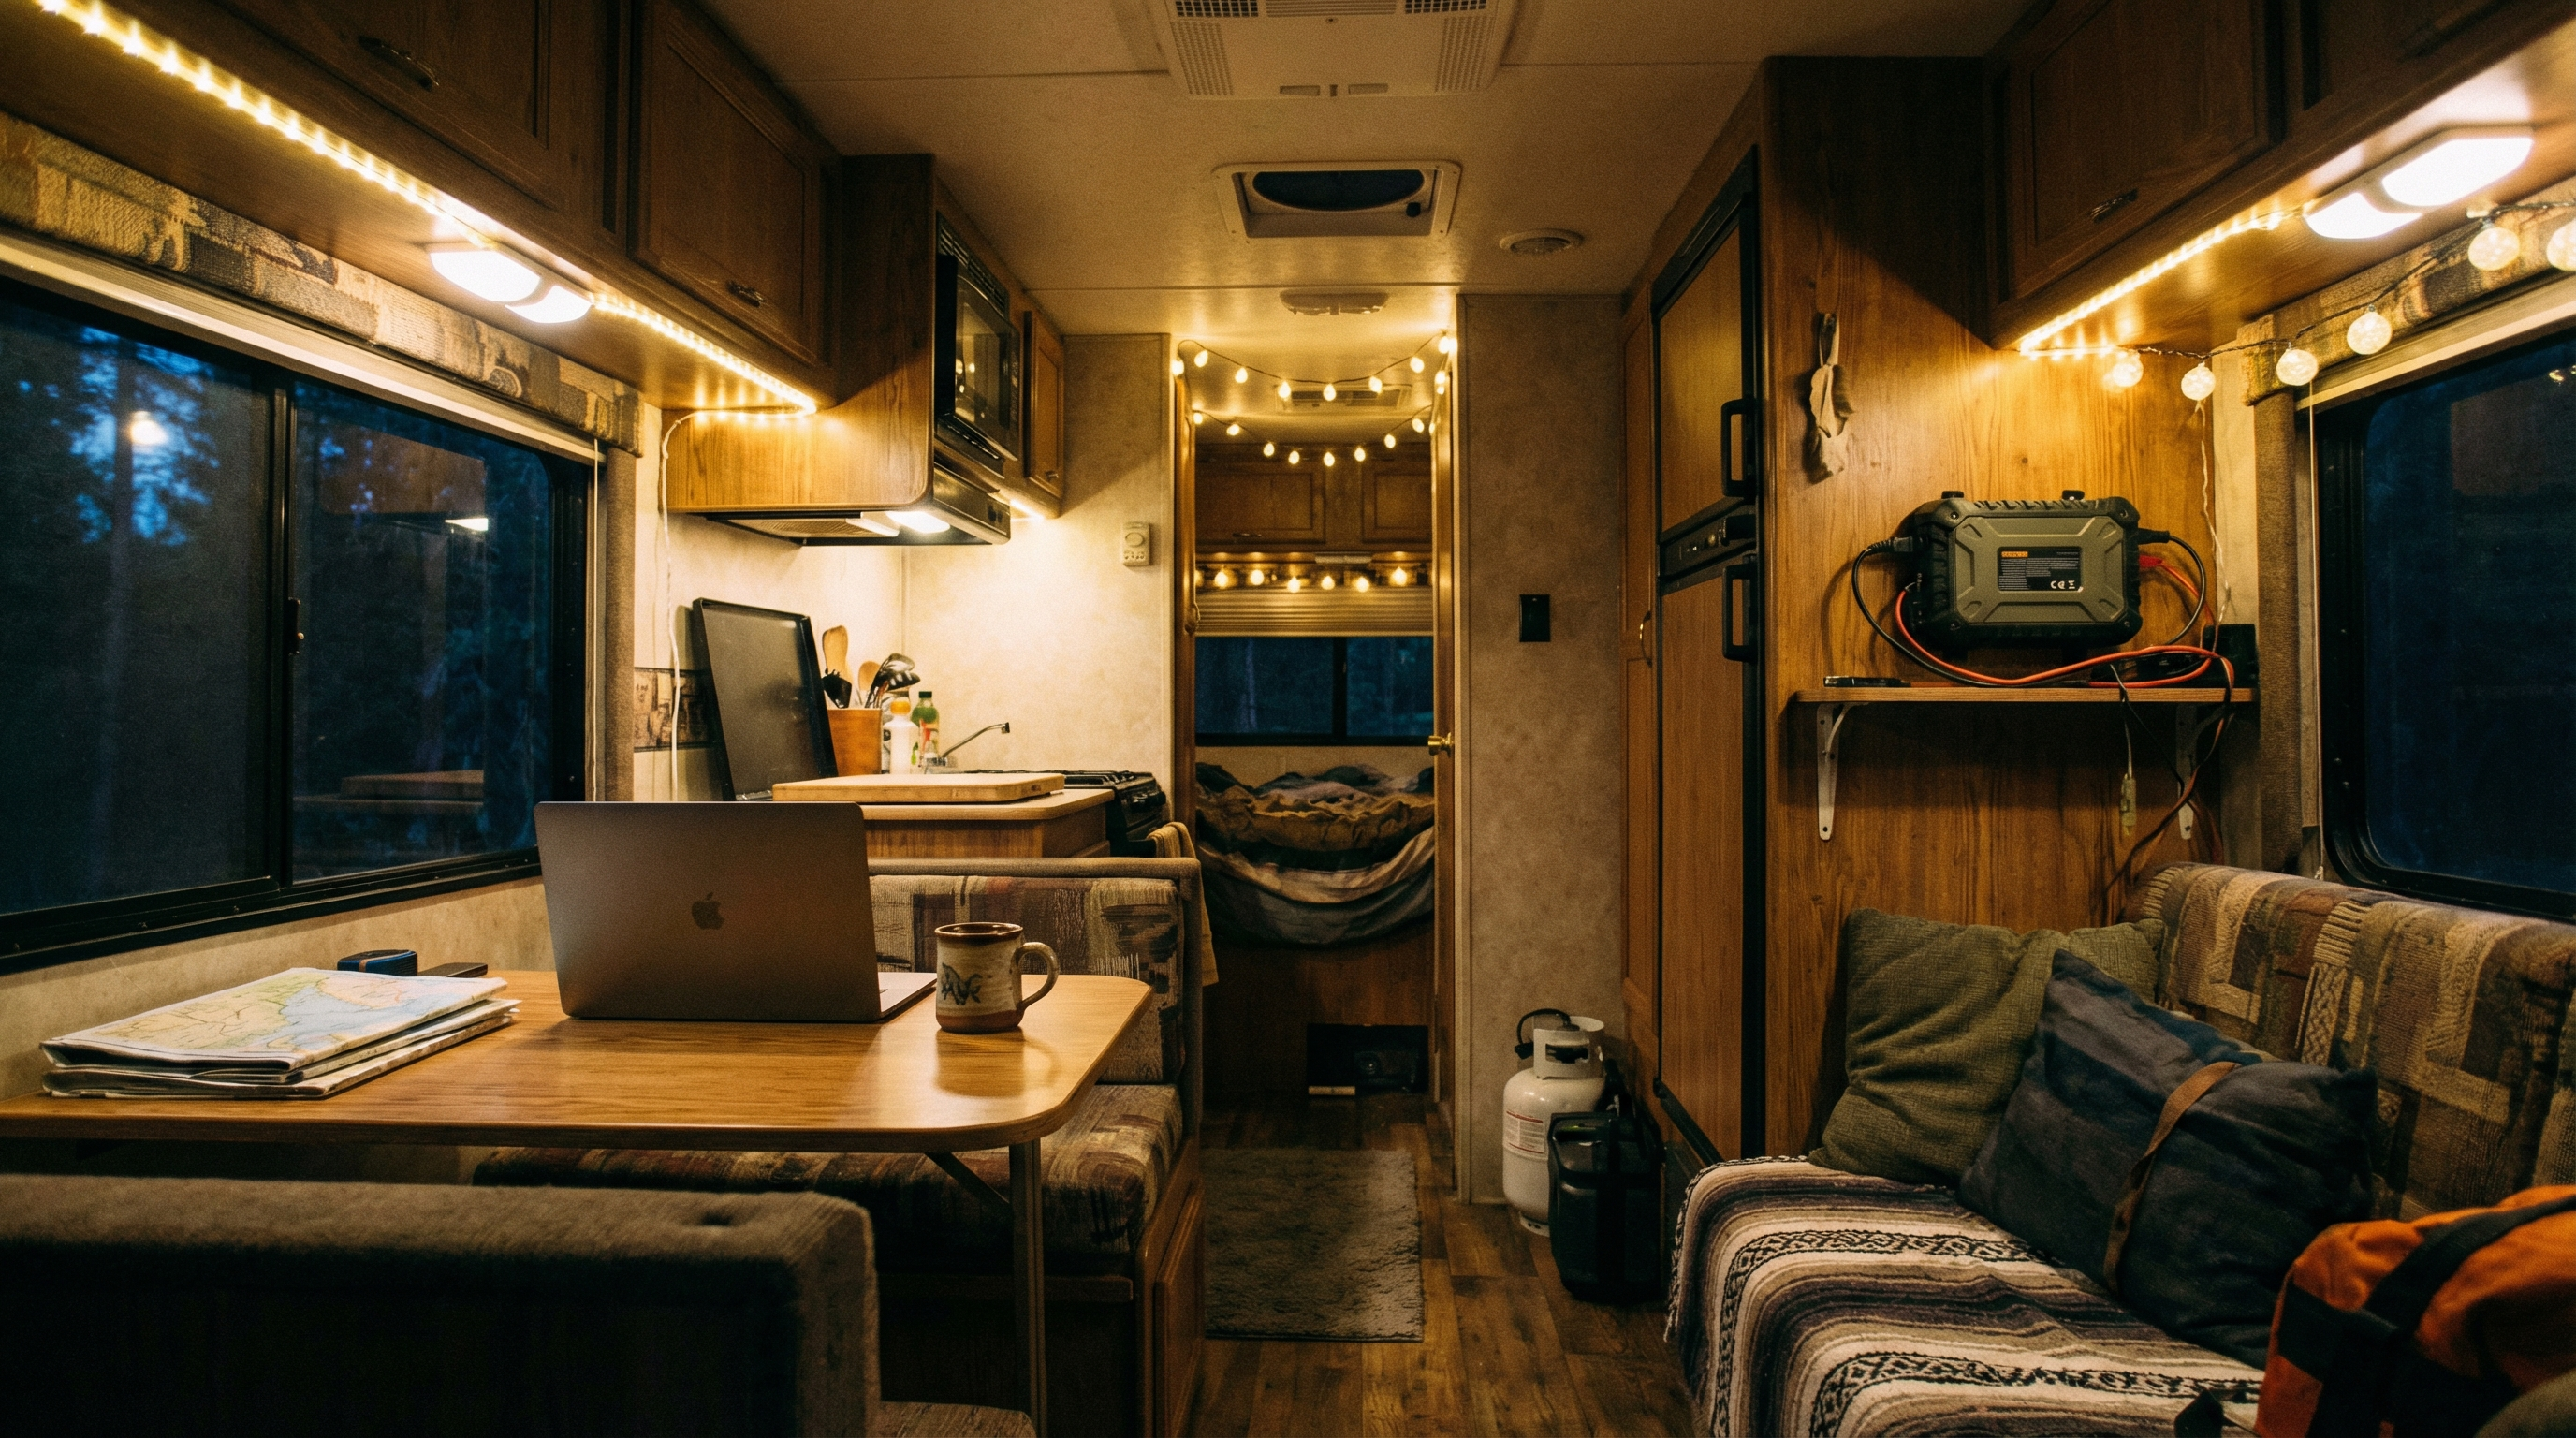
Rooftop Solar vs Portable Power Stations
Not everyone needs a roof install. Some people want plug-and-play. Others want a permanent system. The difference comes down to how you camp and how much power you use.
Portable power stations
Best for lighter loads and people who want simplicity. Great for weekend camping, charging devices, lights, fans, and smaller appliances. Scaling to heavy loads gets expensive fast.
Rooftop solar installs
Best for frequent boondocking, full-time RV living, or anyone who wants a system that quietly runs every day without hauling gear in and out of the rig.
If you’re torn, run the calculator first. Your daily watt-hours usually makes the decision for you: Solar Power Hub + RV Solar Calculator.
How Much Power Do You Need?
This is where most people either nail their build… or end up buying the same stuff twice. You don’t size solar by “how many panels fit.” You size it by daily energy use.
Here’s a realistic example of a basic off-grid day for many rigs:
- 12V fridge: ~320Wh/day (varies a lot by model and temps)
- LED lights: ~120Wh/day
- Laptops + phones: ~200Wh/day
- Water pump + small loads: ~60Wh/day
- Occasional microwave: ~150–200Wh/day (short bursts, but heavy draw)
That can land you around 800–1000Wh/day quickly, and that’s without air conditioning.
Use the calculator to build a realistic estimate in minutes: Solar Power Hub + RV Solar Calculator.
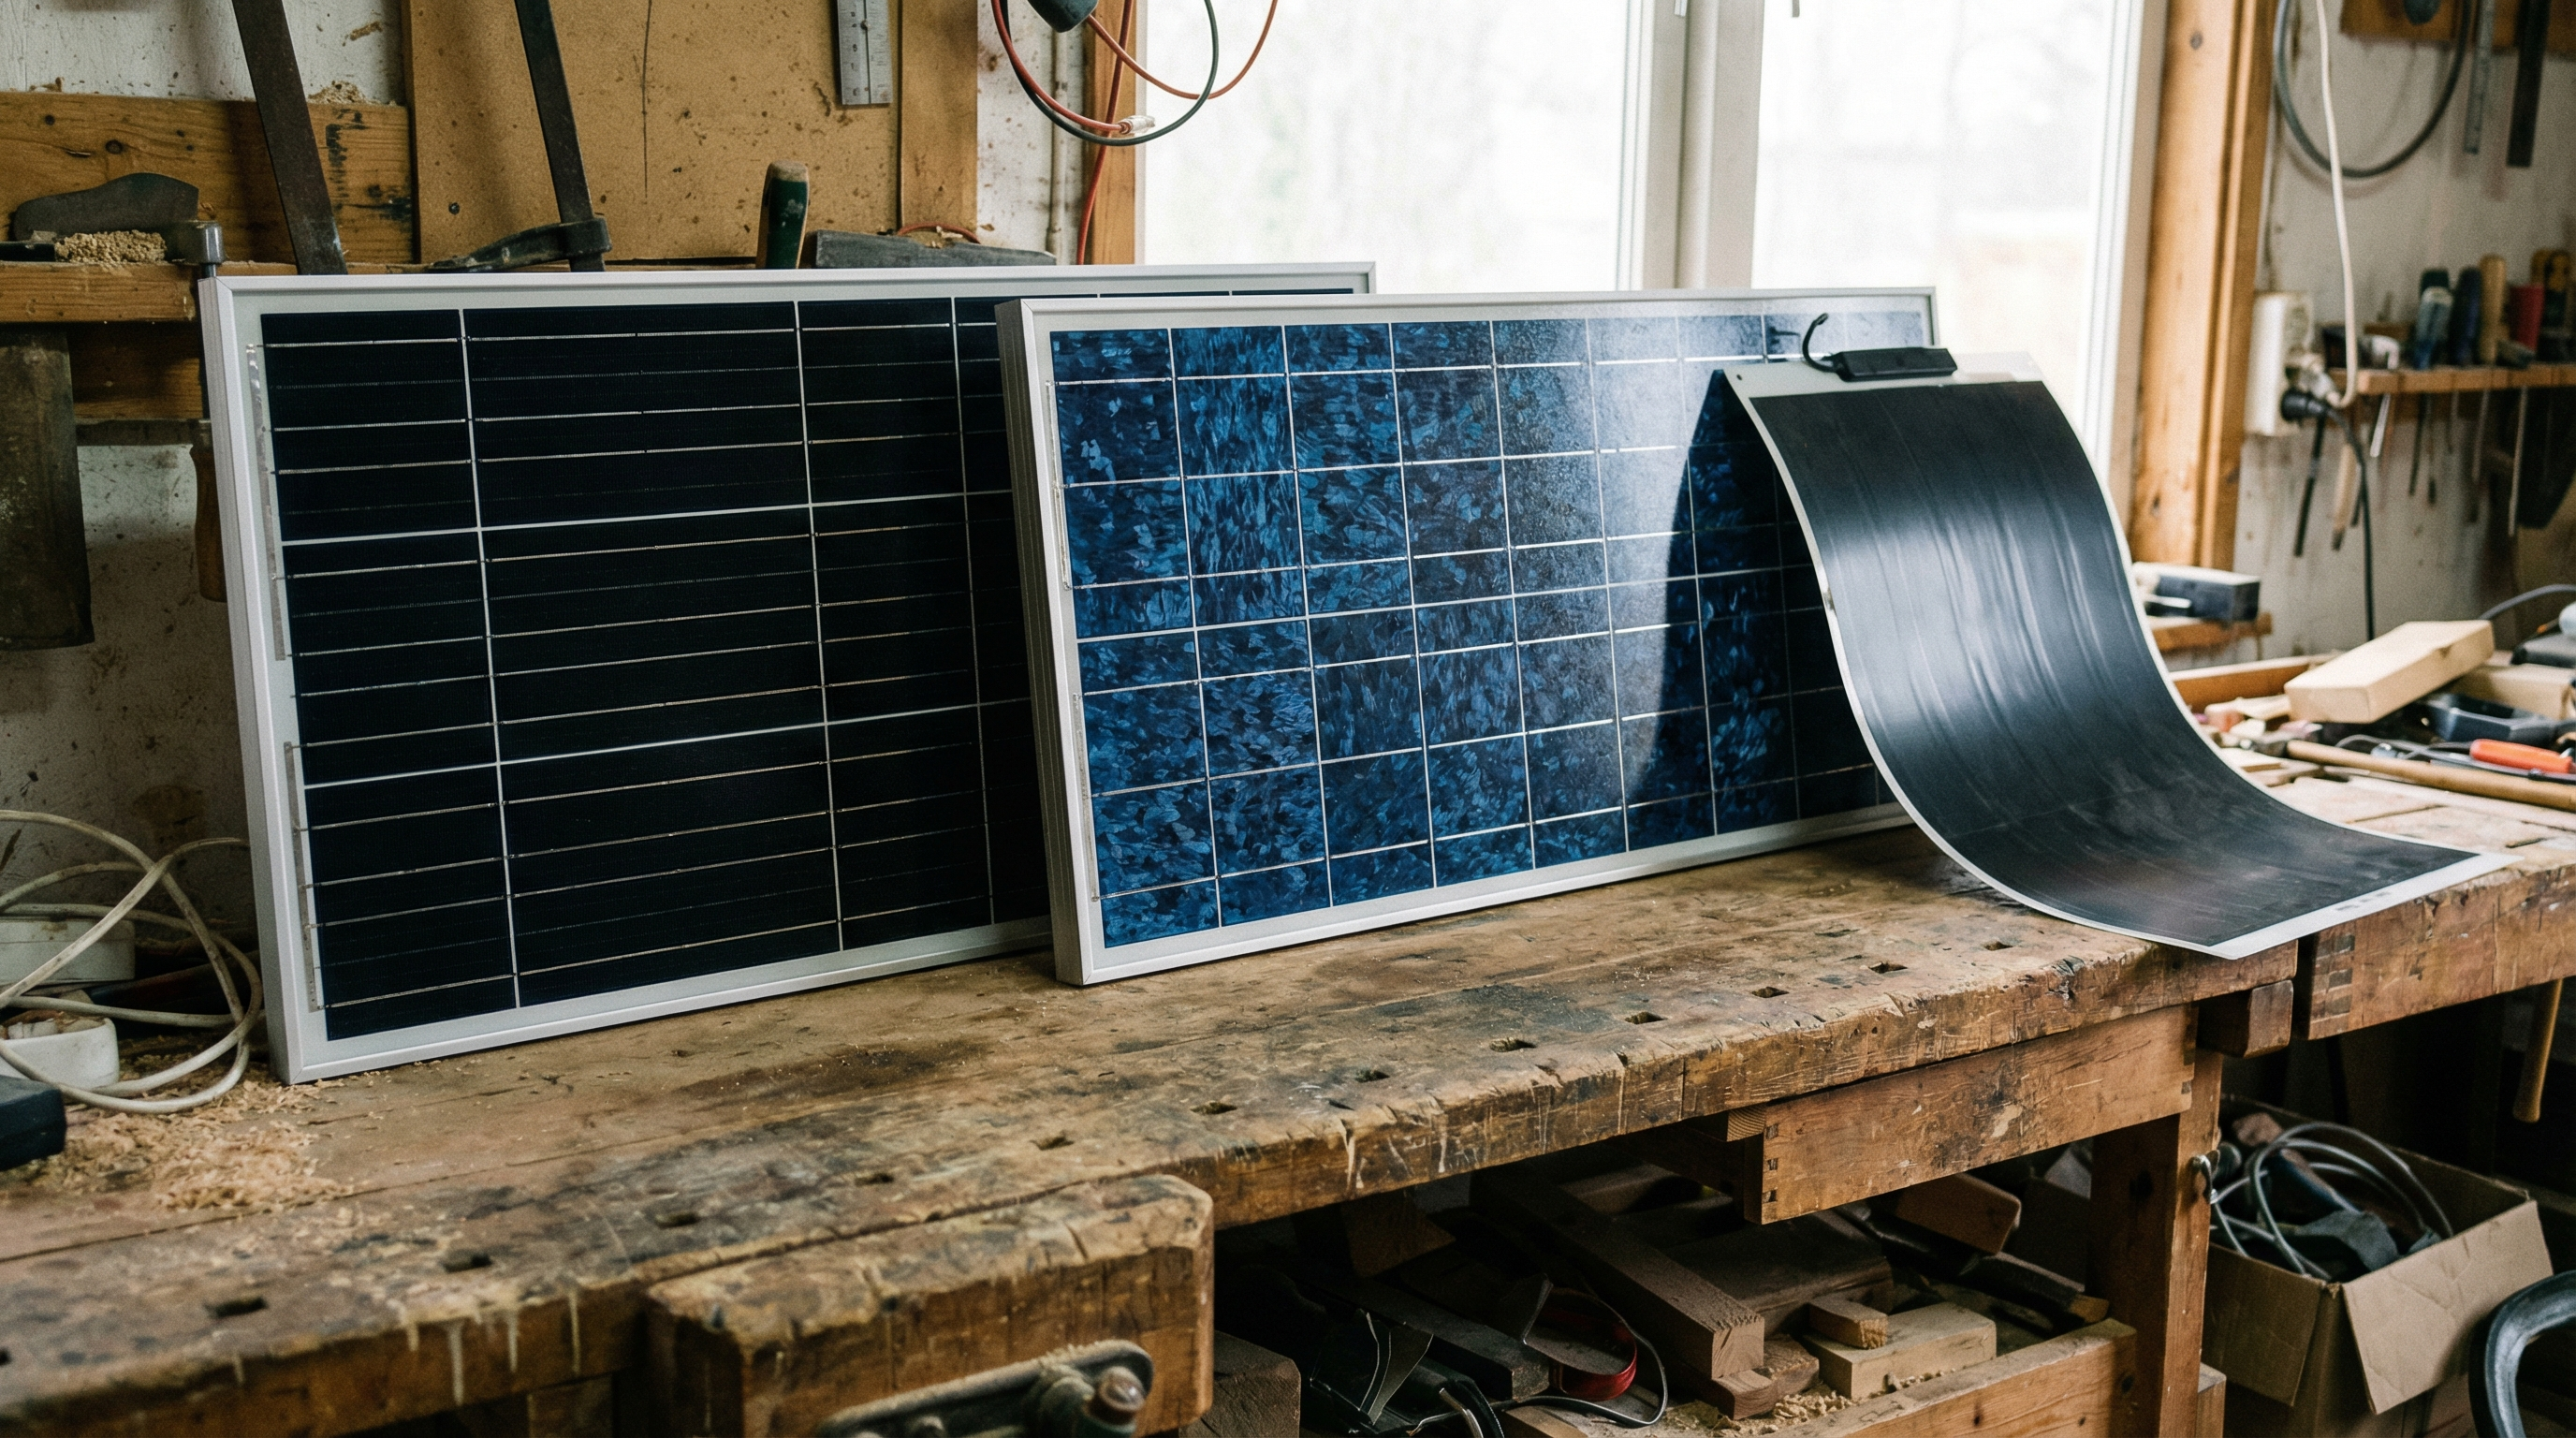
Choosing the Right Solar Panel Type
Solar panels aren’t all the same. In RV life, the “best” panel is the one that fits your roof, your budget, and your camping style.
Monocrystalline
The usual recommendation for RVs. More efficient in limited roof space, typically better performance in real-world conditions, and generally a better long-term bet for frequent off-grid use.
Polycrystalline
Often cheaper, but less efficient. You may need more roof space for the same output. Fine for lighter use if the price is right.
Thin-film / flexible
Lightweight and helpful on curved surfaces, but usually lower efficiency. Not “bad,” just a different use case.
What You Need for a Proper RV Solar Installation
A solar install isn’t just panels. The system is only as good as its weakest component, and that’s usually wiring, fusing, or a controller that’s undersized.
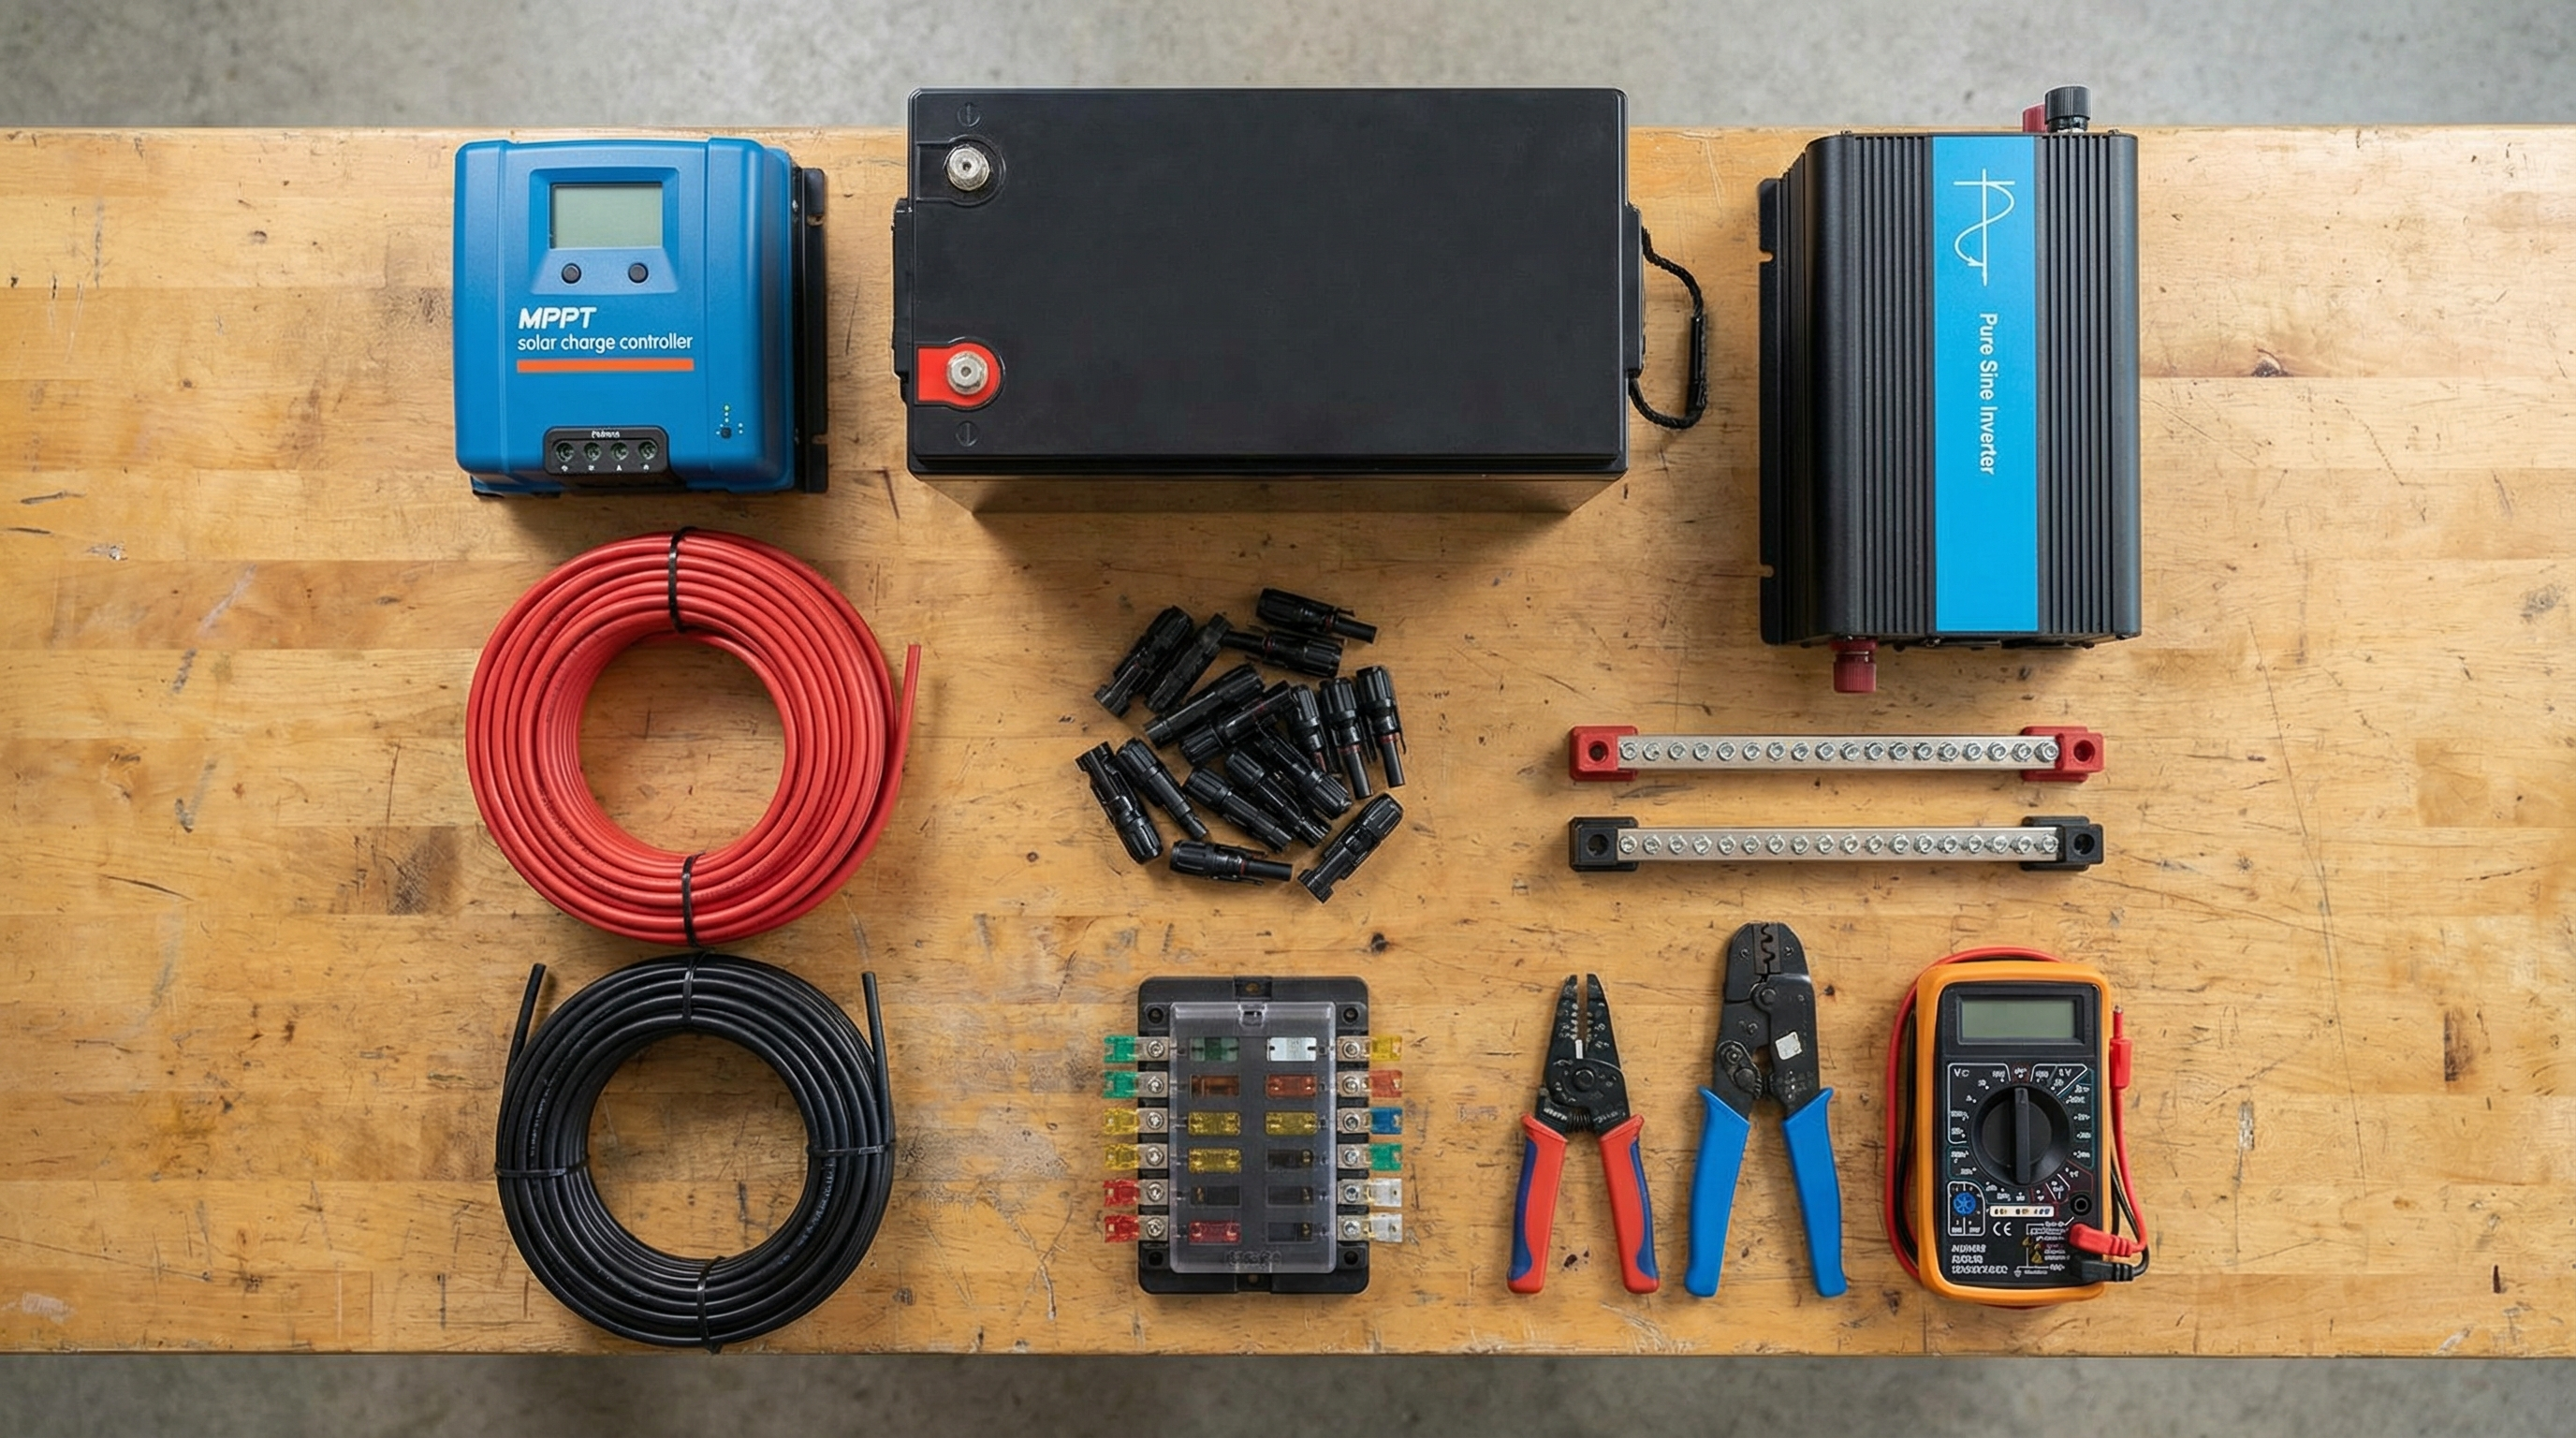
- Solar panels: your daily energy input.
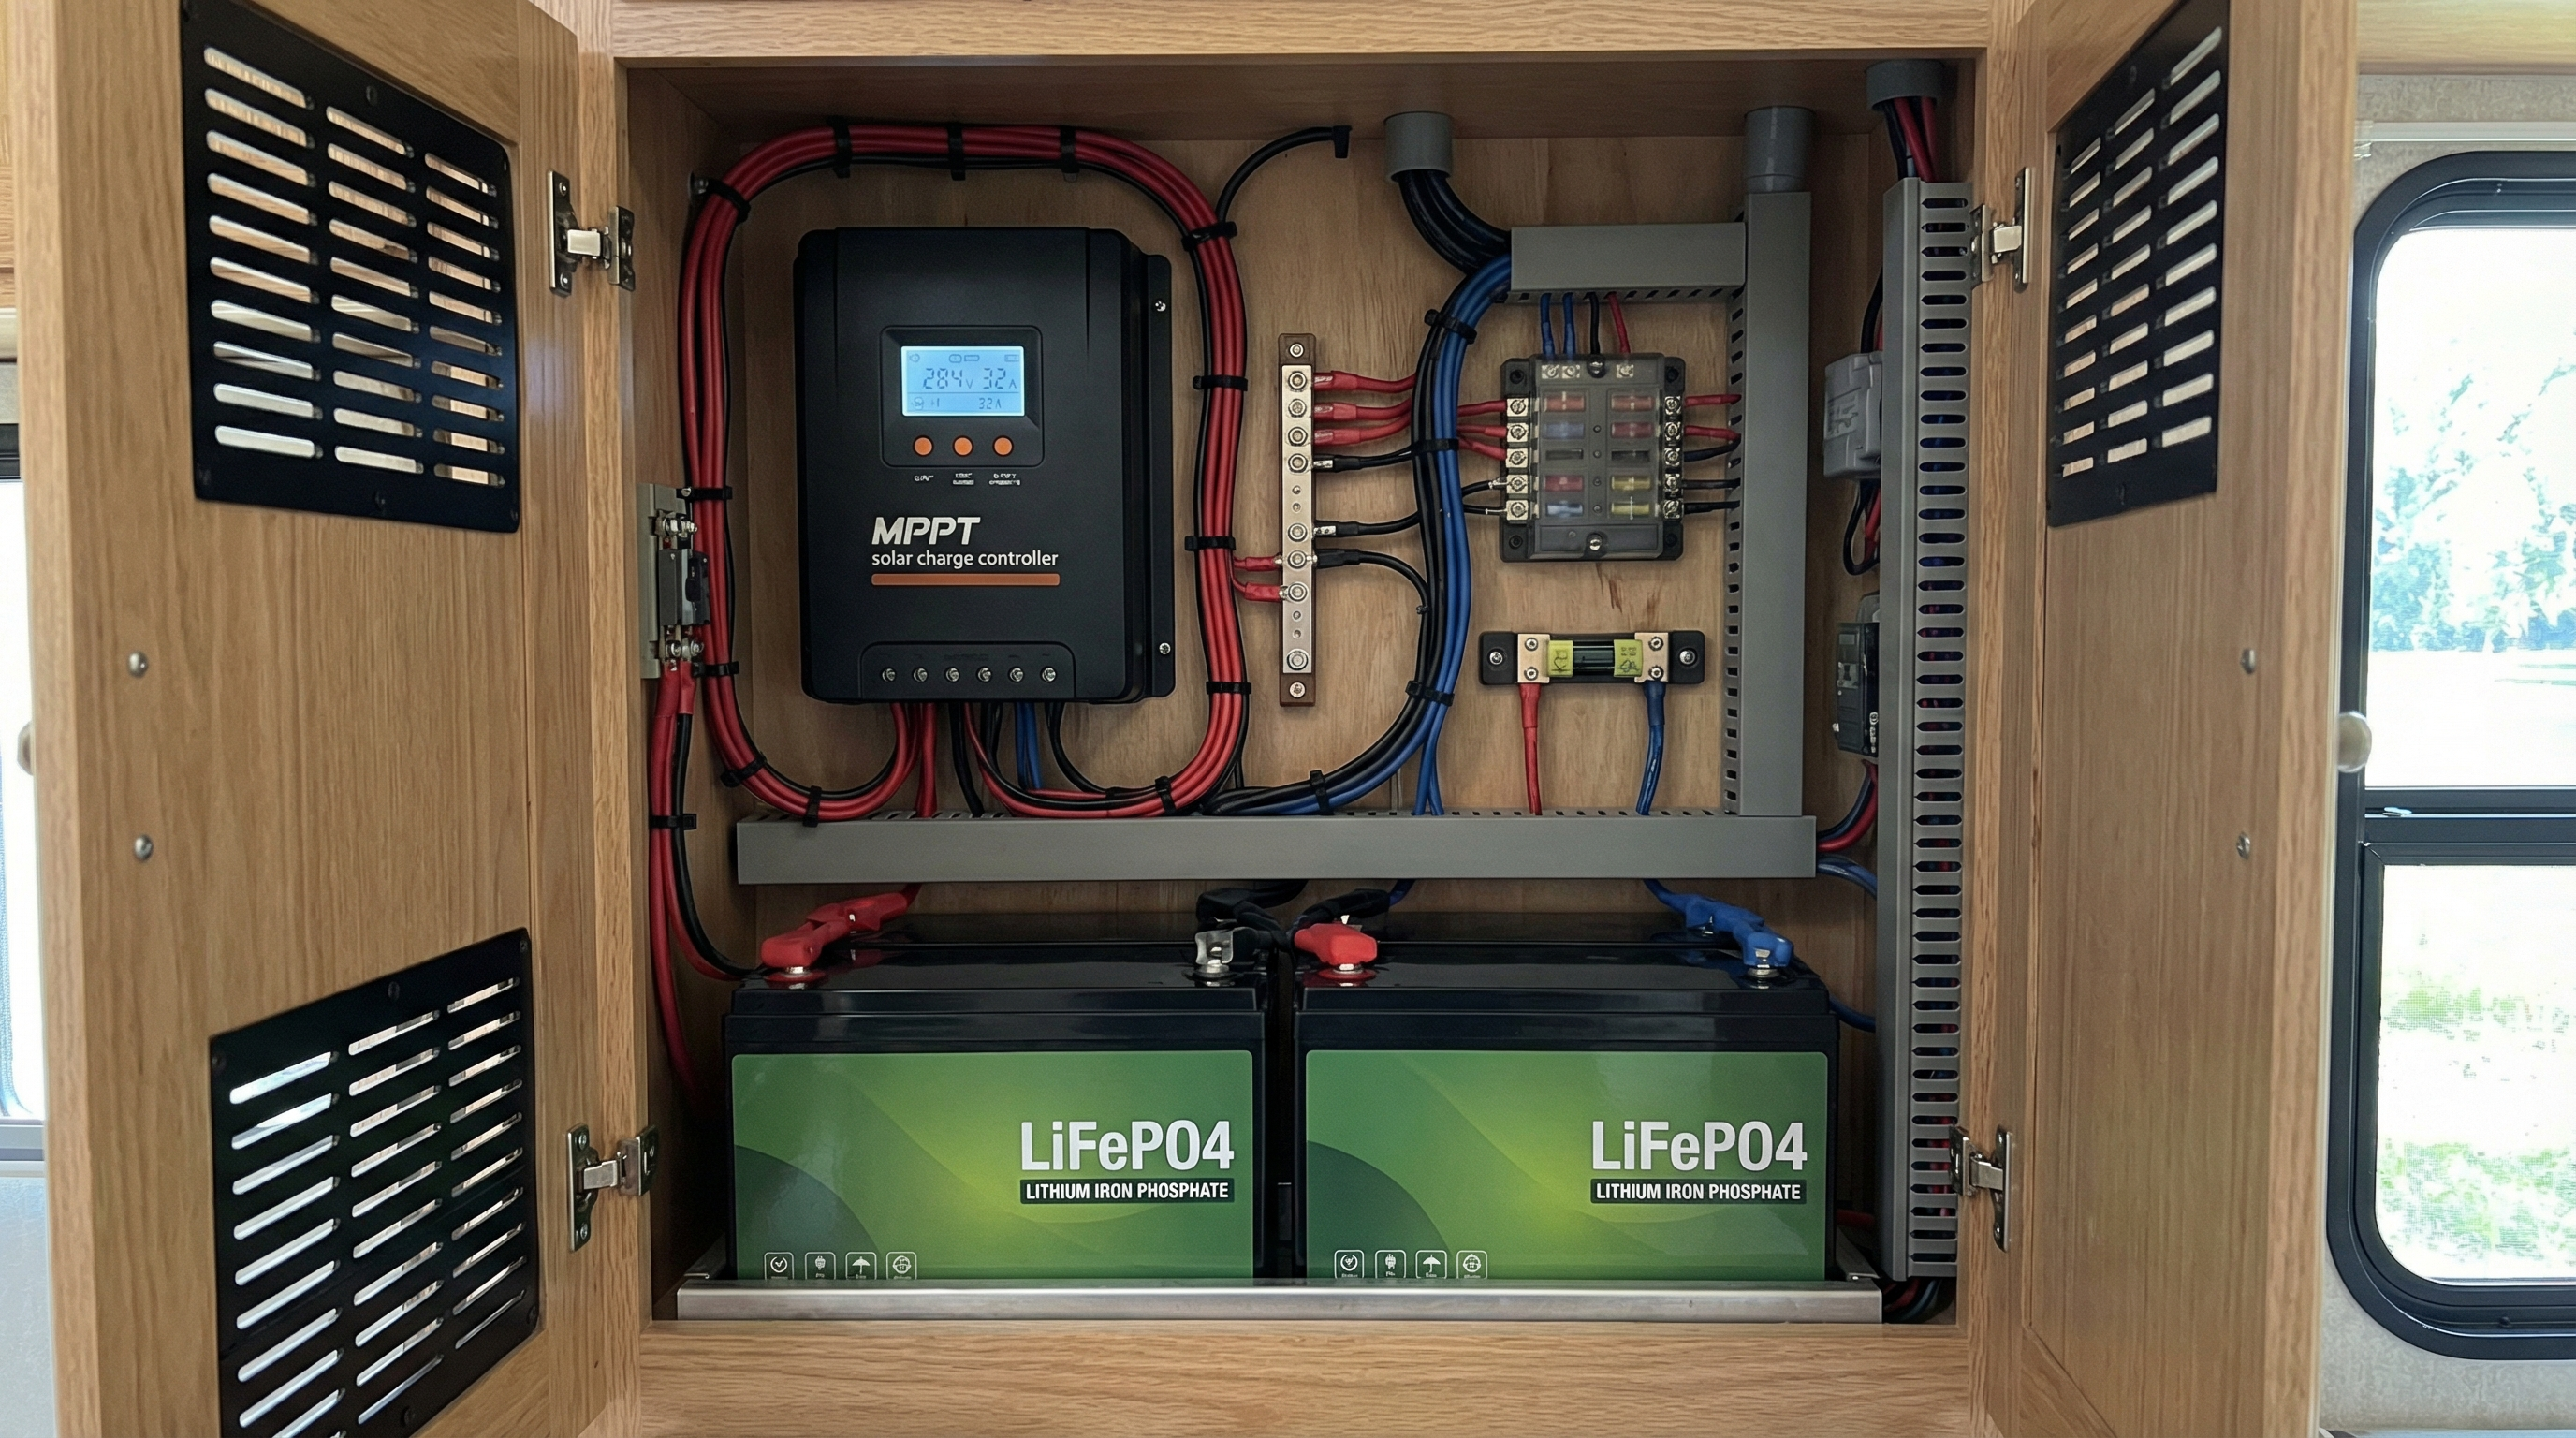
- Charge controller: MPPT is usually worth it for RV builds.
- Batteries: lithium is lighter and more usable capacity; lead-acid is cheaper up front.
- Inverter: converts DC battery power to AC for household appliances.
- Wiring, fuses, breakers, mounts: this is the safety backbone, not “optional accessories.”
Tip that saves headaches: fuse every major run. If something shorts, you want the fuse to sacrifice itself, not your wiring harness.
Pre-Installation Prep
A clean install starts before you mount anything. This is where you avoid leaks, shading losses, and cable runs that turn into spaghetti.
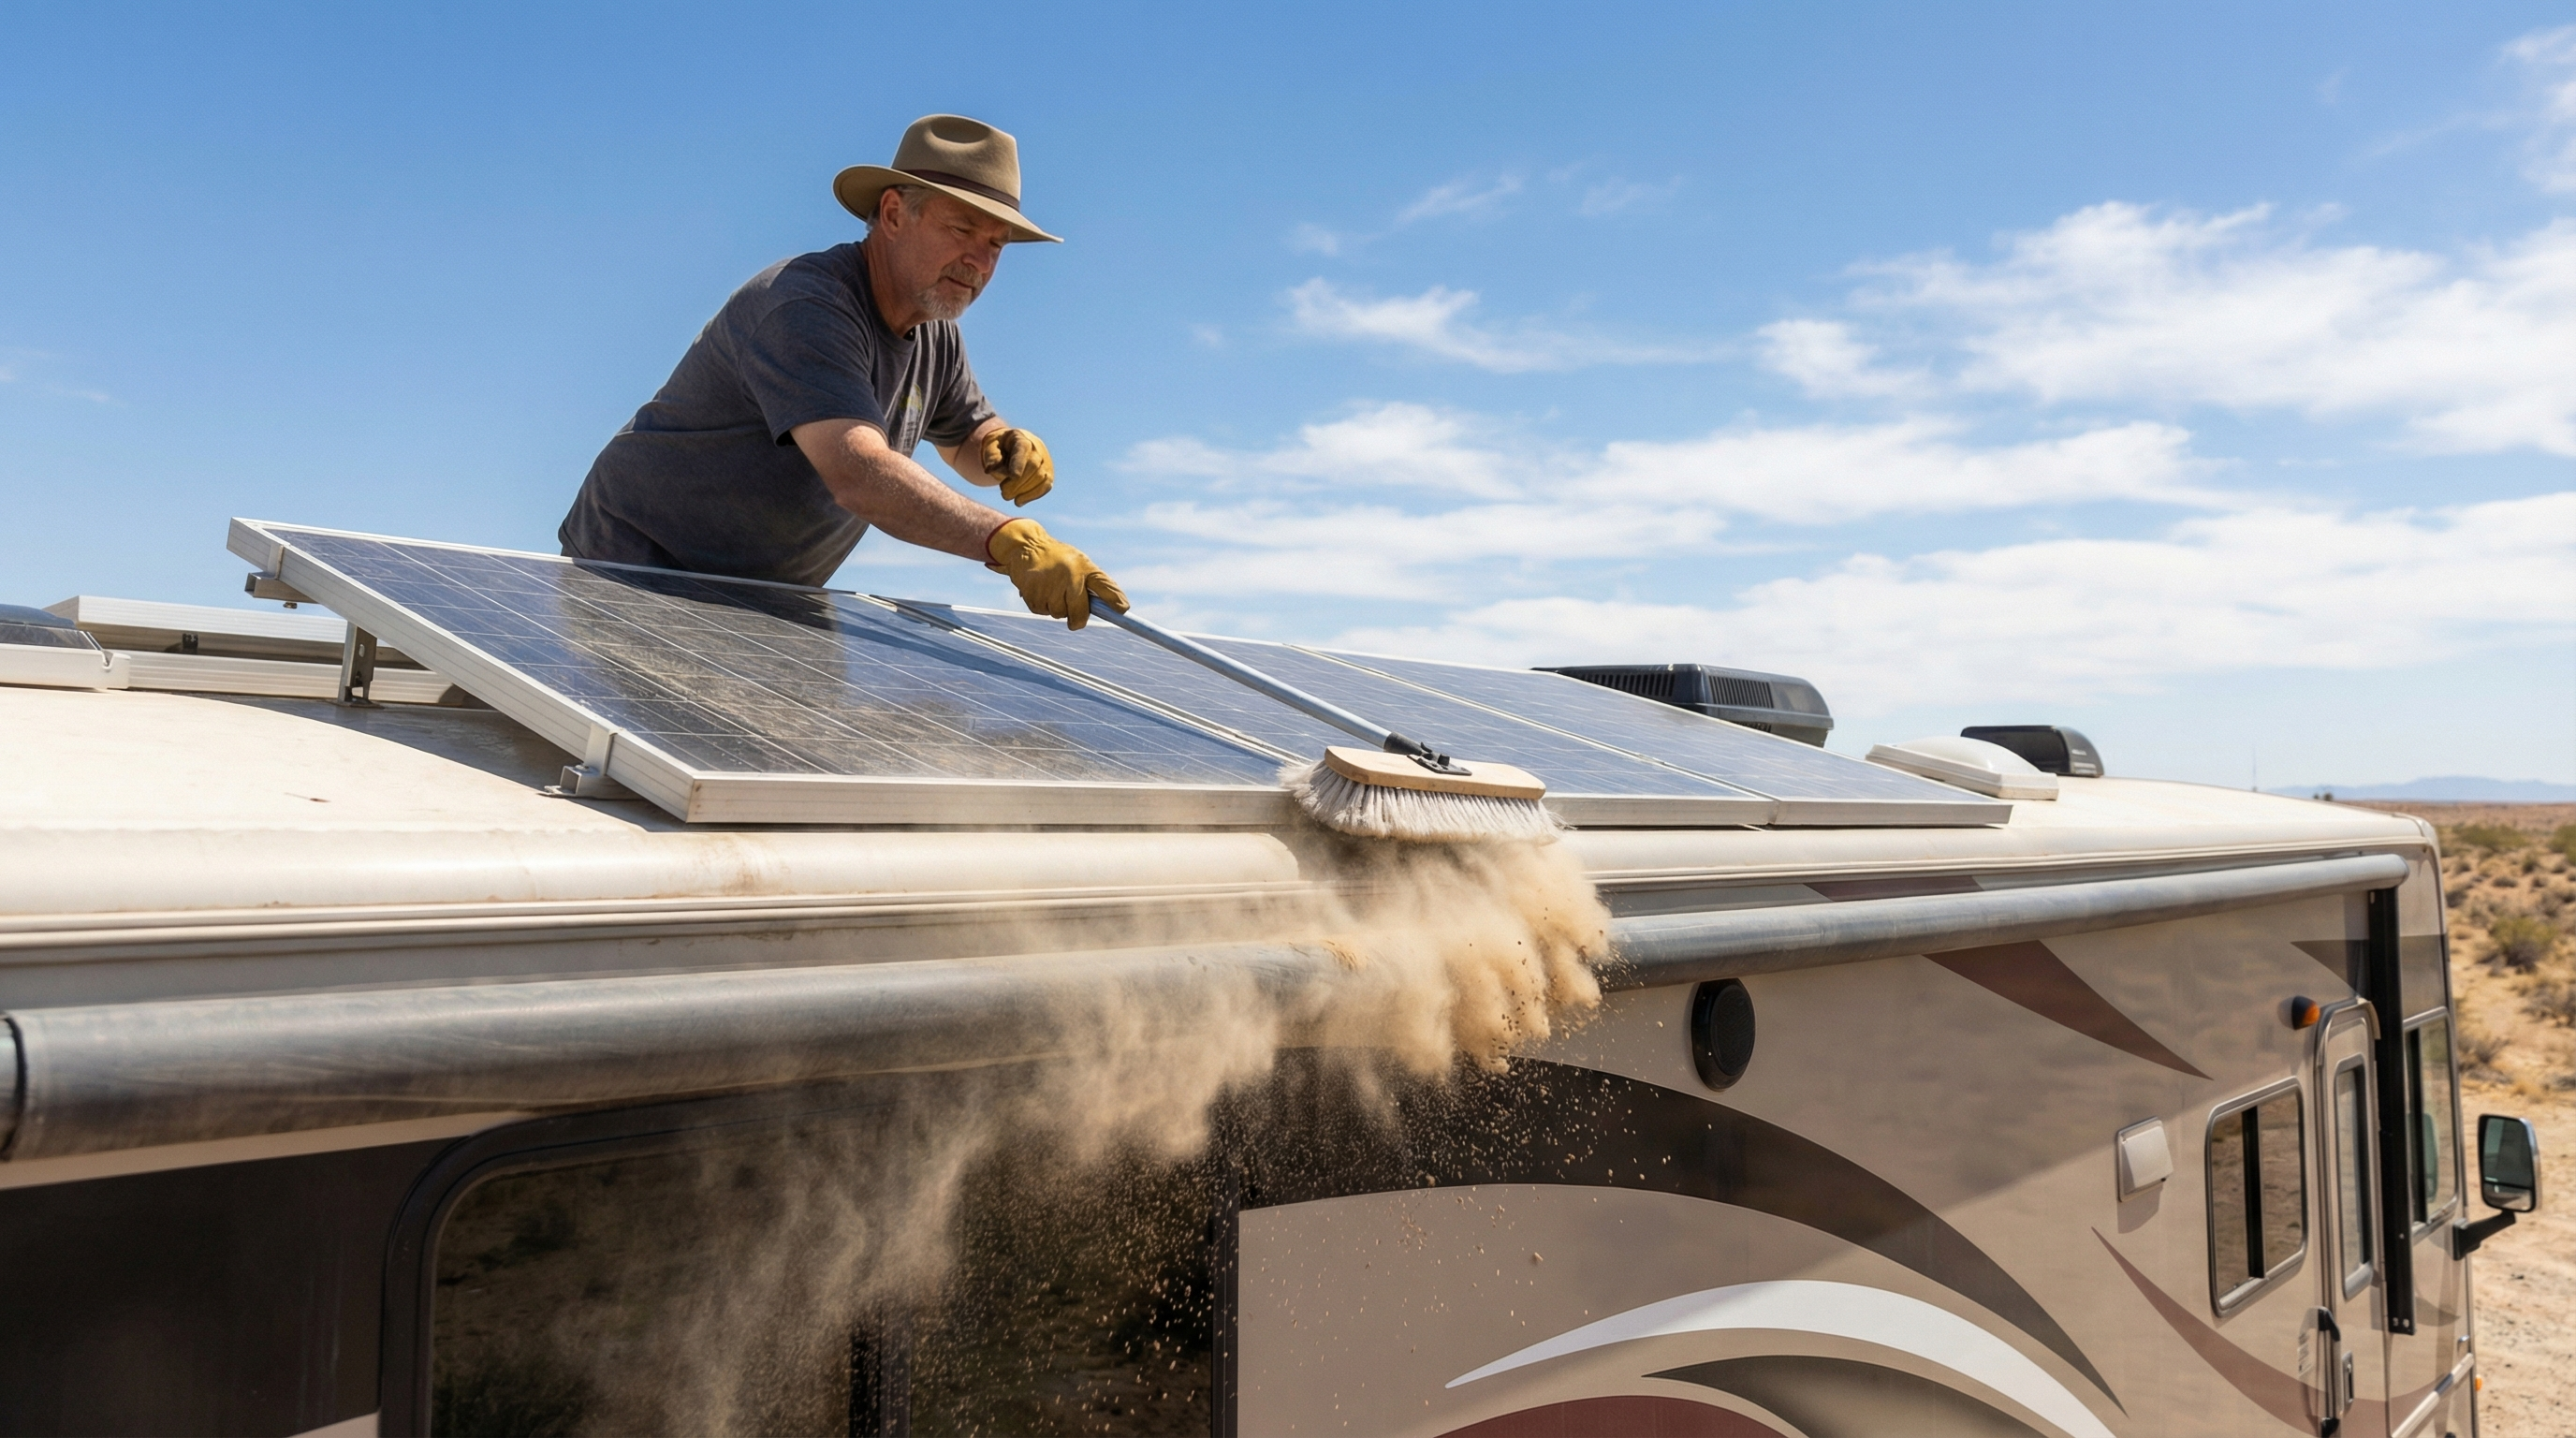
- Inspect and clean your roof.
- Map panel placement to avoid A/C shrouds, vents, and shadows.
- Decide where the controller and battery bank will live (usually close together).
- Plan the wiring route. Shorter runs mean less voltage drop.
- Confirm your mounts and sealant choices.
Step-by-Step RV Solar Panel Installation
The exact install details vary by roof material and system design, but the workflow below is the same: plan, mount, route, protect, test.
If you’re not comfortable with DC wiring, there’s no shame in getting help for the electrical portion. A clean, safe system beats “I watched two videos and sent it.”
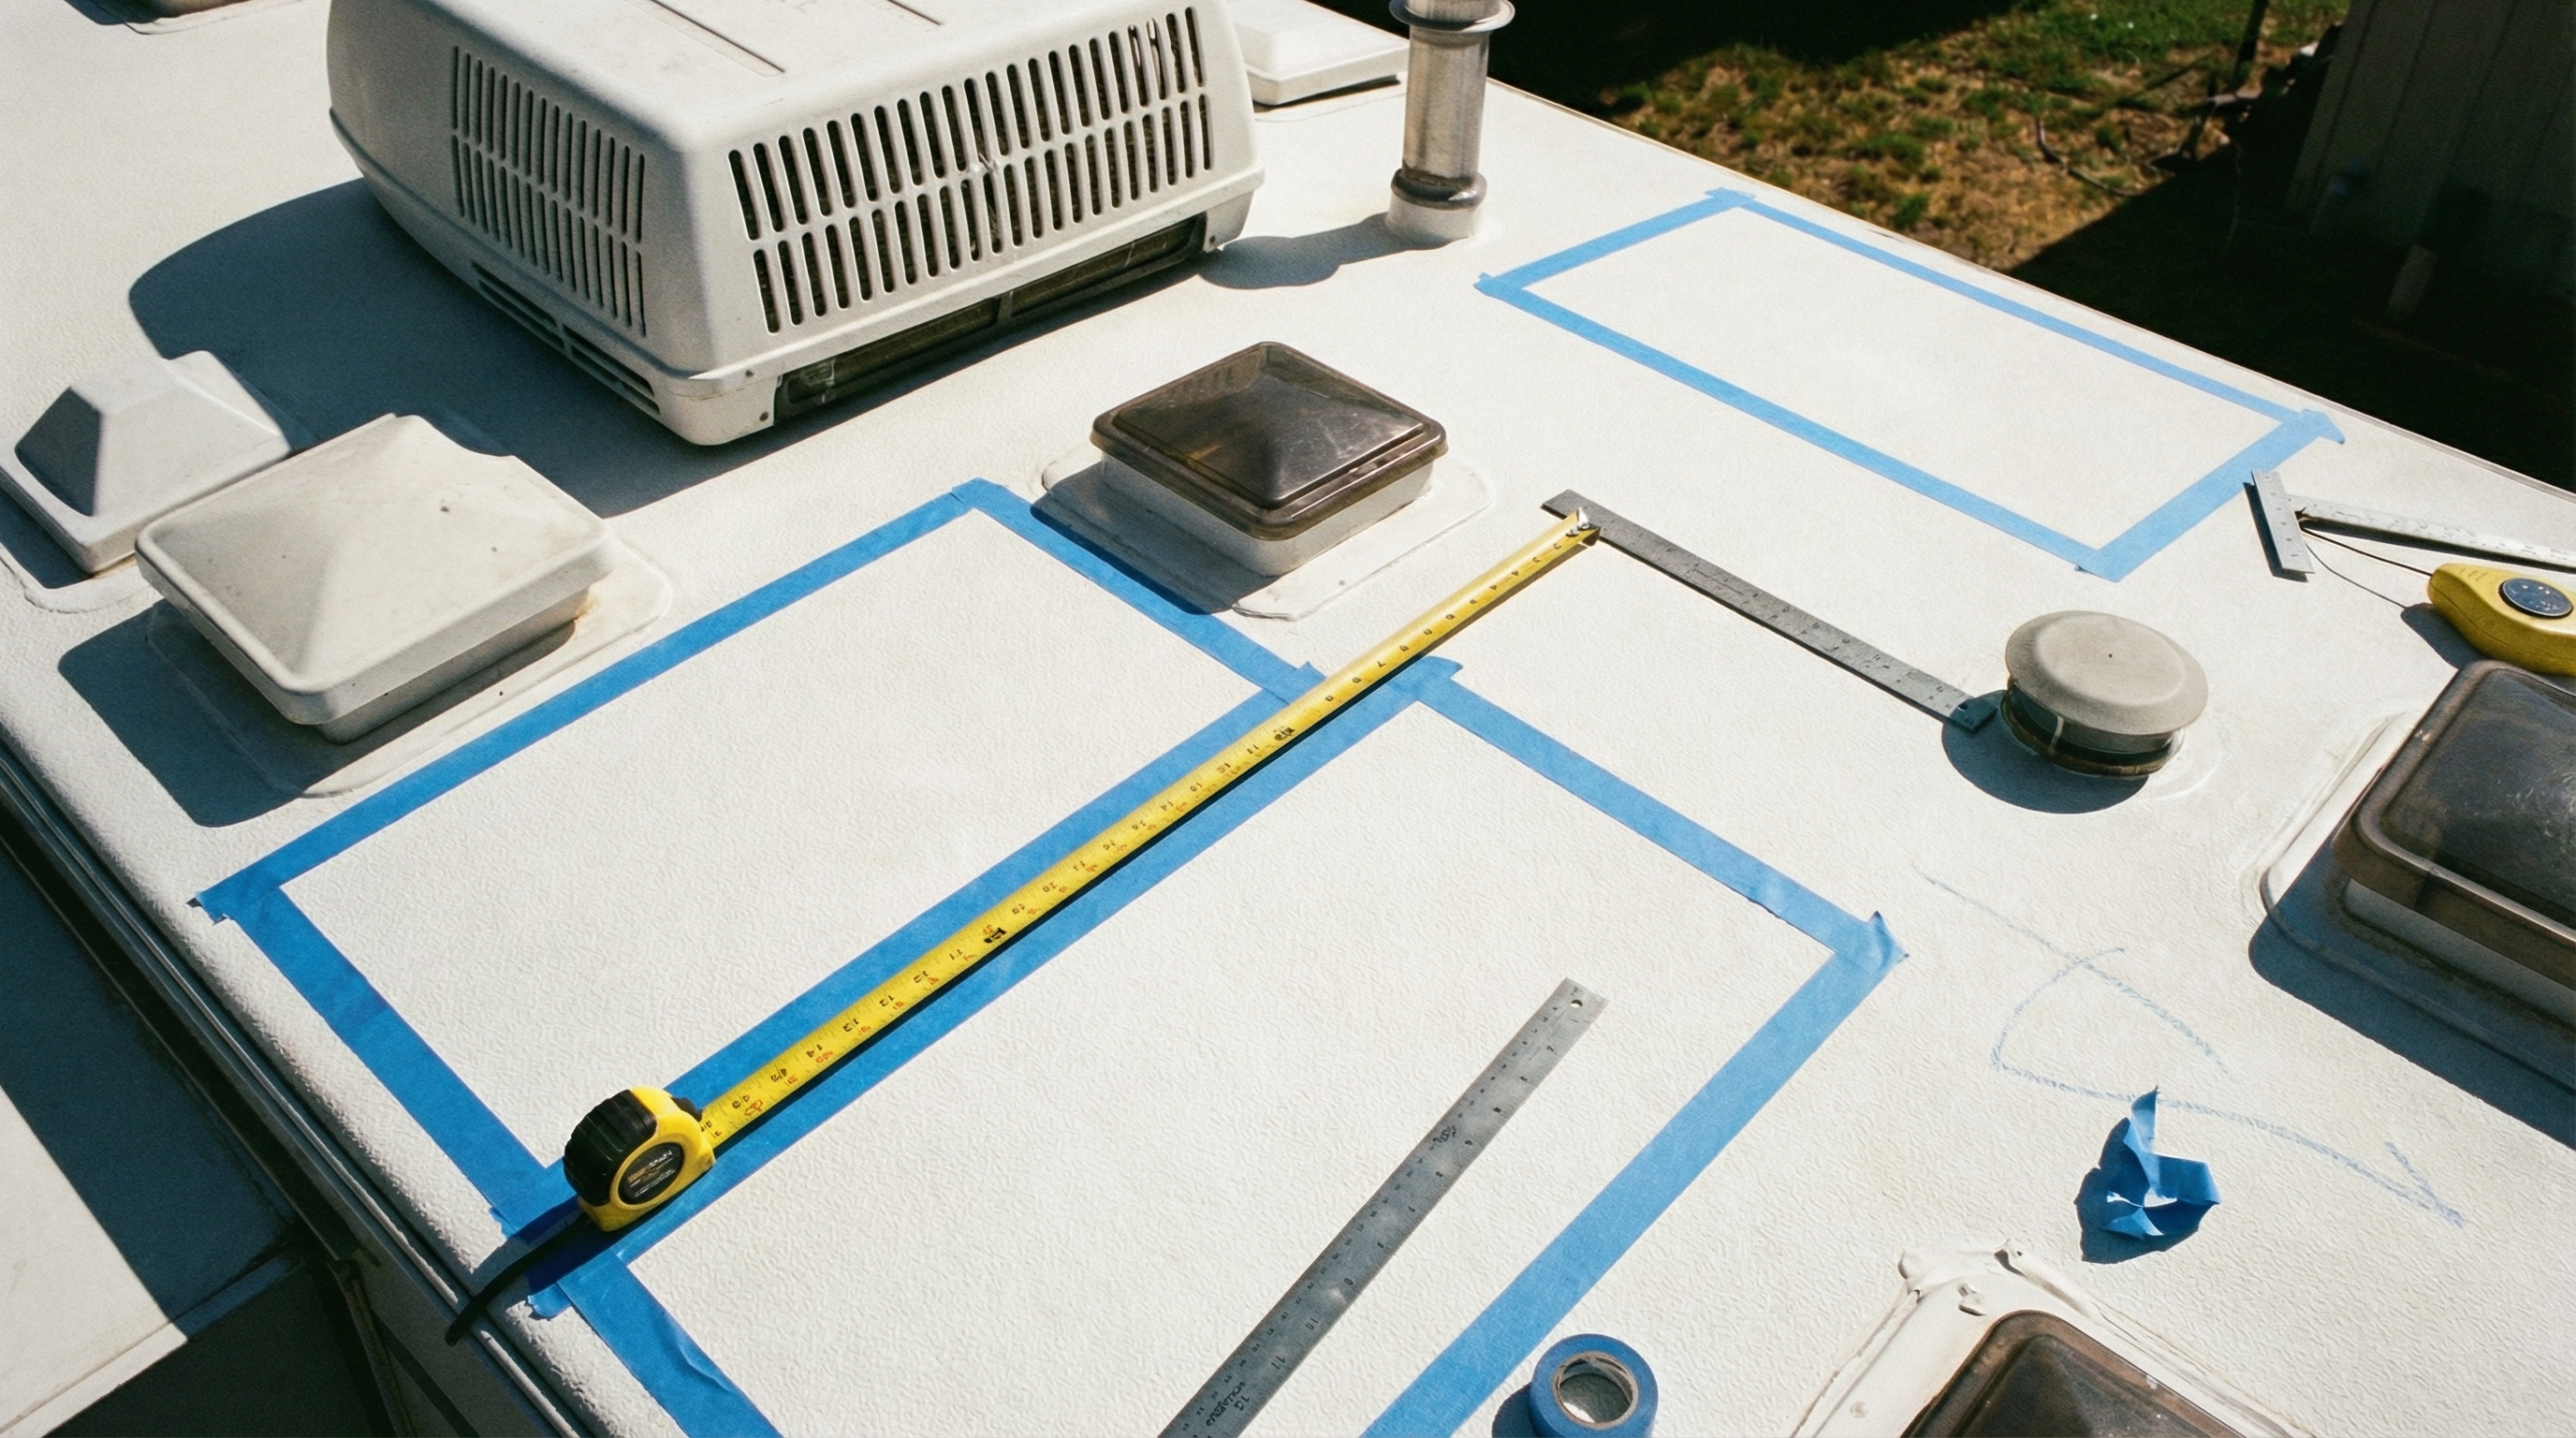
Step 1: Plan your roof layout
Use painter’s tape on the roof to visualize placement. Confirm clearance around vents and A/C. Decide whether you’re wiring in series, parallel, or a hybrid setup.
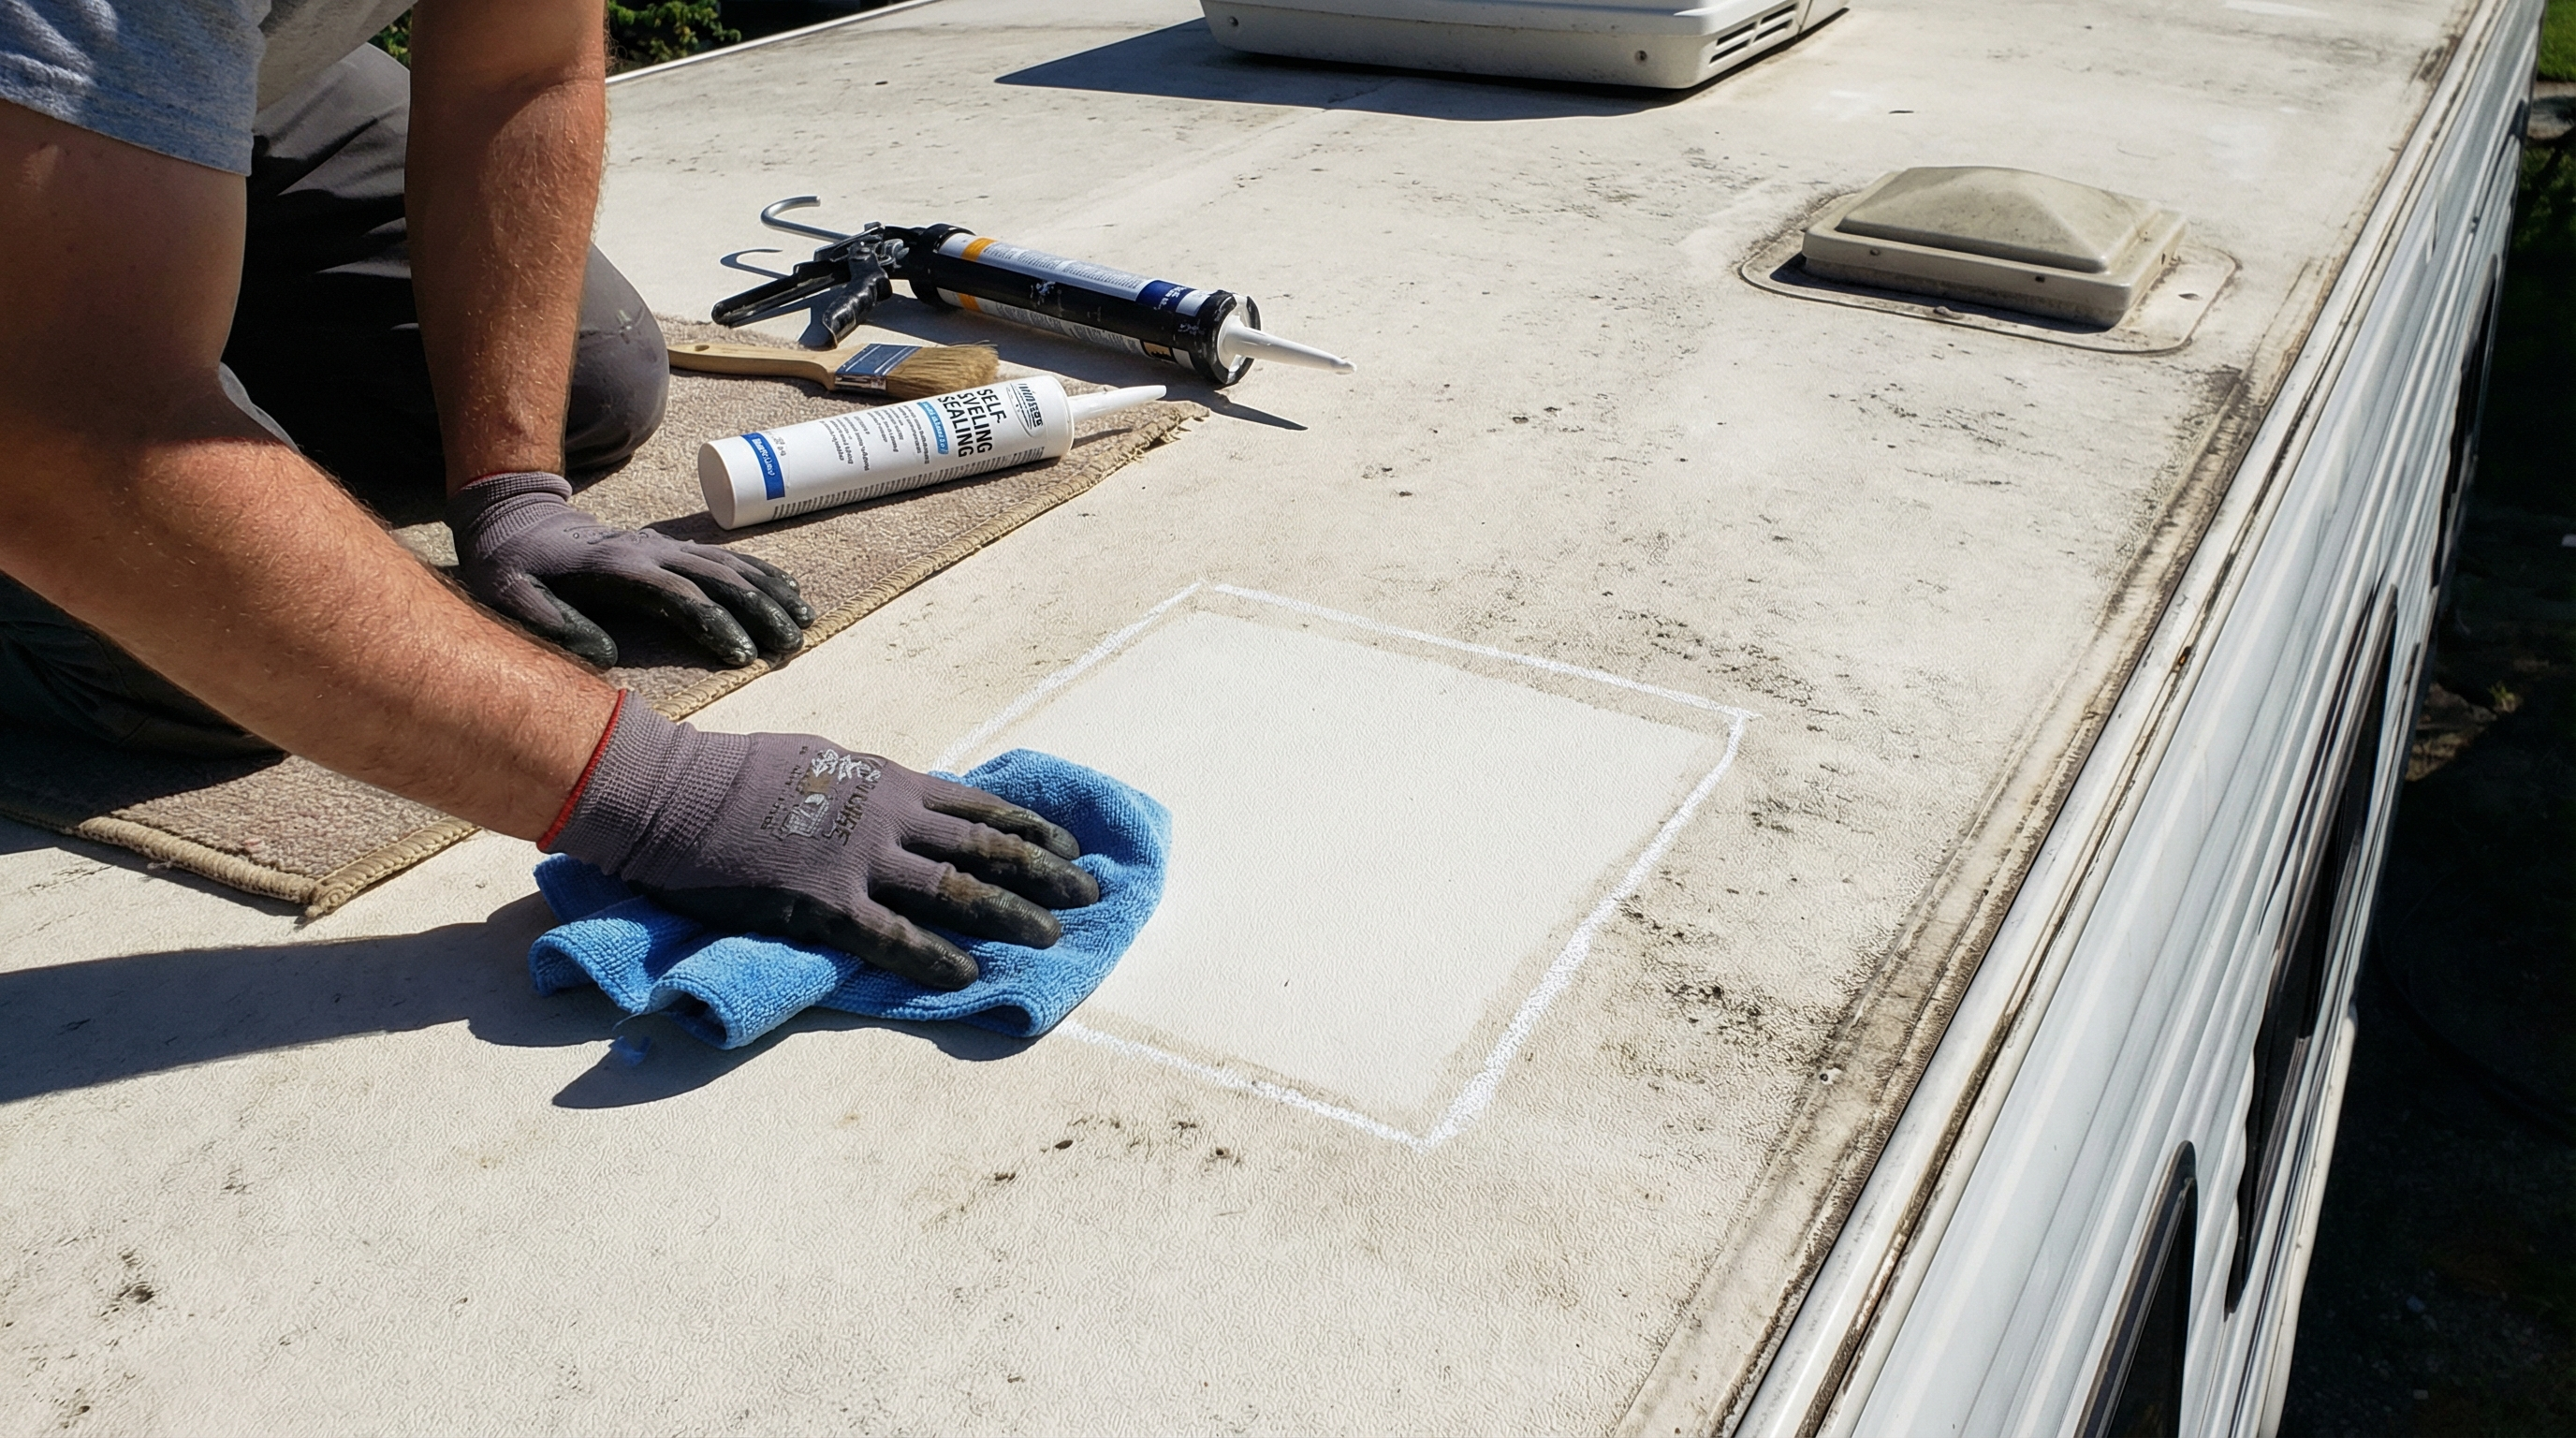
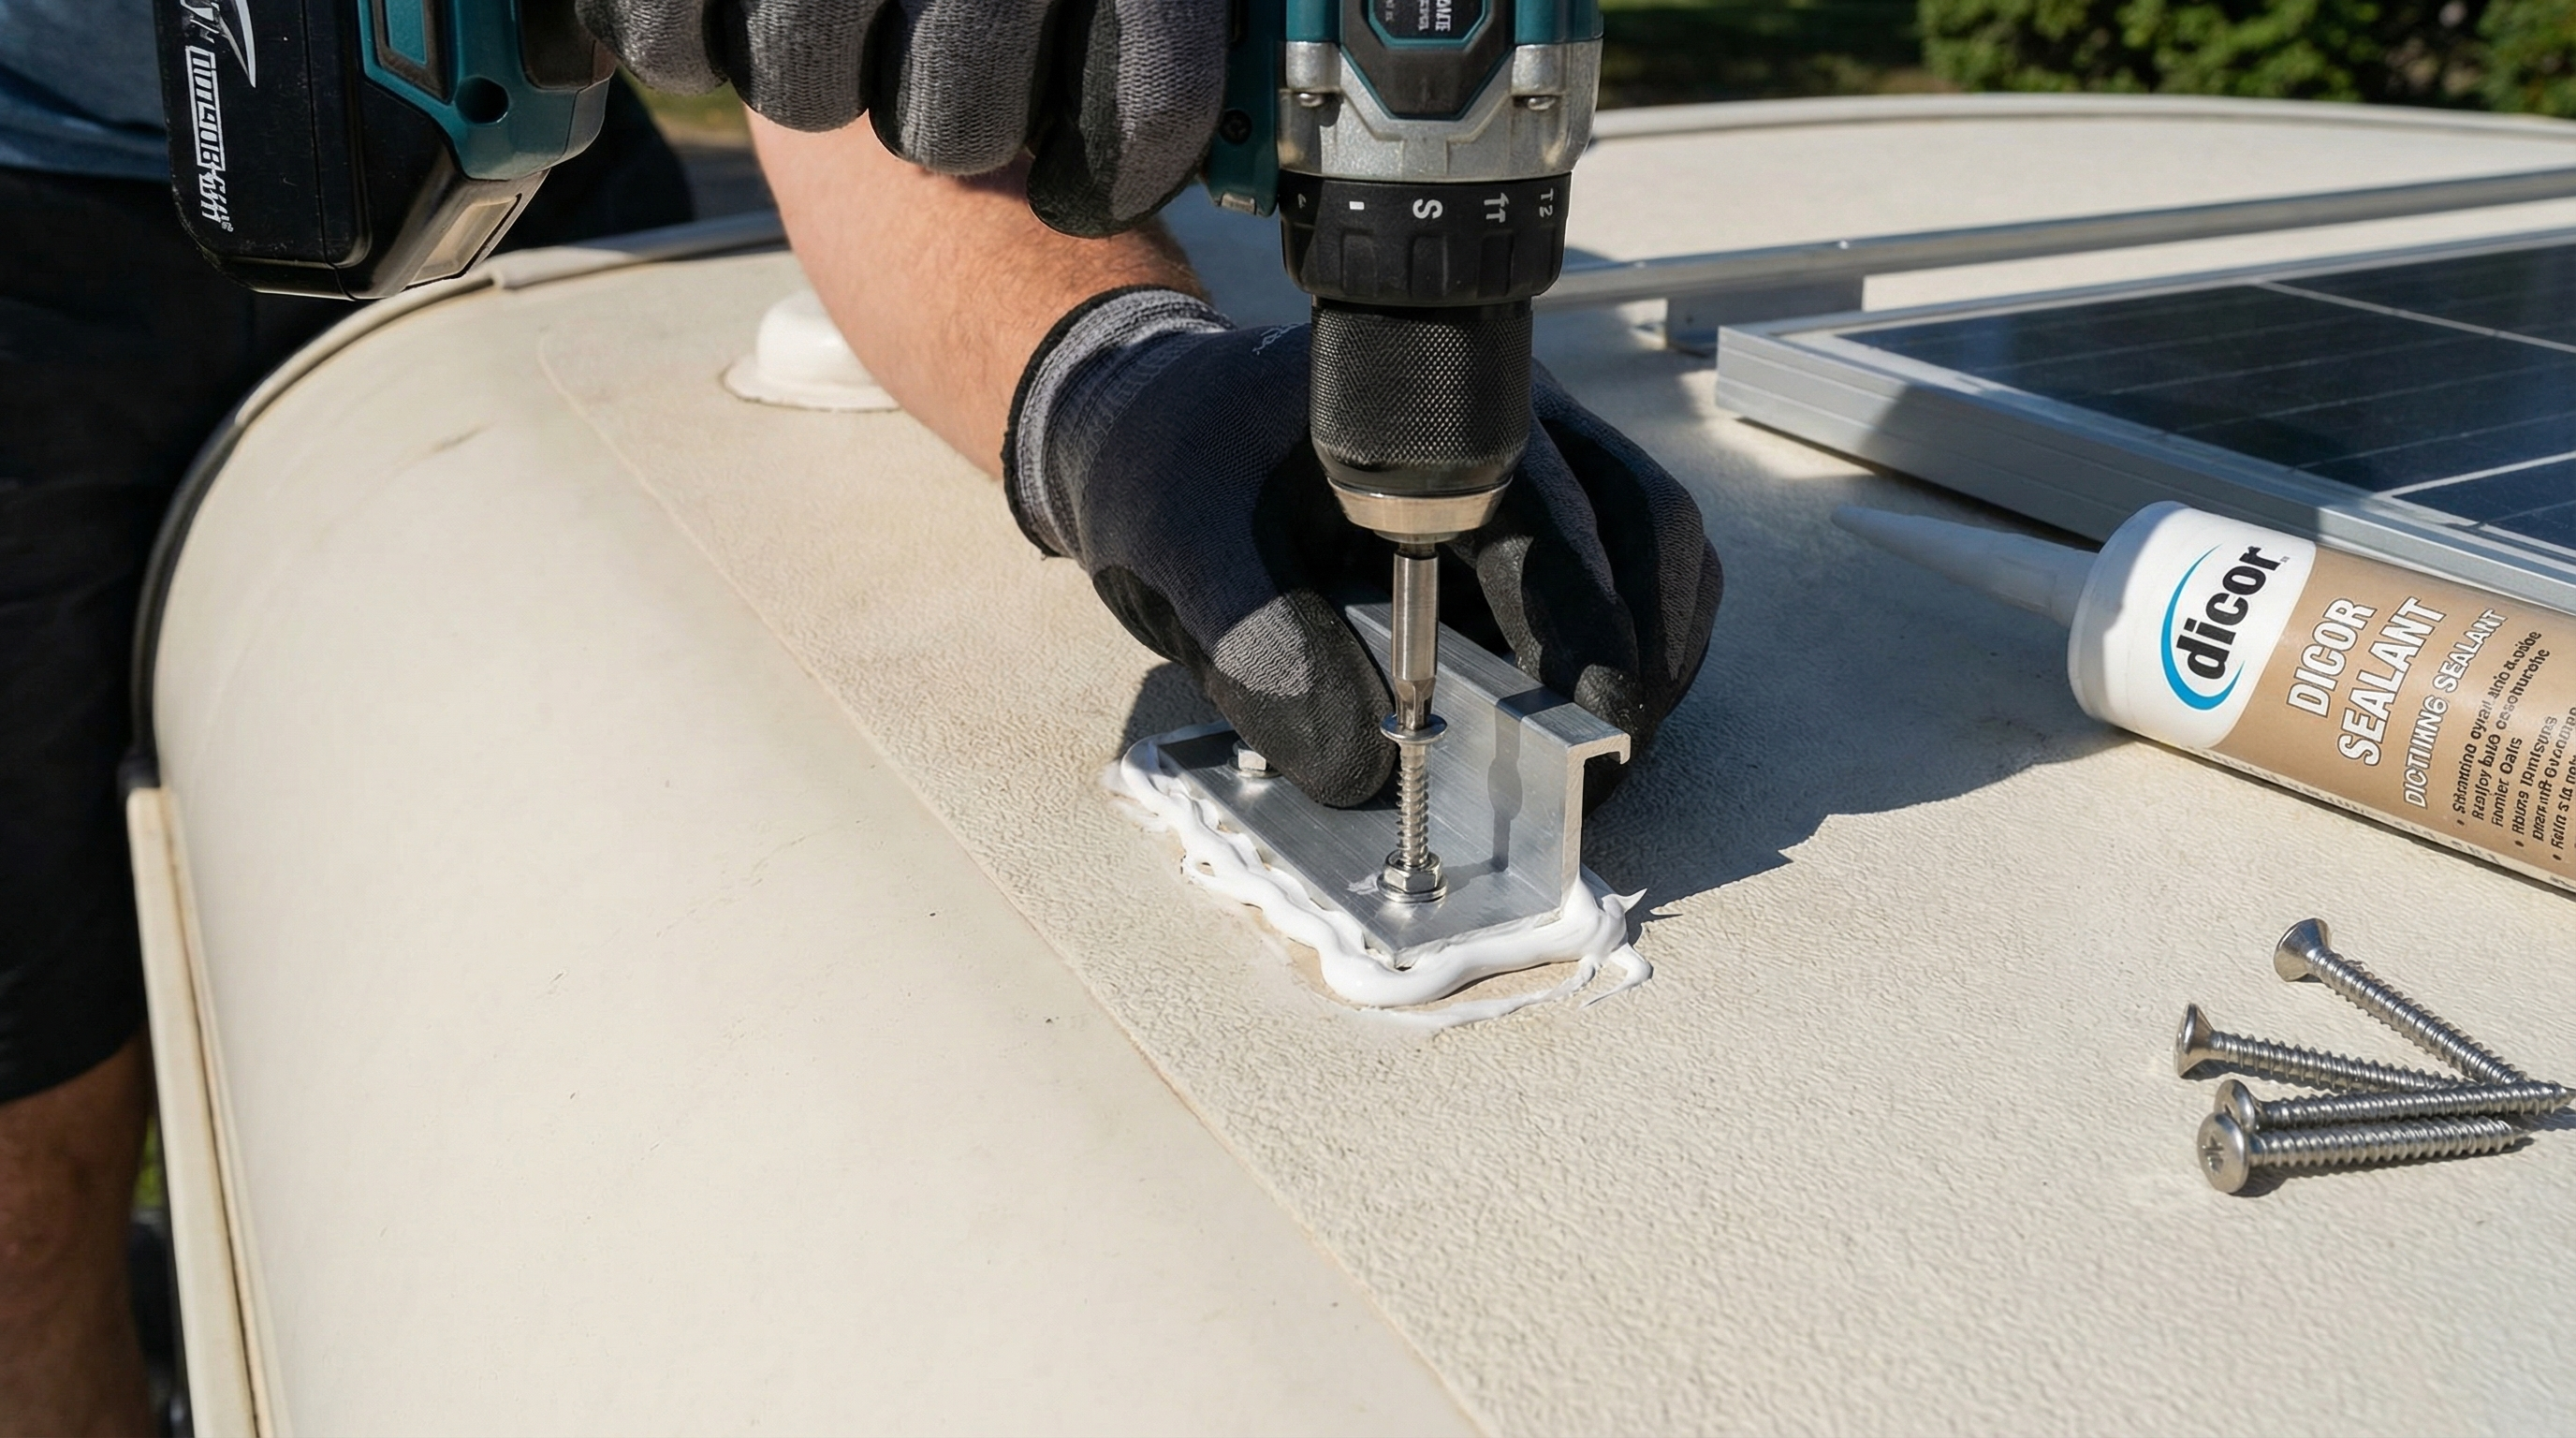
Step 2: Mount the panels (and seal like you mean it)
Use proper mounts, stainless hardware, and a sealant approach that prevents leaks long-term. Every penetration needs to be sealed.
- Clean the mounting area thoroughly.
- Use butyl tape under brackets (common leak-prevention step).
- Fasten mounts securely, then seal over screws and edges.
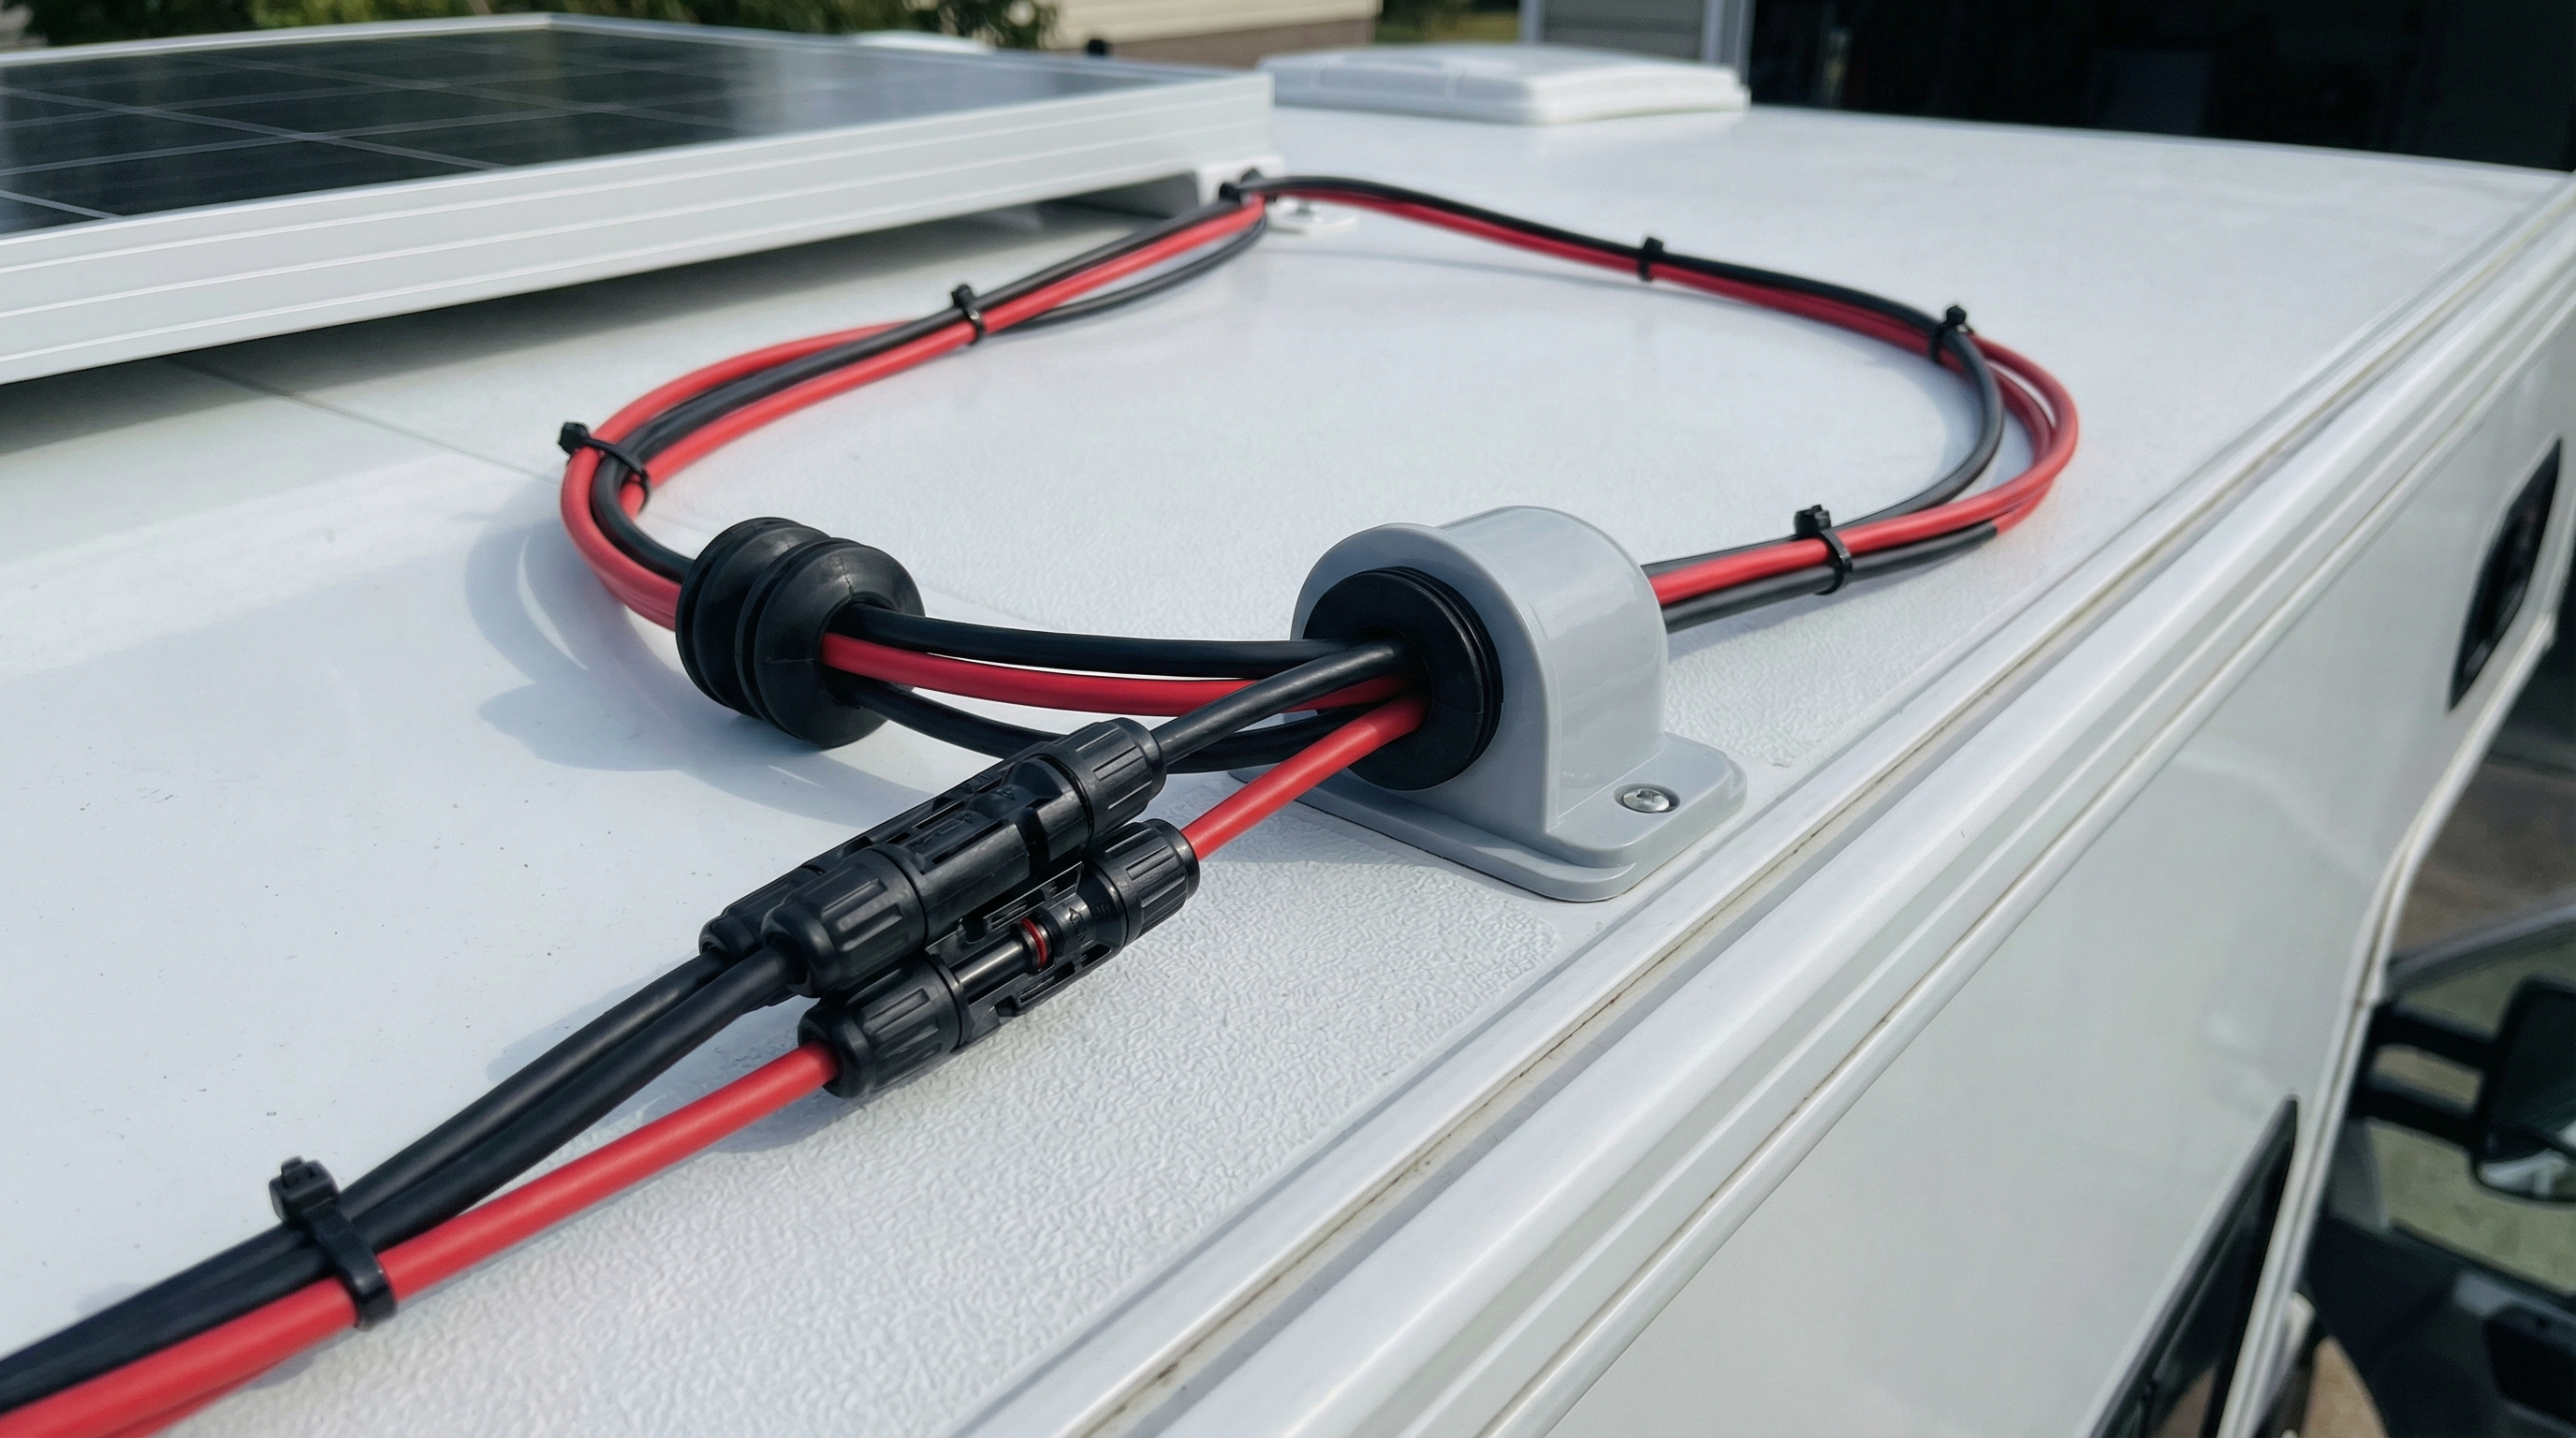
Step 3: Route wiring into the RV
Use a proper cable entry gland or junction box. Don’t run wires loose where vibration can chafe them over time. Label polarity clearly.
Step 4: Install the charge controller (near the batteries)
Place the controller close to the battery bank to reduce voltage drop. Fuse panel input and battery output. Ventilation matters for heat.
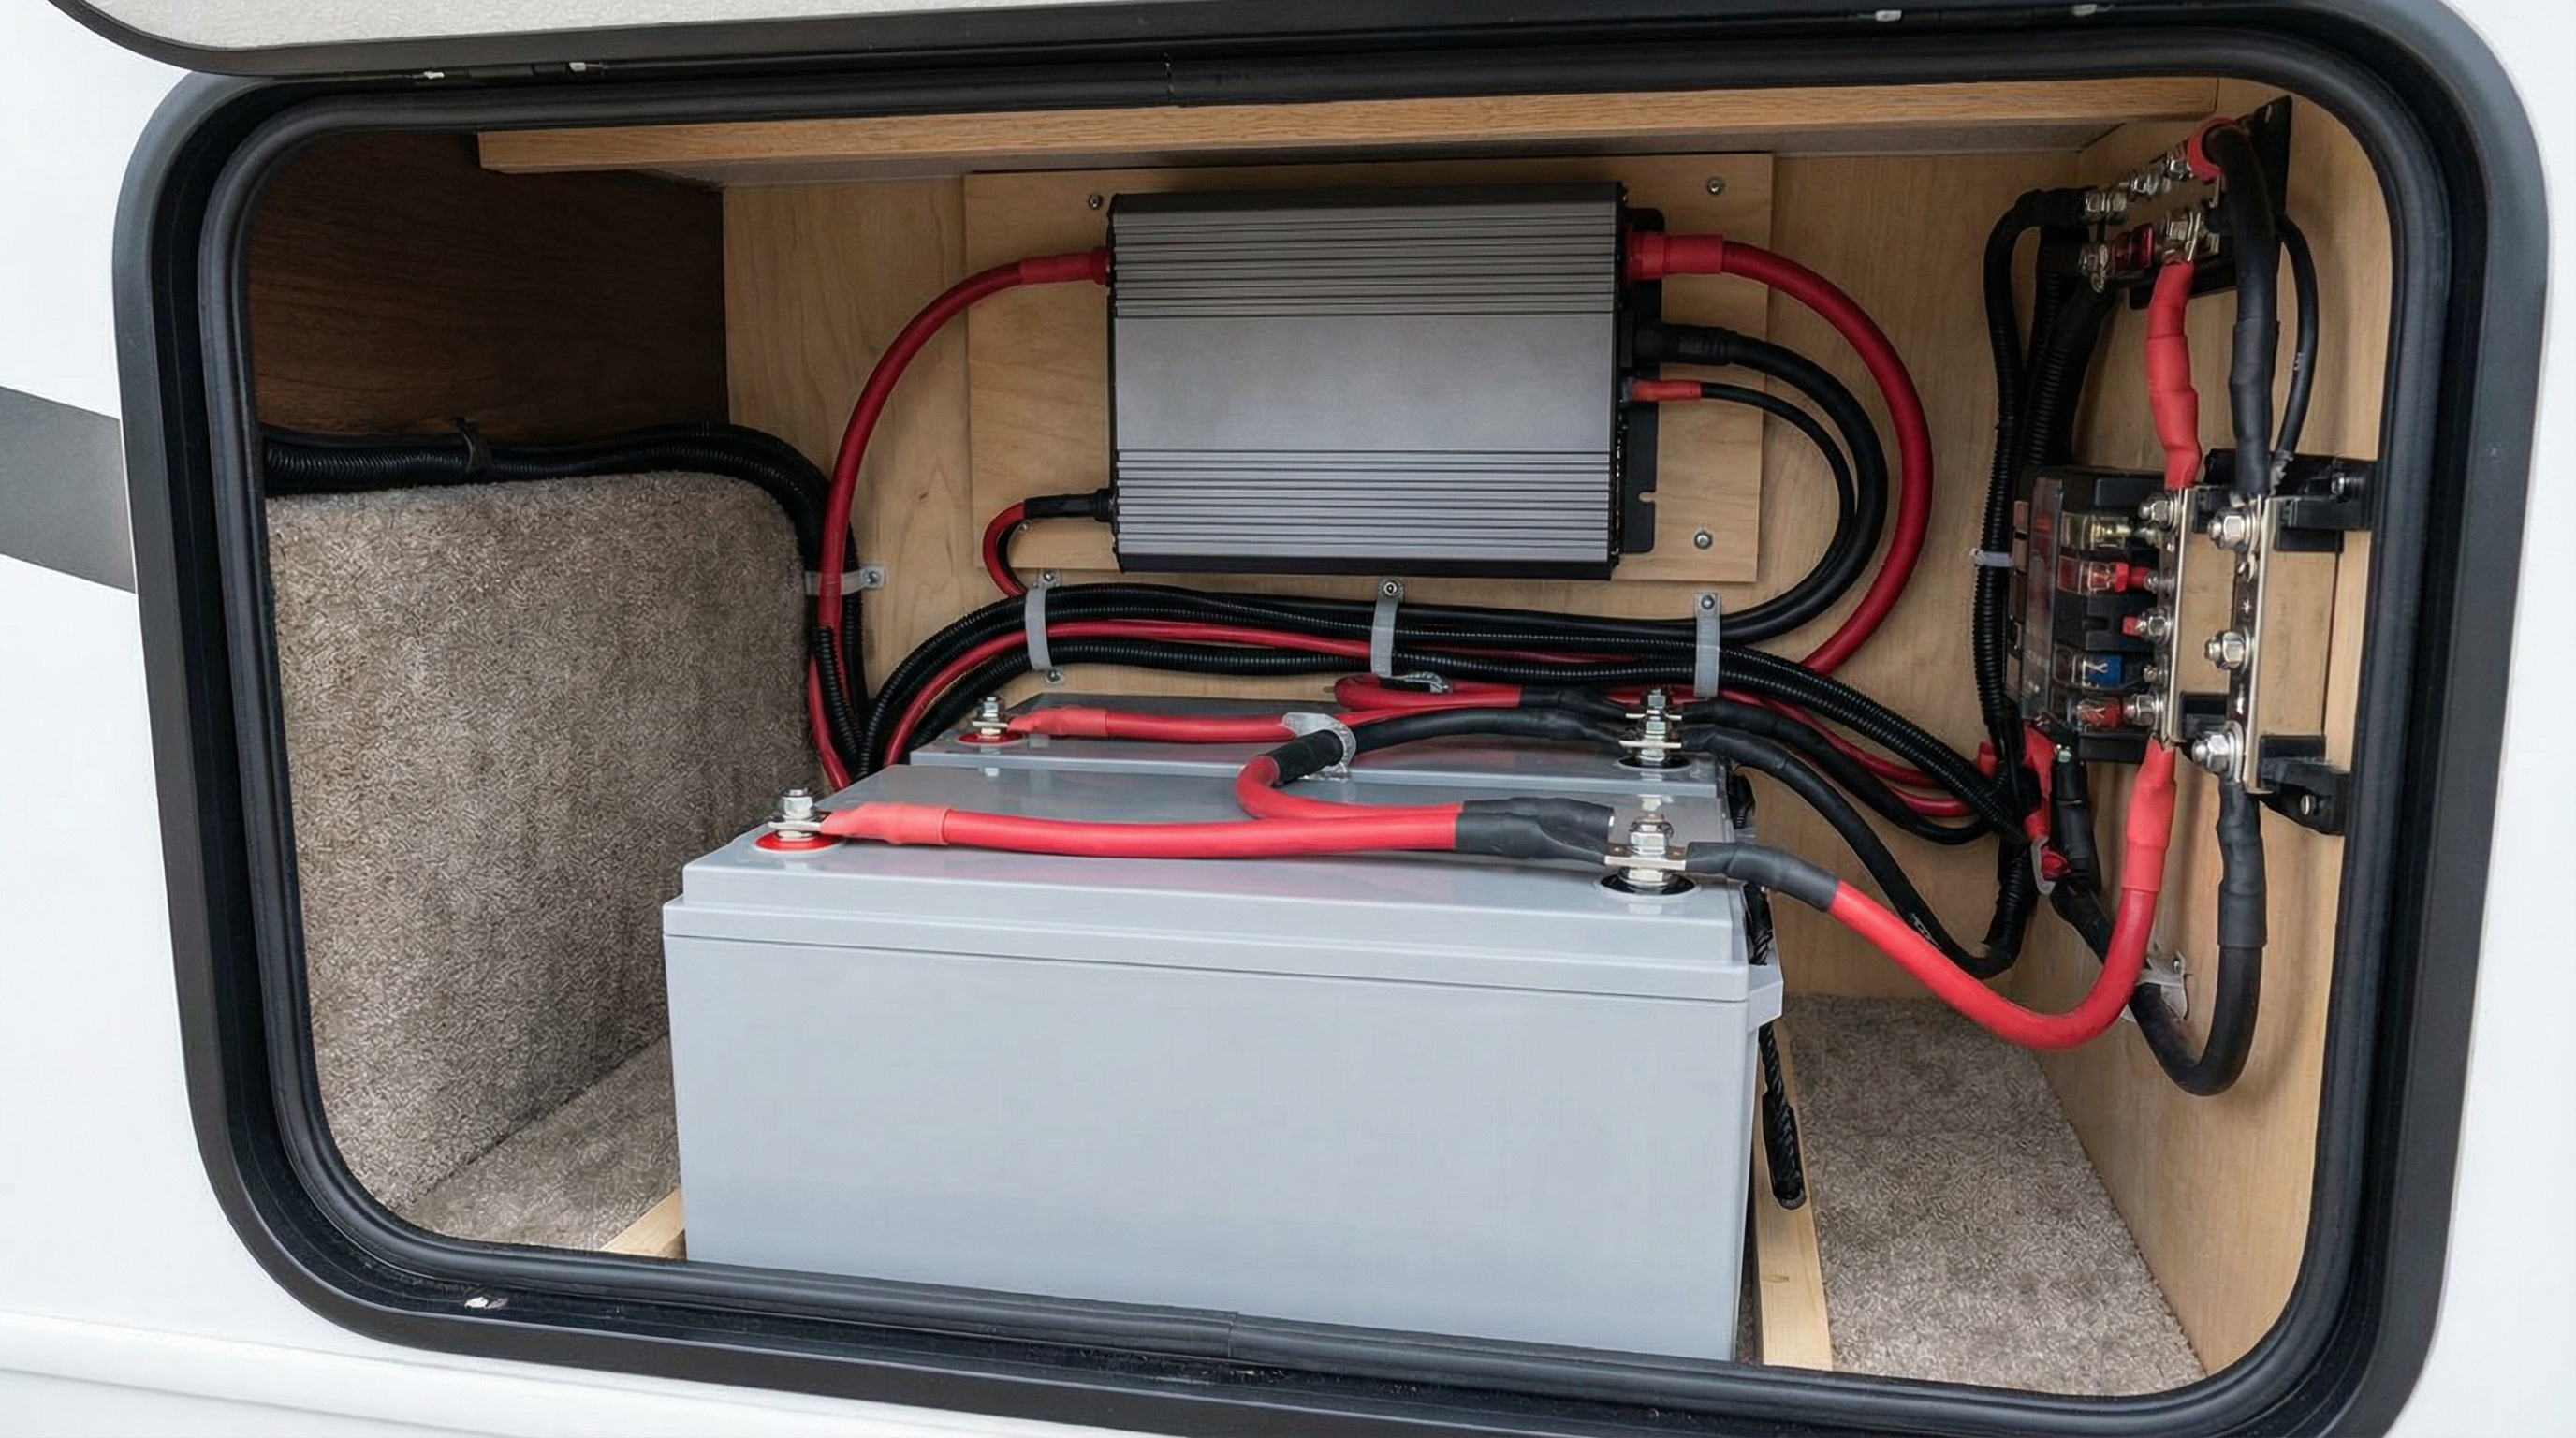
Step 5: Connect batteries and inverter
Use correct cable gauge based on load. Undersized cable can run hot and cause voltage drop. Fuse between major components. Ground your system properly.
If you’re running heavy AC loads (microwave, induction cooktop, A/C), inverter sizing and battery capacity become the whole game. The calculator will show you when you’re in “big system” territory.
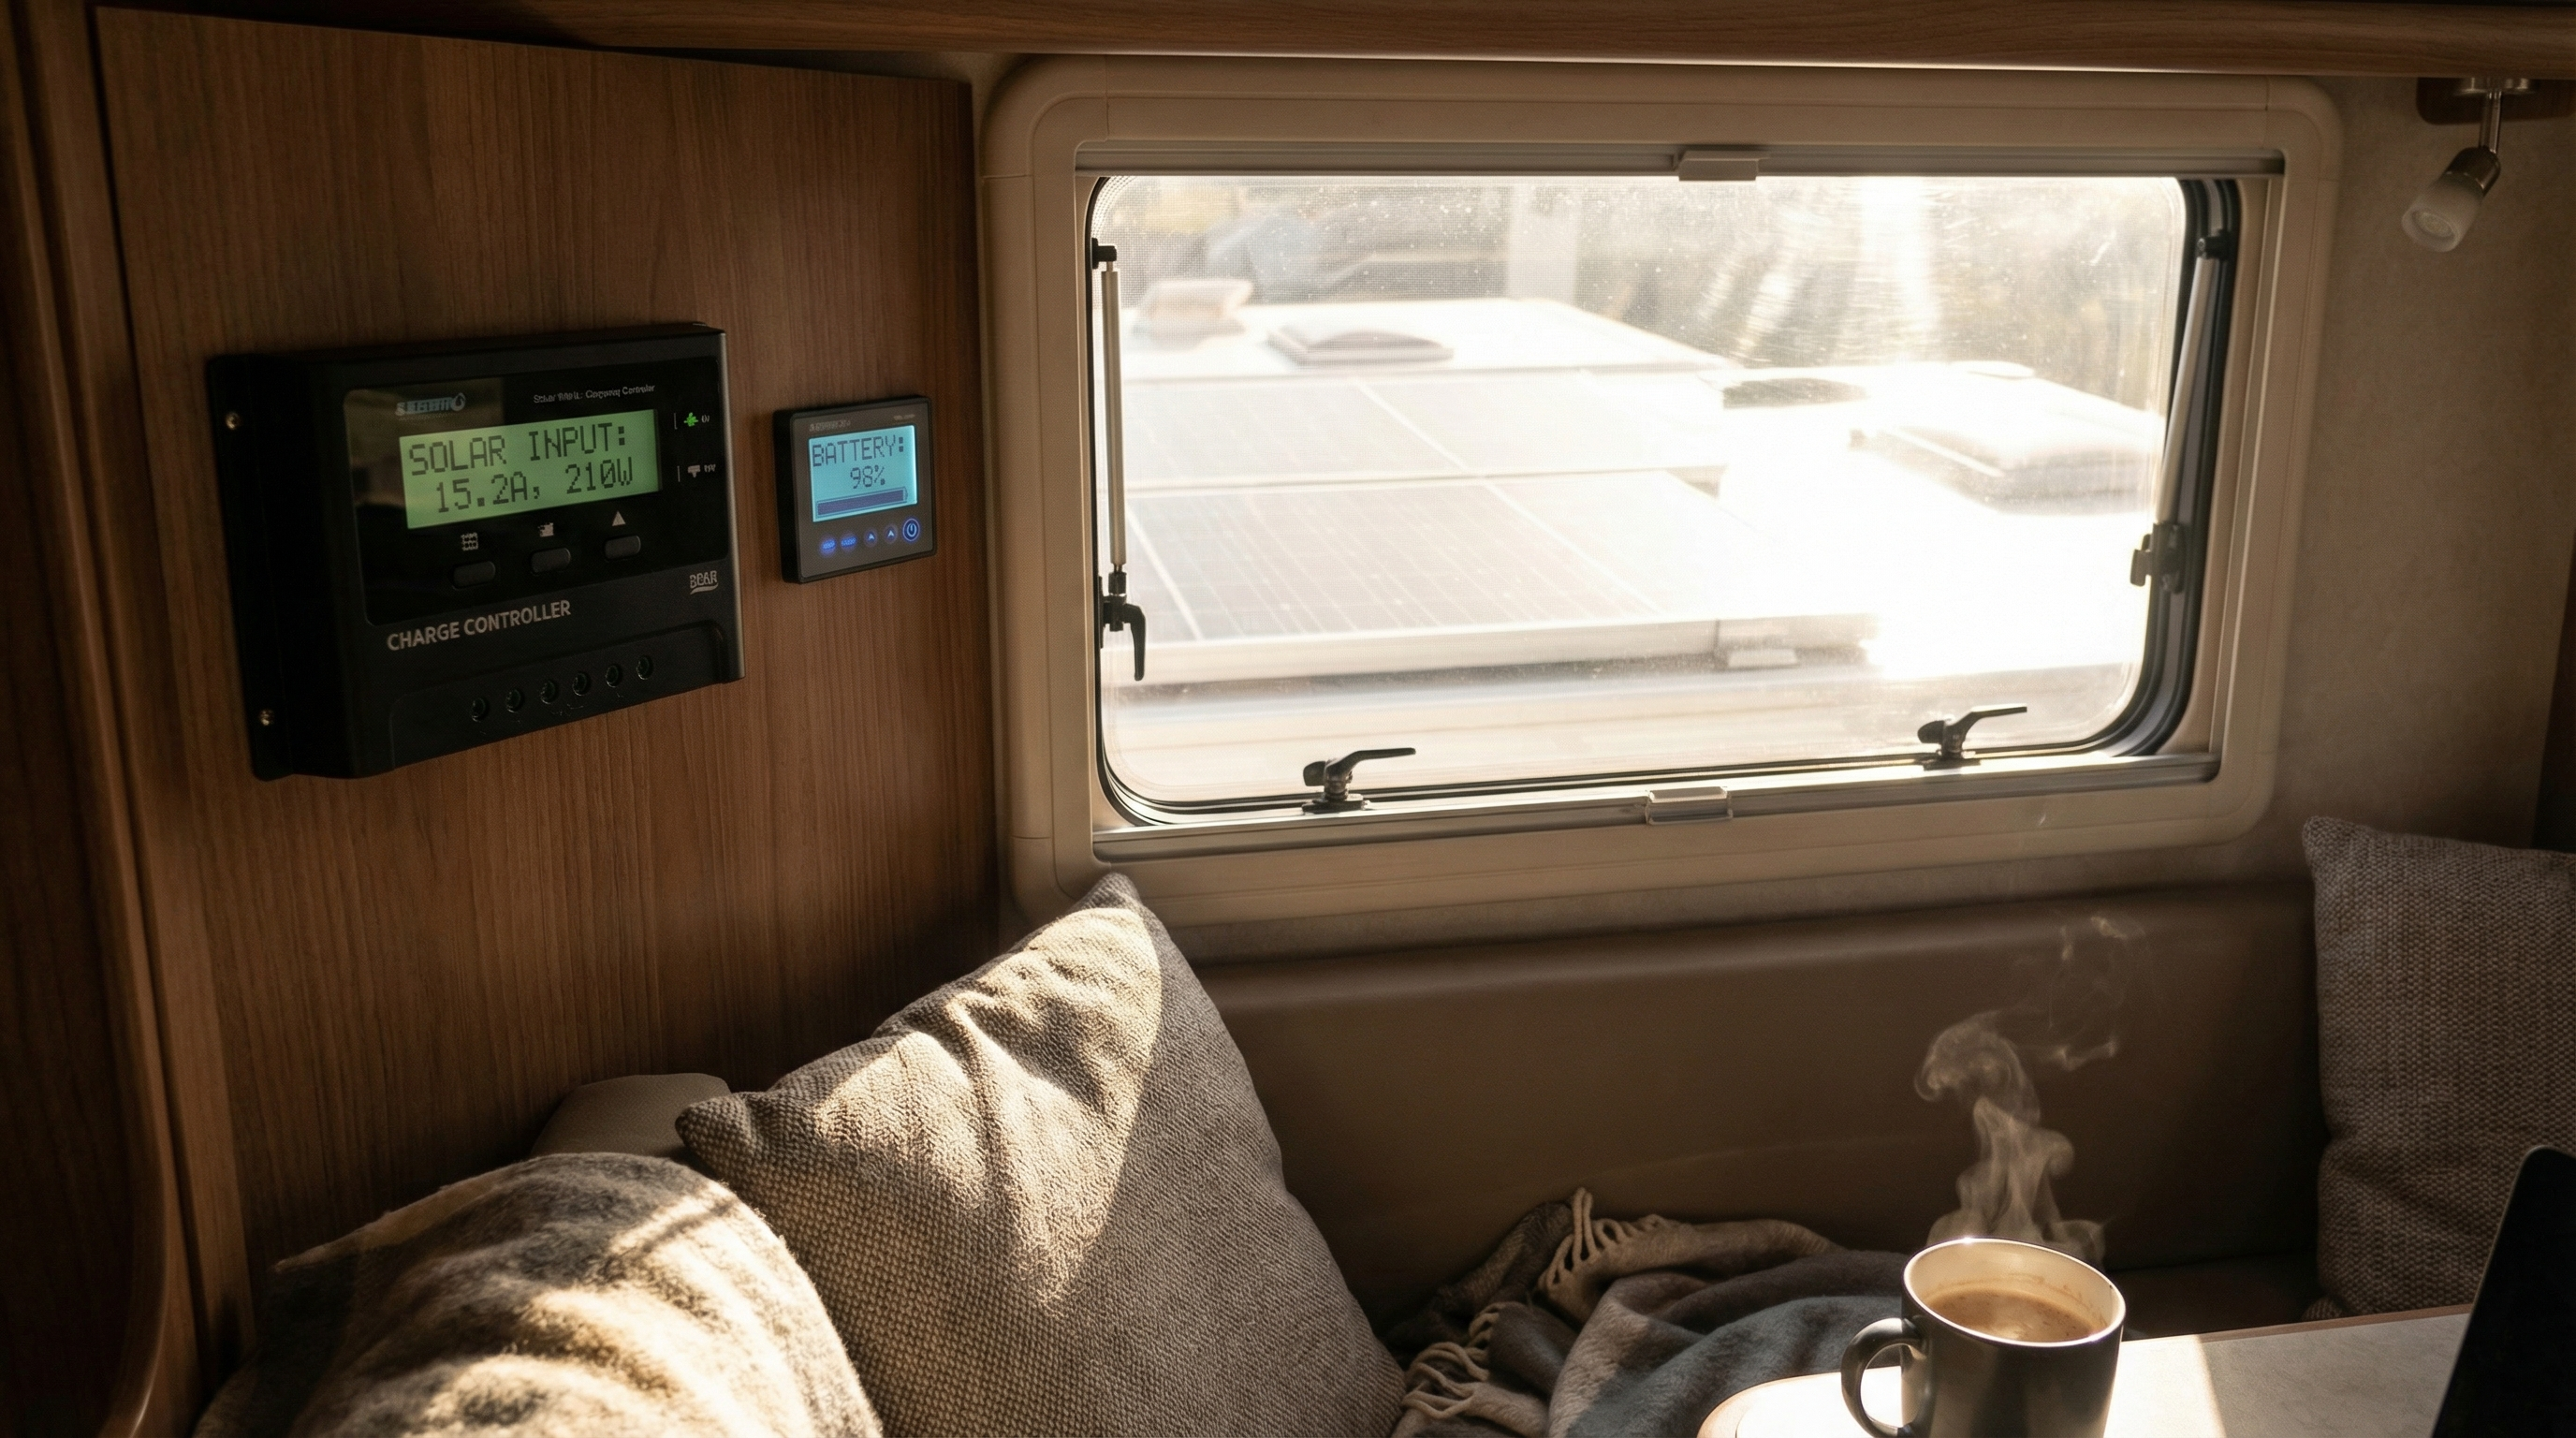
Step 6: Test and power up
Power up the controller first, verify solar input and battery voltage, then test your inverter with a small load. Watch for error codes. Confirm everything stays cool under use.
Bonus Tips That Save You Later
- Label everything: future troubleshooting becomes a 5-minute job instead of a weekend.
- Fuse everything: it’s not overkill, it’s safety.
- Shade is brutal: one shaded panel can drop output more than you’d think.
- Consider a battery monitor: knowing your real usage changes everything.
- Don’t cheap out on wiring: voltage drop and heat are how “small problems” become expensive problems.
Maintaining Your RV Solar System
Most RV solar systems don’t need much maintenance, but ignoring the basics will slowly chip away at performance.
- Clean panels every few months or after dusty travel days.
- Inspect mounts and sealant after rough roads and seasonal temperature swings.
- Check cable runs for abrasion or loose fasteners.
- Monitor battery health so you don’t accidentally deep-discharge for weeks.
If output suddenly drops, the first suspects are shade, dirt, loose connections, or a battery issue. The Solar Hub has more troubleshooting support: Solar Power Hub.
Final Thoughts: Is RV Solar Right for You?
If you love boondocking, hate generator noise, or you just want your RV to feel more self-sufficient, solar is one of the best upgrades you can make. The key is getting the system sized properly so it matches what you actually do on the road.
Run your numbers first, then shop with confidence: Solar Power Hub + RV Solar Calculator.
FAQs
How many watts of solar do I need for an RV?
It depends on your daily watt-hours. Many weekend setups land around 200–400W. Full-time or frequent boondocking often moves toward 600–1000W. The fastest way to know is to calculate your real daily usage using the Solar Hub calculator.
Is RV solar hard to install?
The mounting portion is usually straightforward. The electrical side requires more care: correct wiring, fusing, and safe routing. If DC wiring makes you uneasy, get help for that part.
Is MPPT worth it over PWM?
In most RV builds, yes. MPPT is more efficient and performs better when panel voltage is higher or conditions are changing. PWM can work for small basic setups, but MPPT usually wins in real-world RV use.
Can I run my RV air conditioner on solar?
Sometimes, yes. But it requires a larger battery bank, properly sized inverter, and enough solar input to recover daily use. That’s why “runs A/C” is a system build, not a starter kit.
What’s the biggest mistake RVers make with solar?
Buying gear first and calculating usage later. The second biggest mistake is skipping fuses and using undersized wiring. Plan first, protect everything, then install.


.jpg/:/cr=t:5.56%25,l:0%25,w:100%25,h:88.89%25/rs=w:1240,h:620,cg:true)


Leave a Reply