
Affiliate Disclosure: I earn commissions if you shop through the links below at no additional cost to you.
Last Updated on February 2, 2026 by Jeremy
Disclosure: This page may contain affiliate links. If you purchase through them, I may earn a commission at no extra cost to you.
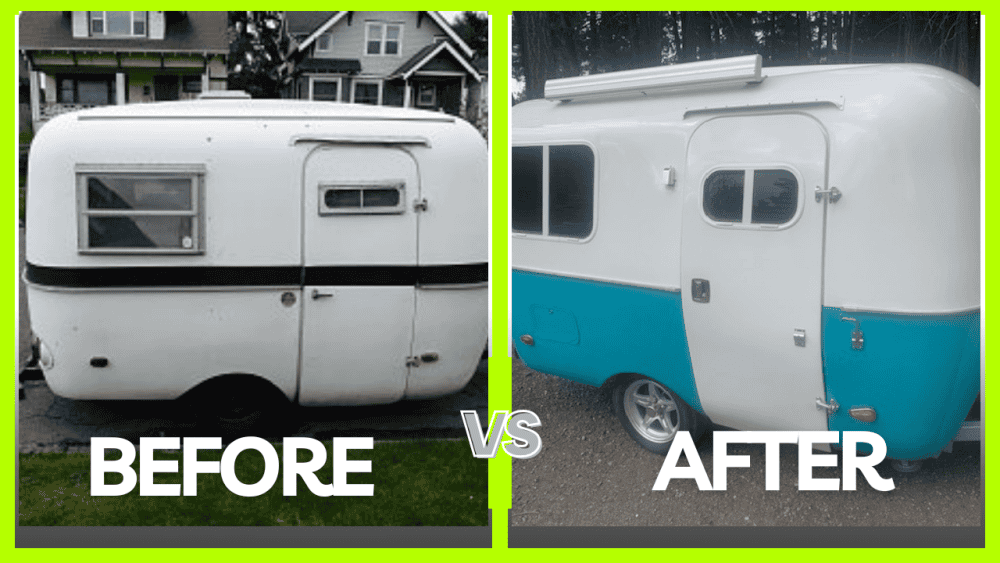
There are two kinds of people in campgrounds. The ones who walk past an old trailer and say, “That’s a lot of work.” And the ones who stop, squint, and say, “That could be something.”
Shannon is the second kind. I met her at a campground at Kentucky Alleyne, and she told me the story of a vintage 1975 Boler that went from rough to ridiculously clean. Not “someone wrote a check” clean. DIY clean. The kind that only happens when a person keeps showing up for the next step, even when the previous step was a mess.

Introduction
Taking a tired old bumper pull and turning it into a cozy, self-contained trailer is one of those projects that looks impossible from the outside. Especially when the starting point is “questionable Craigslist listing.”
What makes Shannon’s restoration worth sharing is that it wasn’t a quick flip. It was a long, methodical rebuild that kept the trailer’s soul, but still upgraded the parts that matter. The photos below show the progress in a way words never can.
If you want Shannon’s full step-by-step thread with every detail and photo, it’s here: Shannon’s full restoration project (FiberglassRV) .
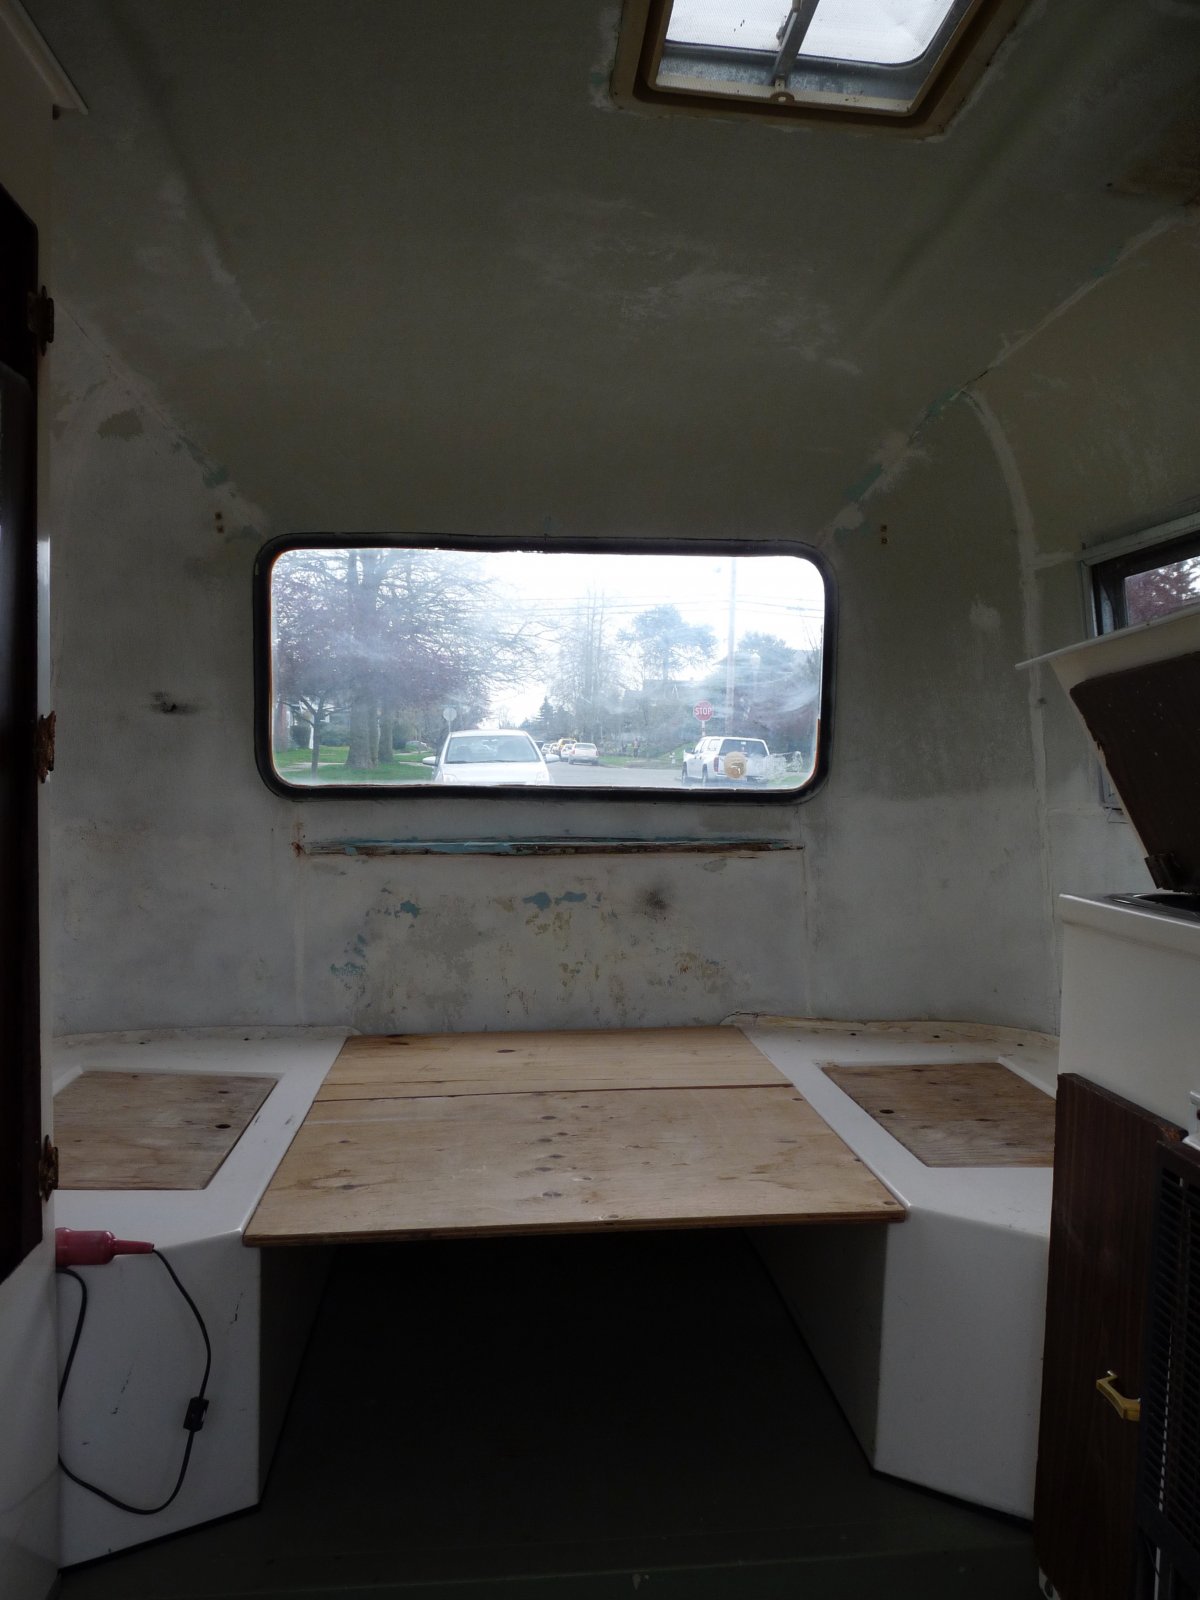
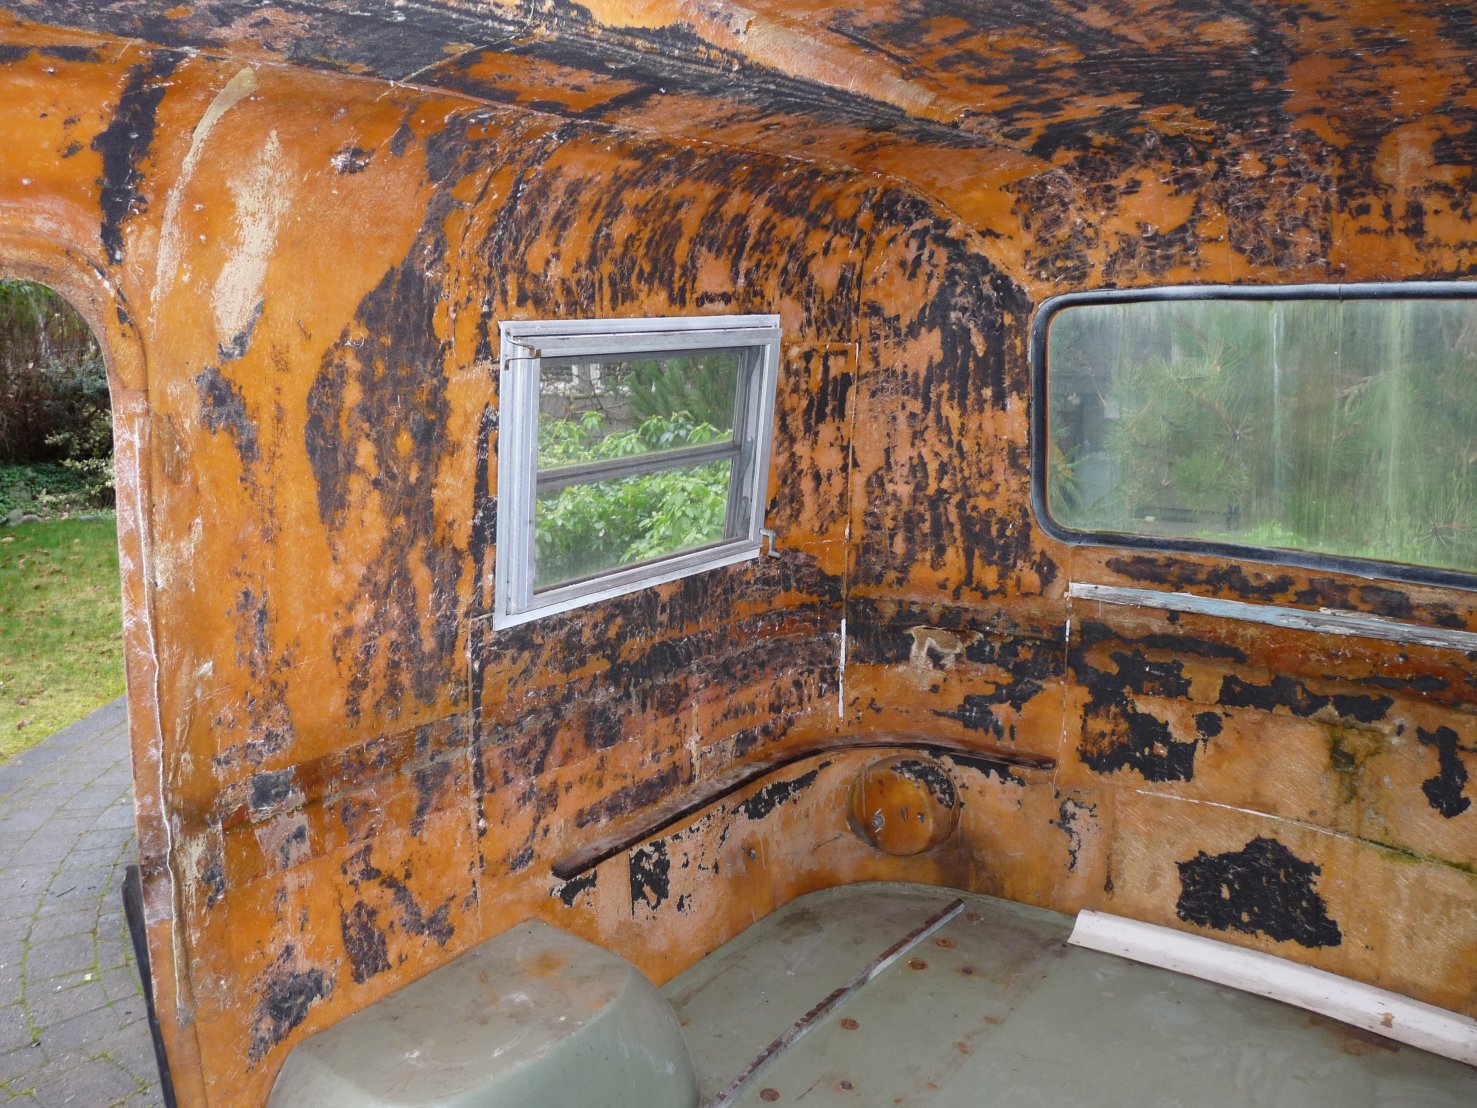
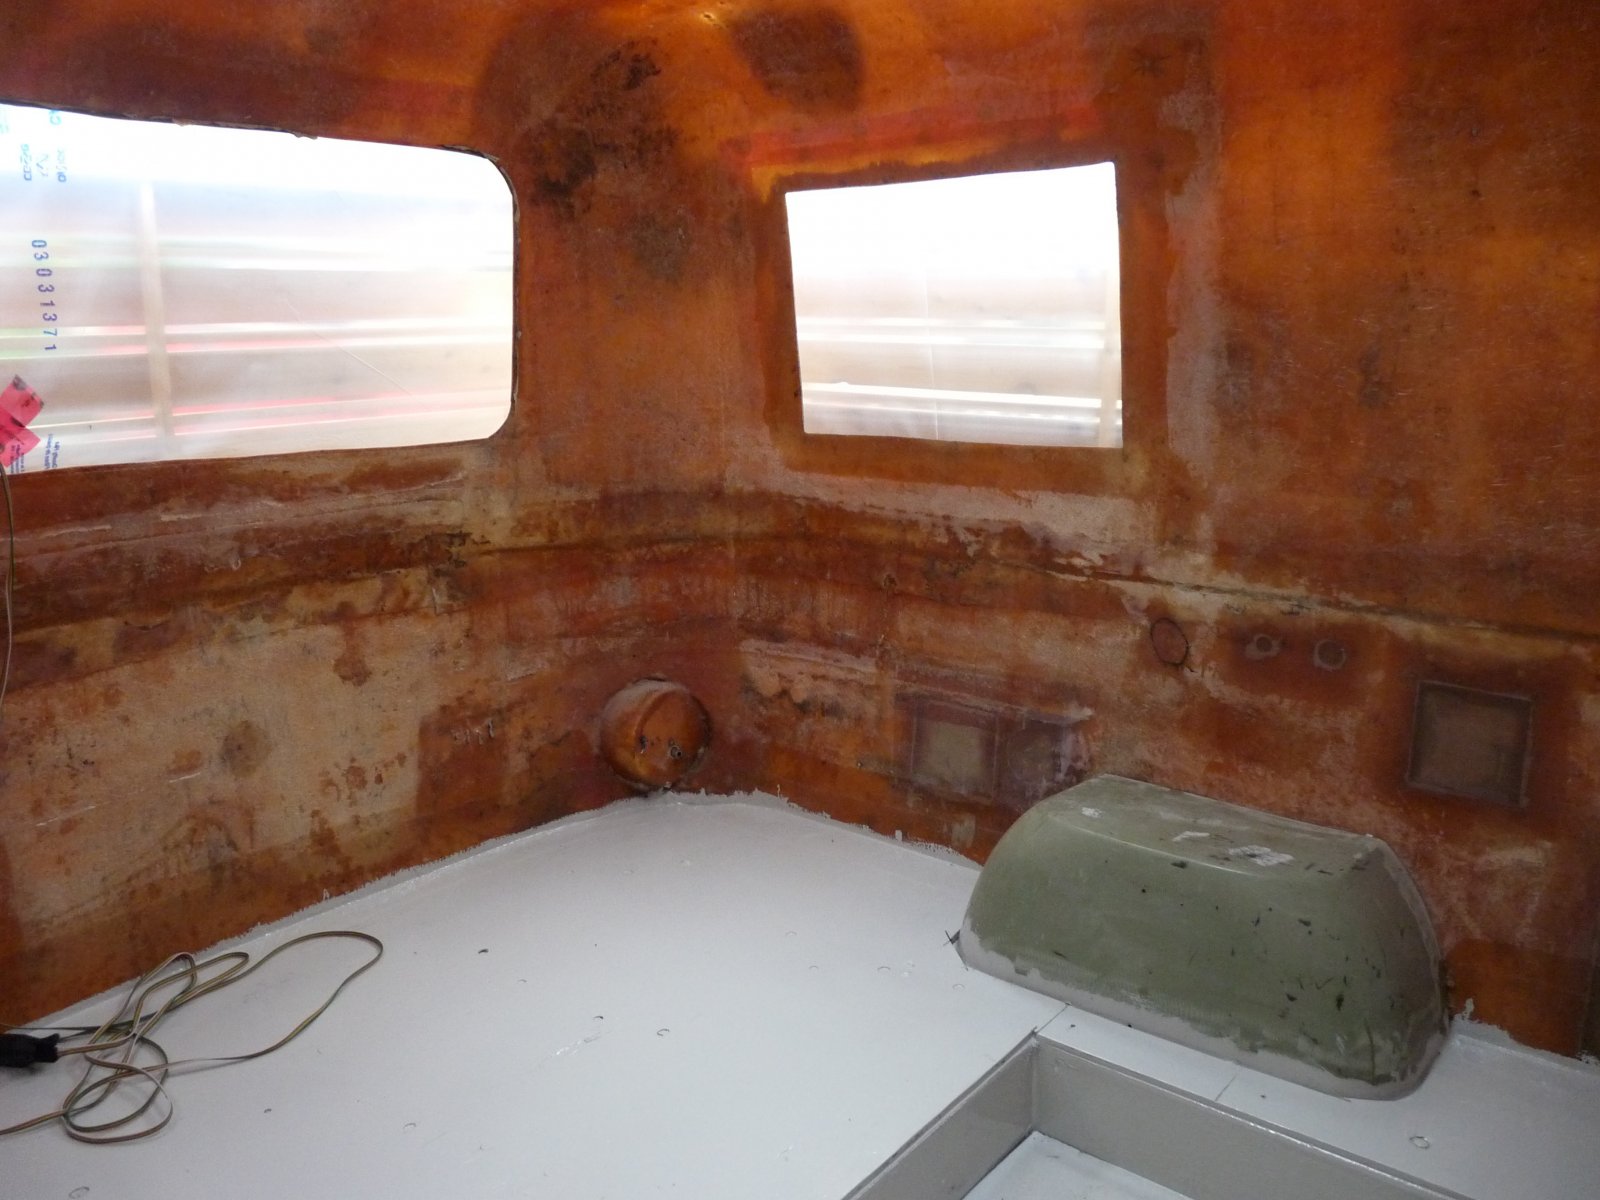
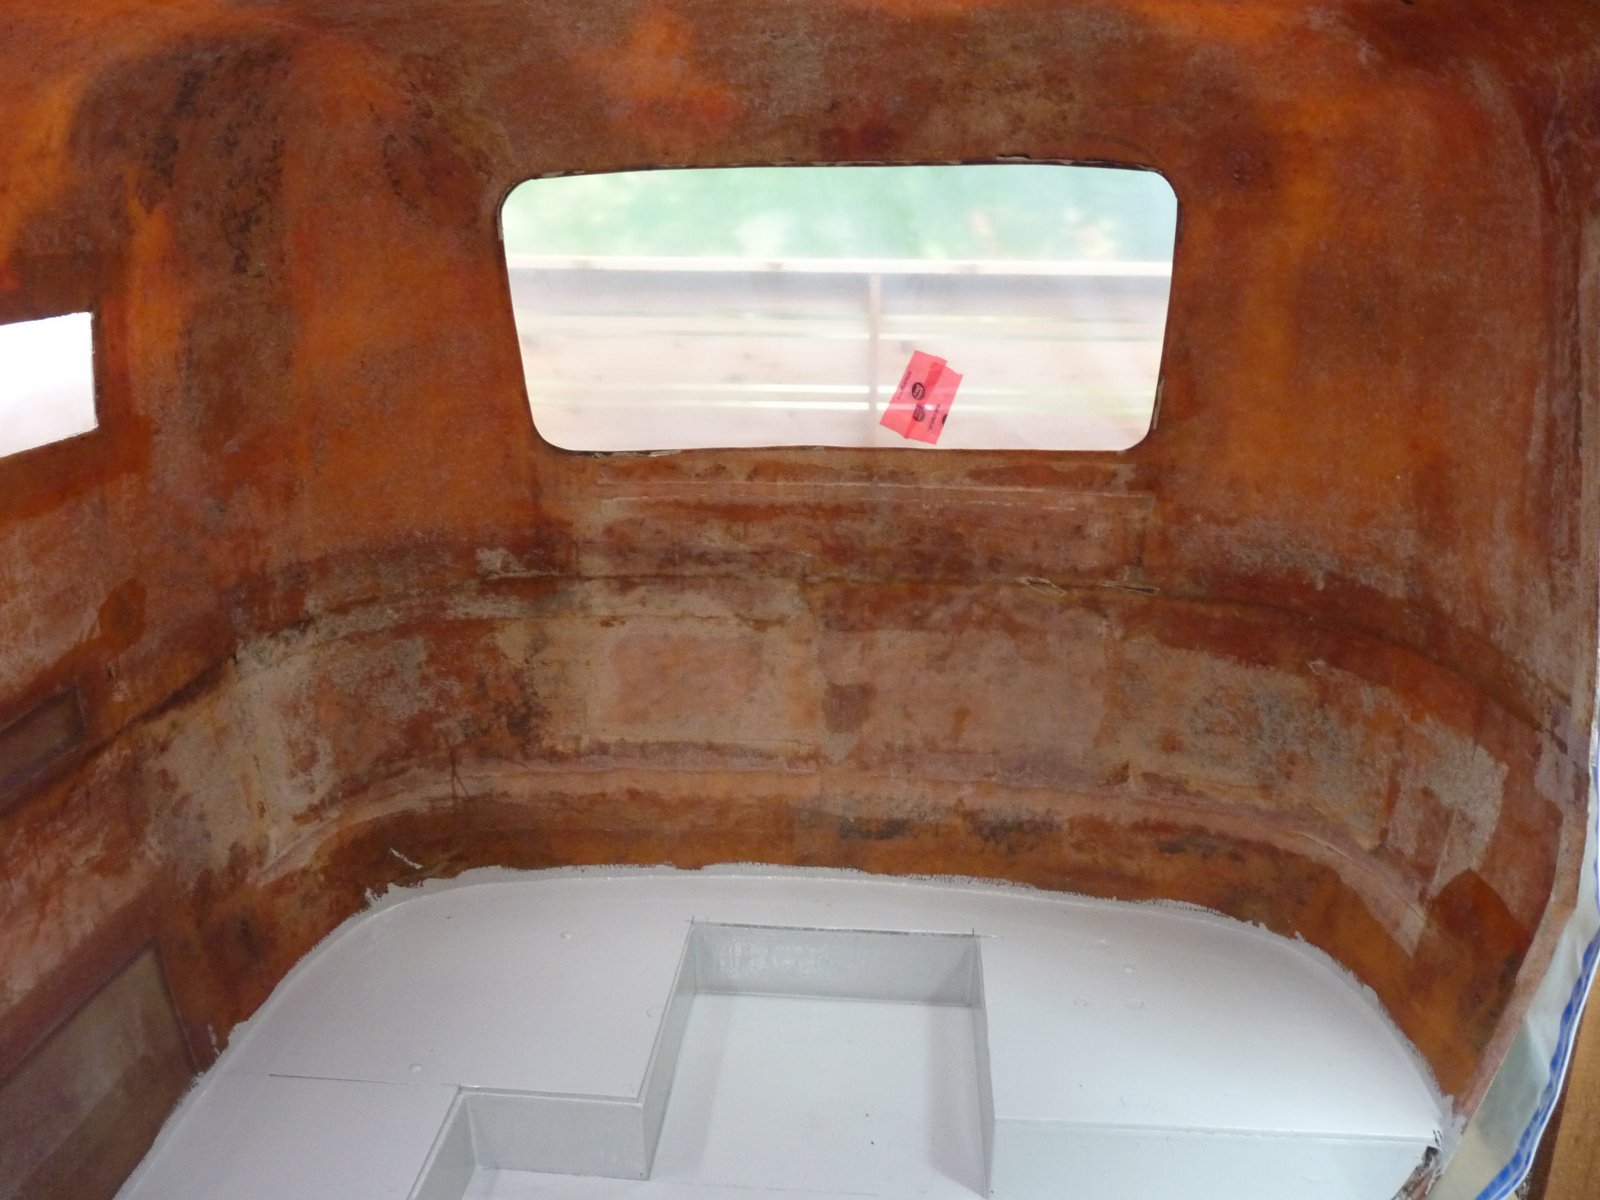
Original interior. The “it’ll be fine” phase, before you start pulling things apart and finding surprises.
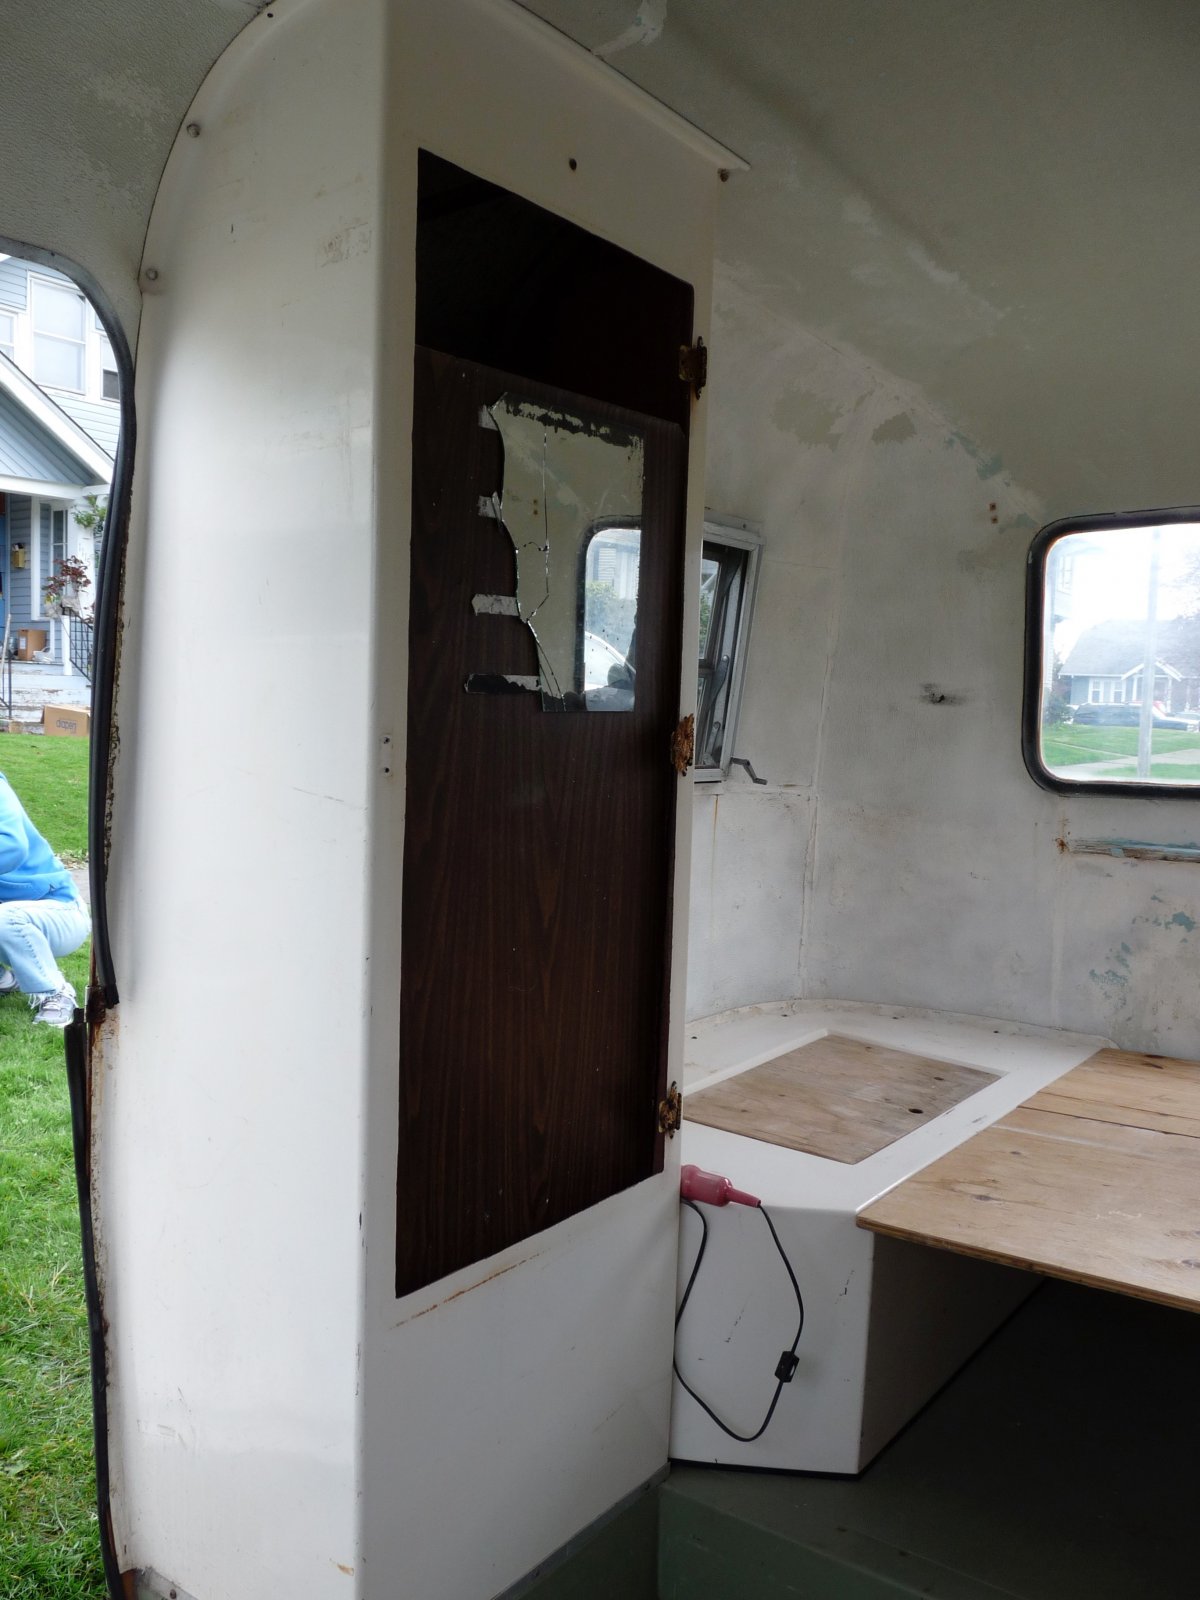
Another interior angle. These reference photos end up being gold later when you’re rebuilding.
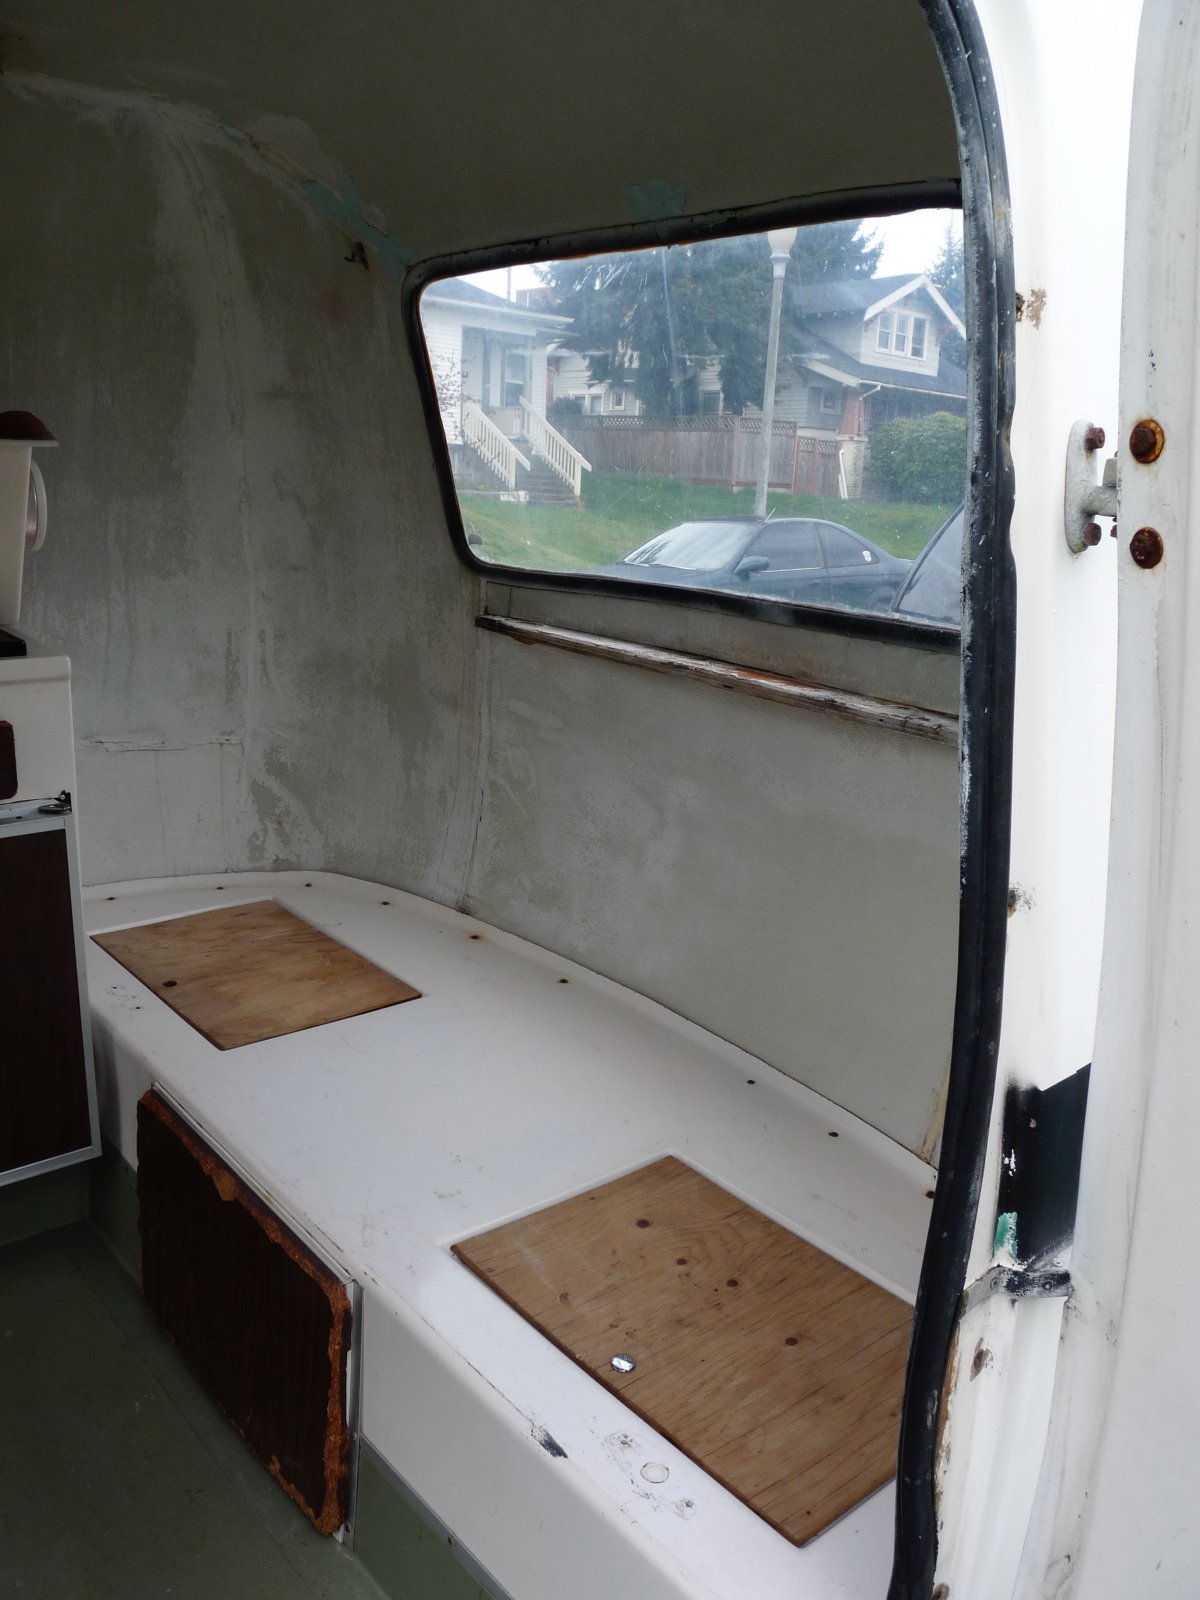
Old materials, old layout, old everything. The starting point matters, because it explains every decision after.
More interior detail. This is where most people either commit, or walk away slowly.
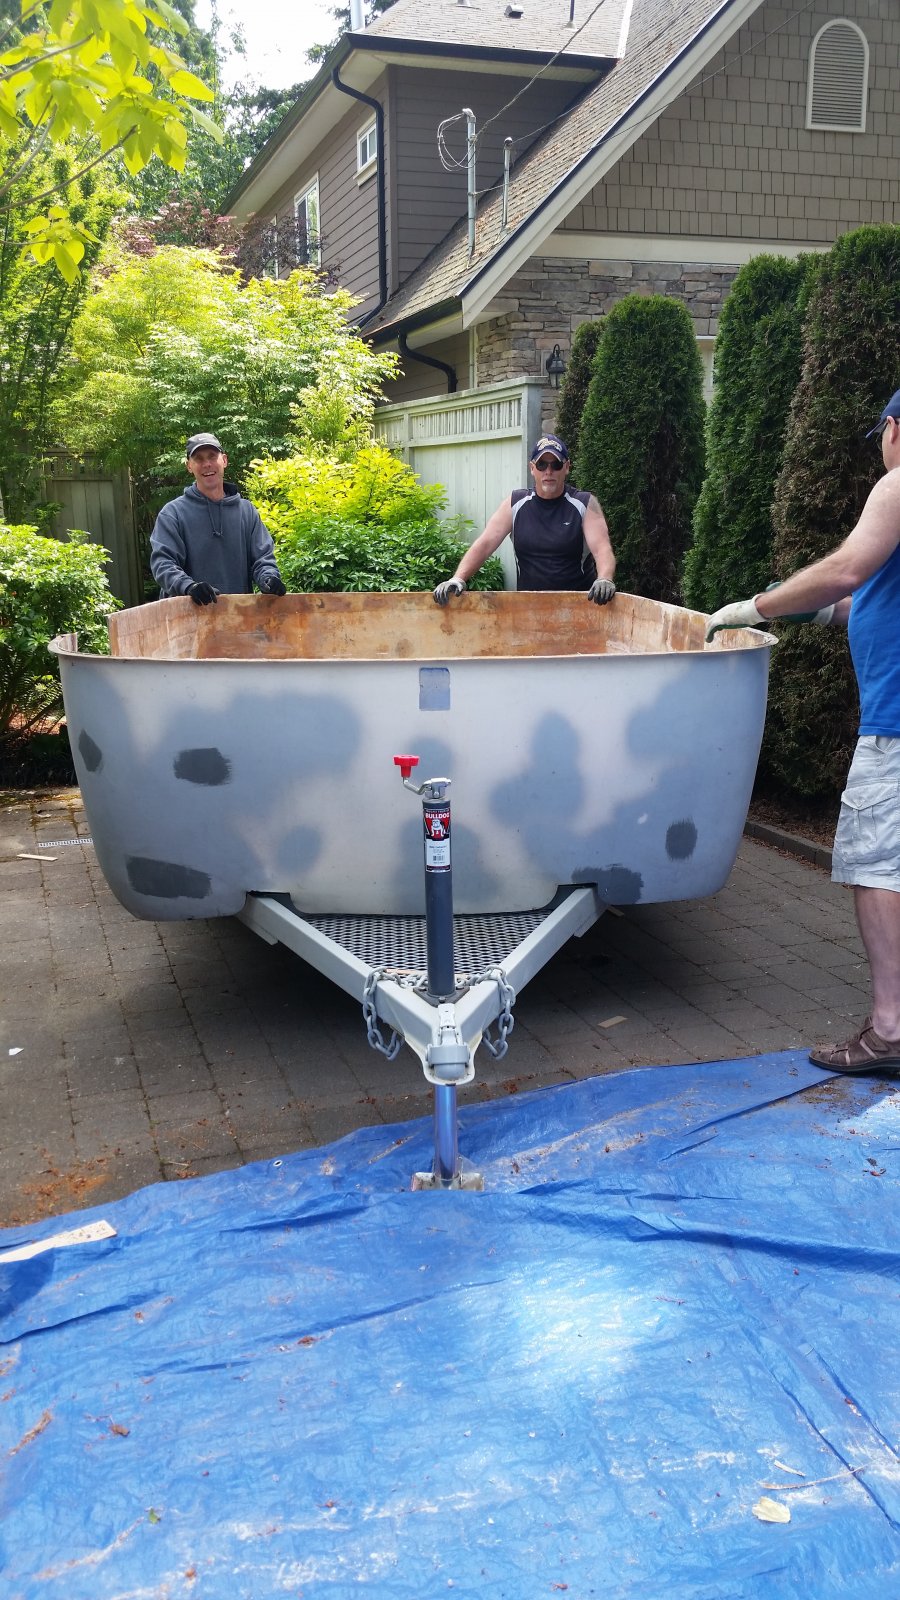
Original exterior. You can still see the potential, but it needs real work to get there.
Another exterior view. This is the phase where people say “just sand it and paint it.” Sure. In theory.
Exterior details tell you what you’re dealing with. Windows, seals, trim, and all the areas water loves.
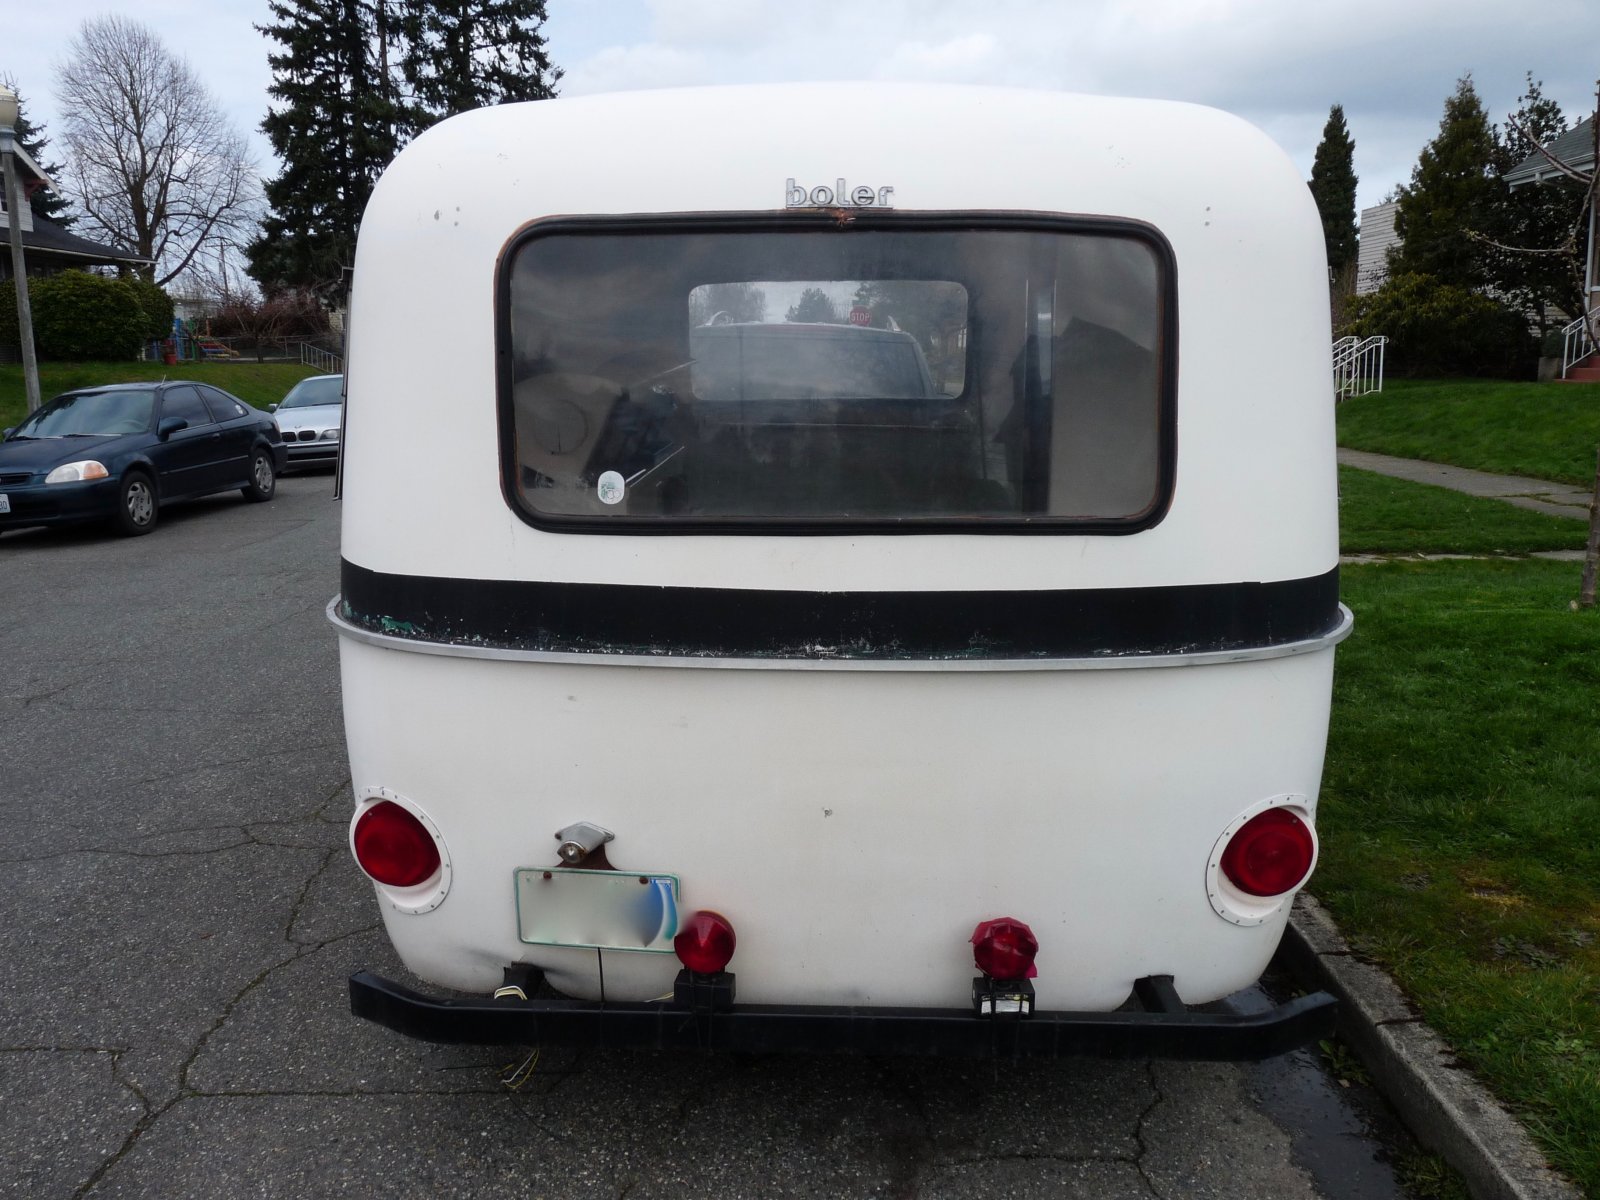
The “before” shot you’ll be proud of later, once the trailer stops looking tired.

Stripped interior. The messy middle. Necessary, but nobody posts this part on social media.
Another stripped angle. This is where you discover what’s solid and what needs rebuilding.
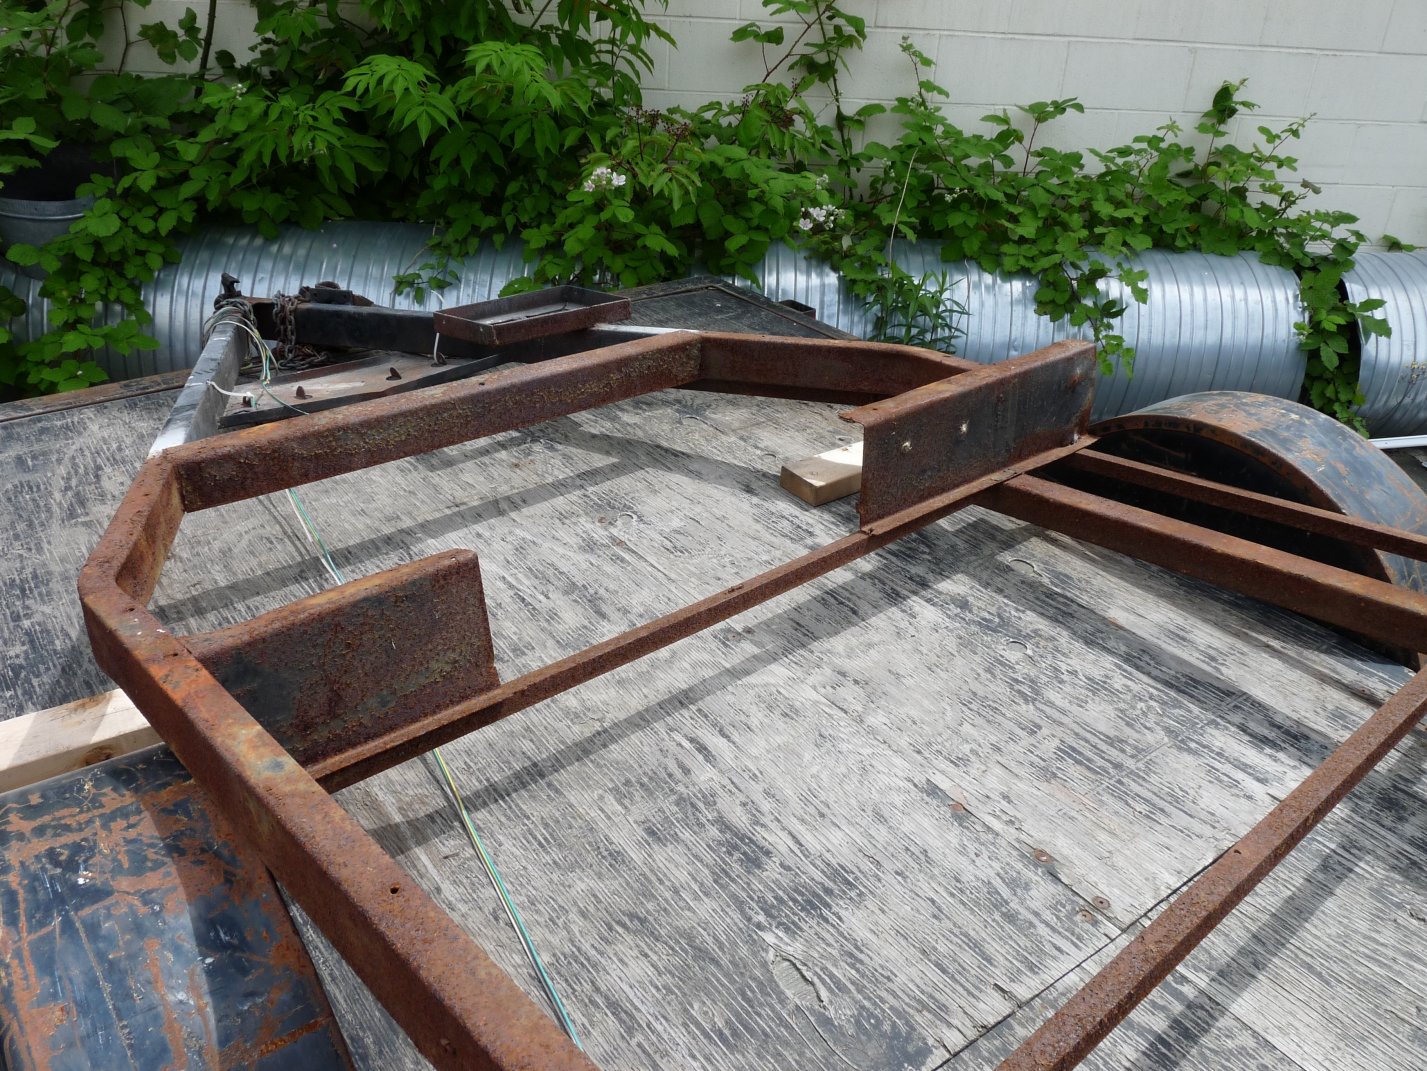
Original frame. If the frame is compromised, nothing else matters until it’s right.
More frame detail. This is where “vintage charm” stops and “safety” starts.
Shell repaired and plywood floor going in. This is when it starts to feel real again.
More floor progress. It’s not glamorous, but it’s the foundation for everything inside.

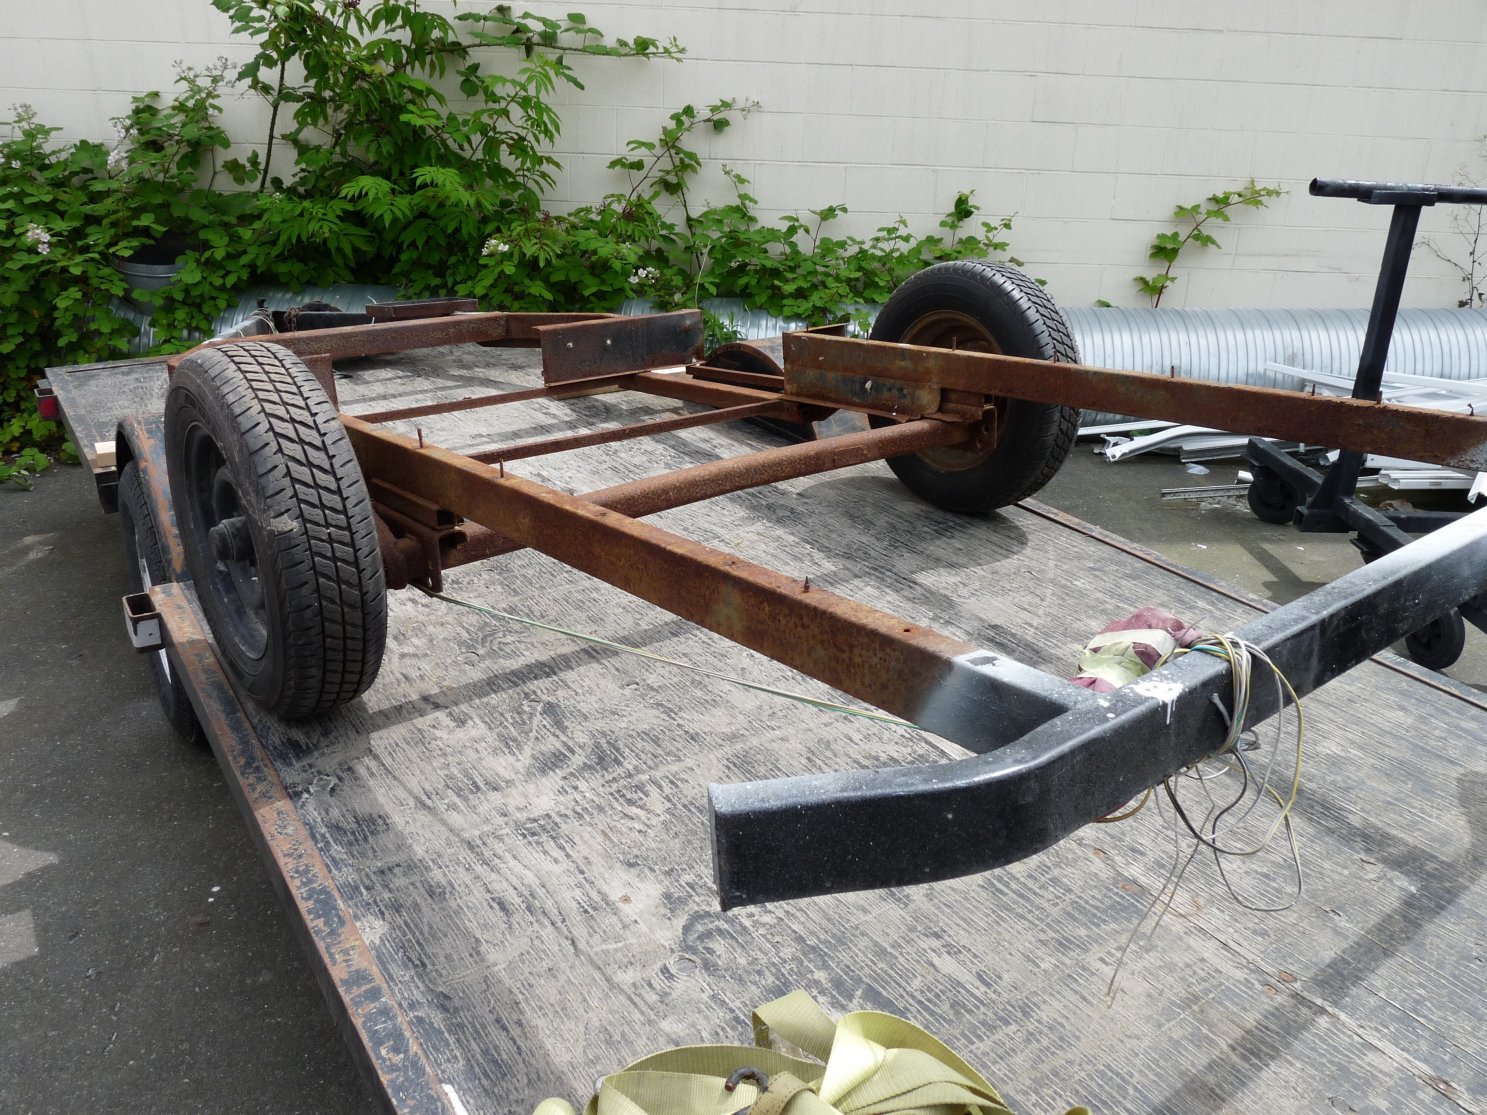
Frame repaired and updated. Now the trailer can actually be trusted on the road.
Piecing it back together. The point where you stop feeling like you ruined it.
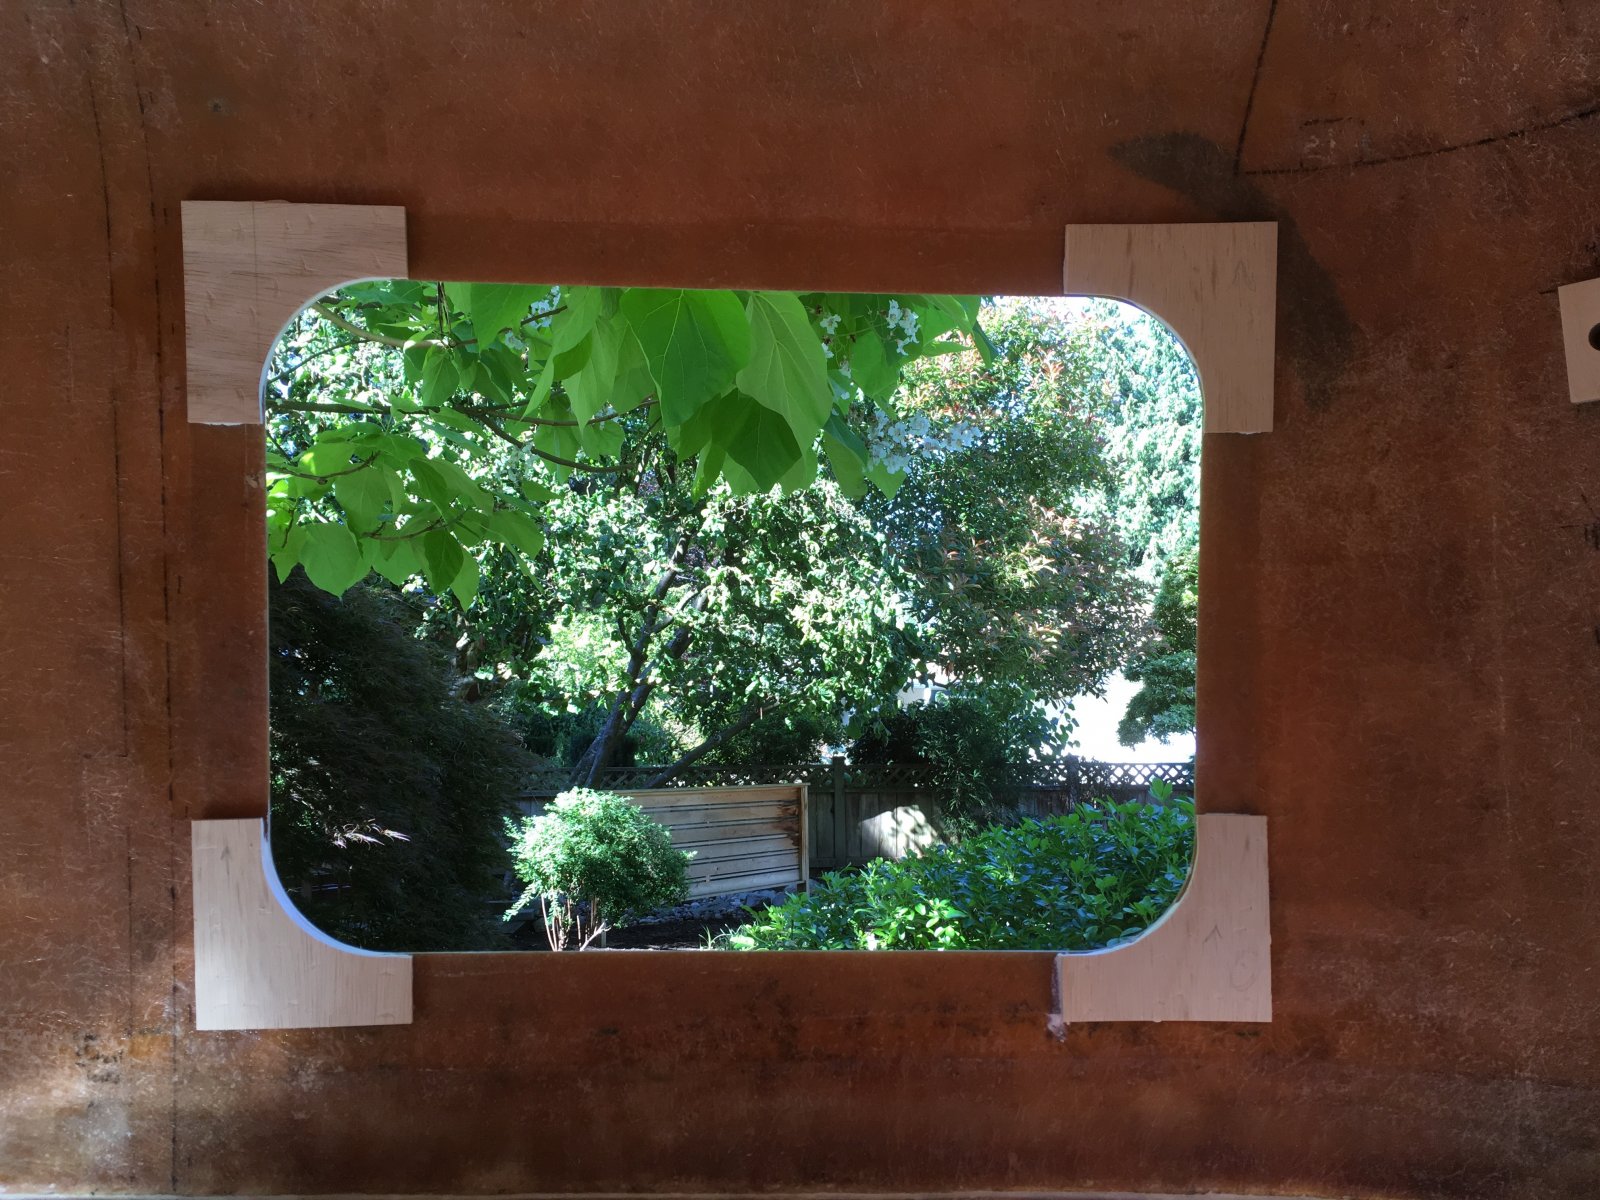
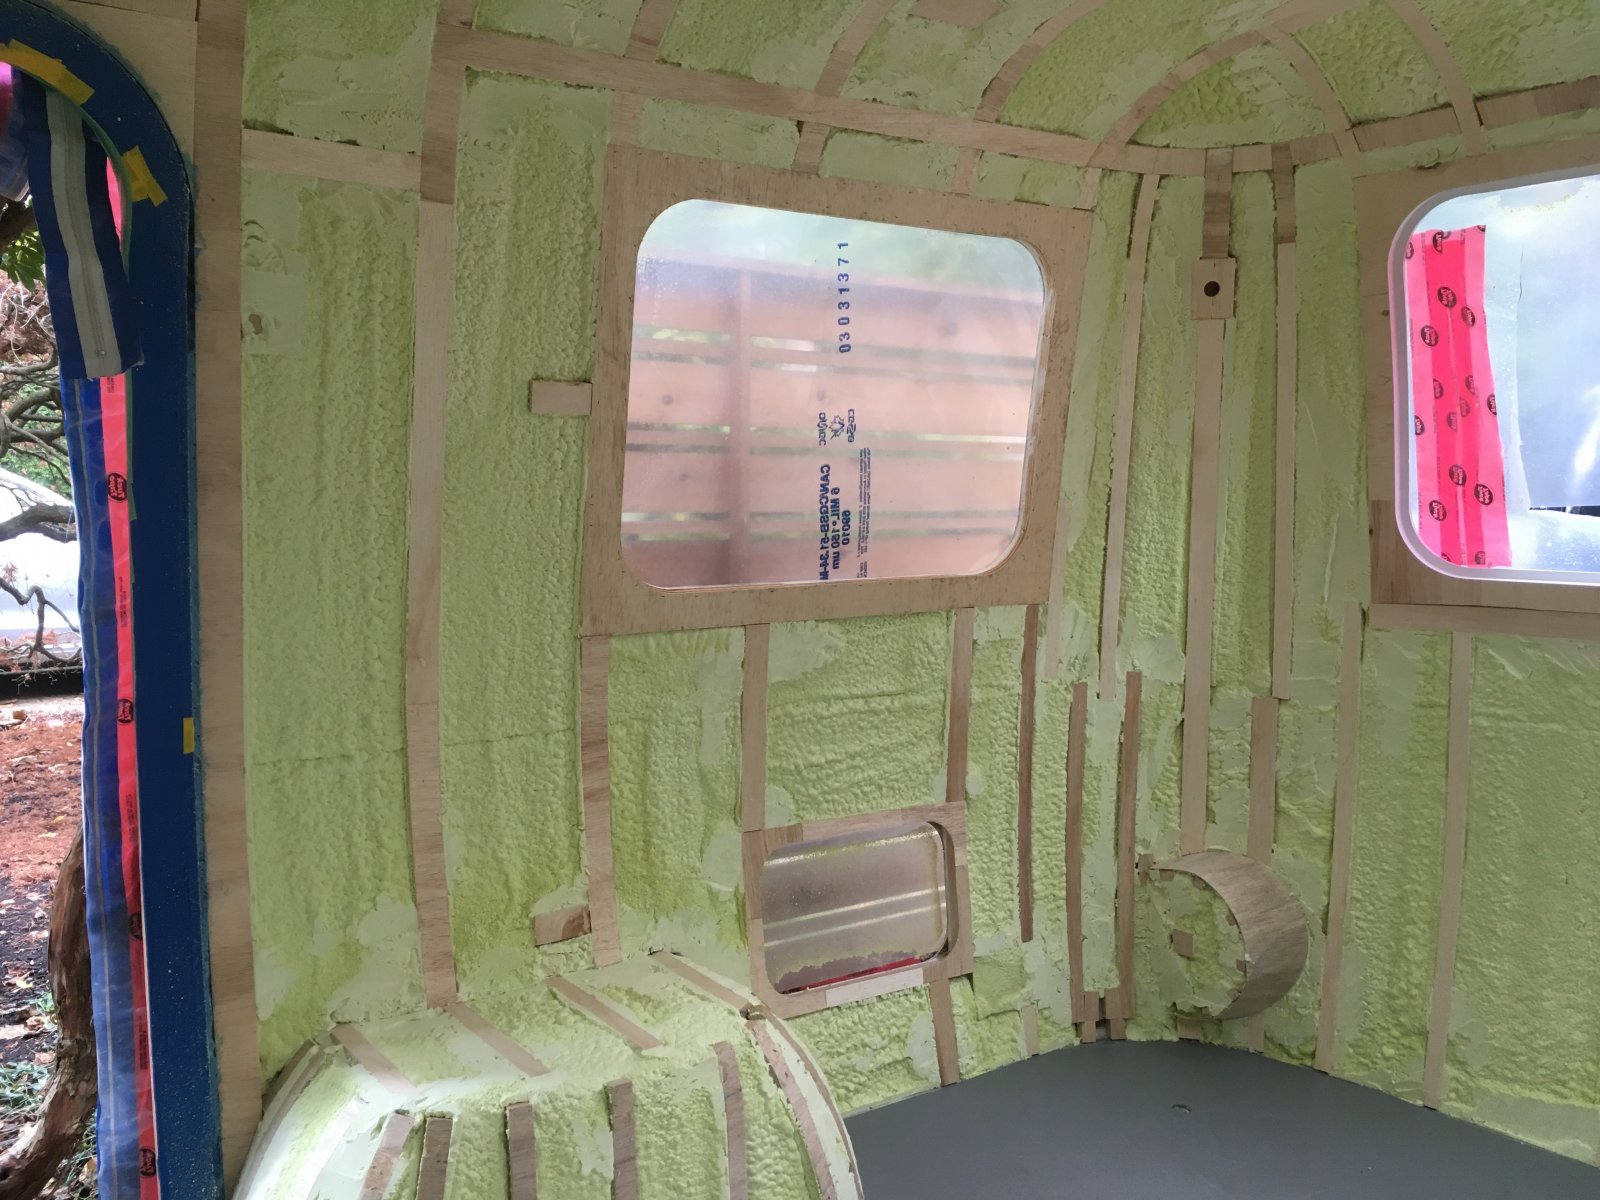
Window framing. Windows are where leaks start, so this stage matters more than people think.
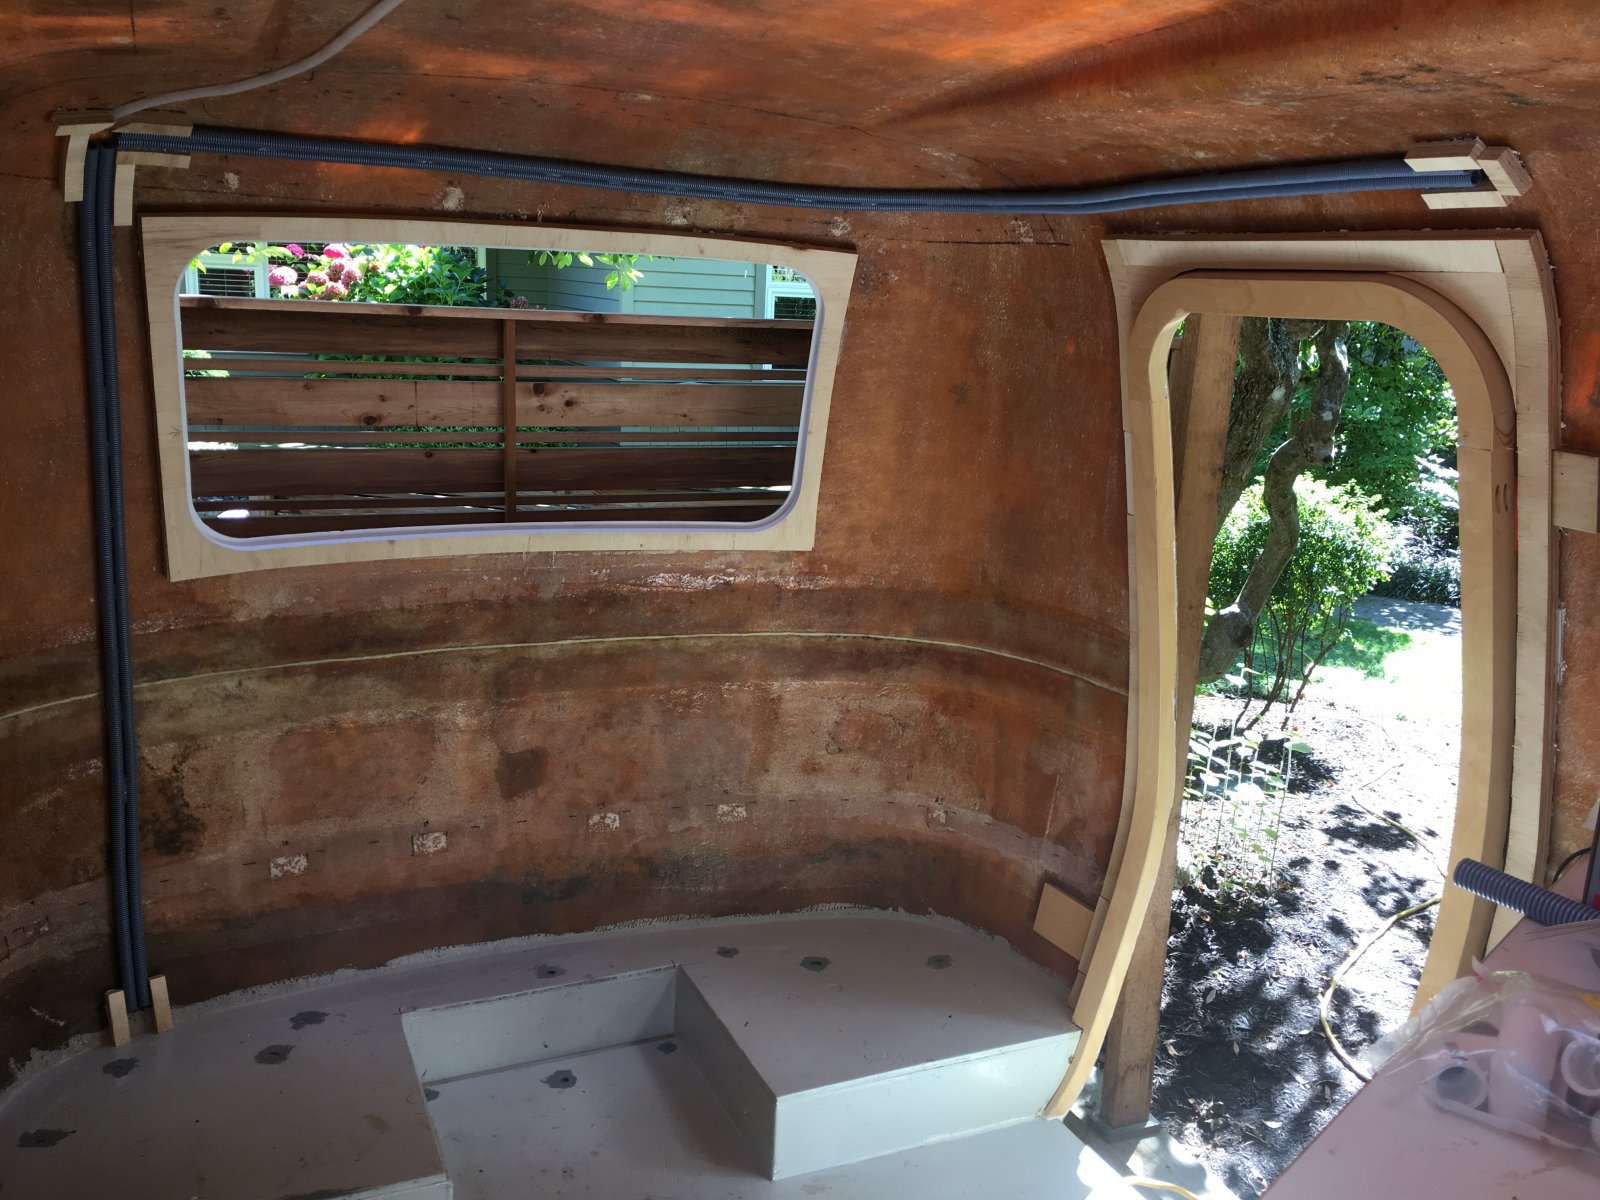
Wiring and conduit. Hidden systems are boring until they fail. Then they are all you think about.
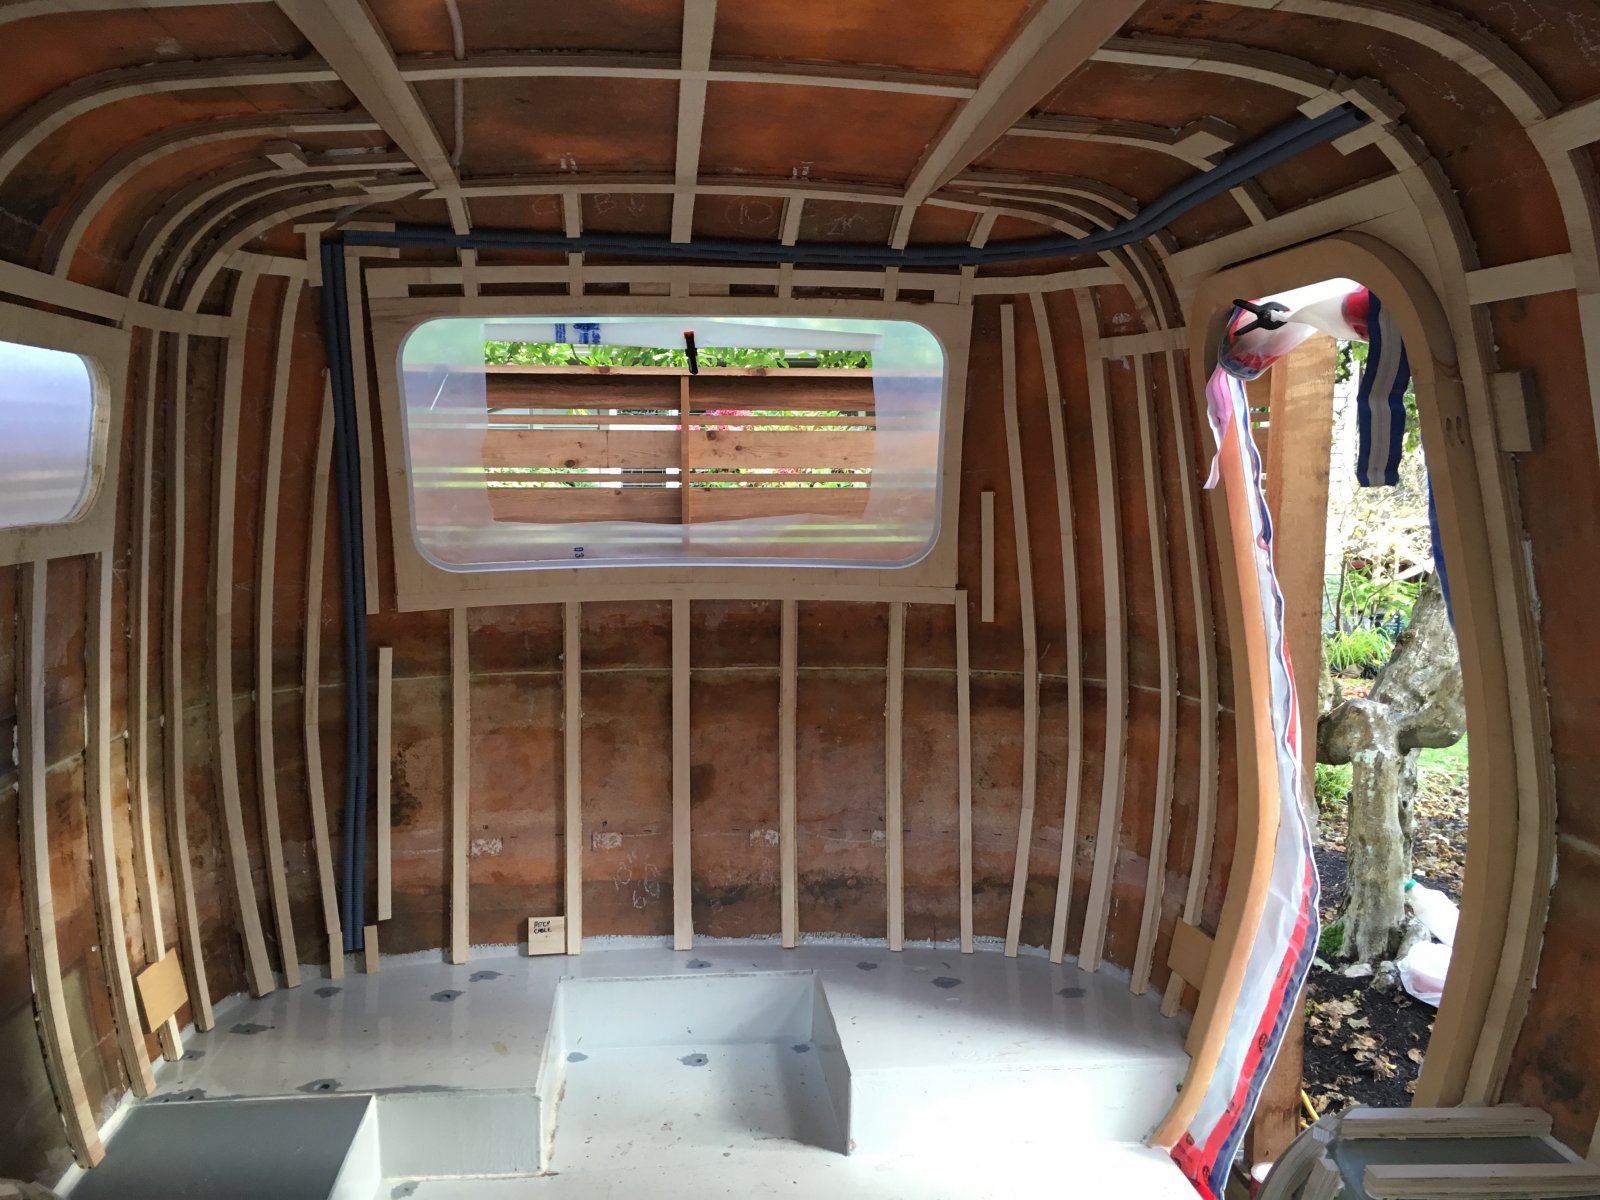
Interior layers going in. This is where patience and precision do most of the heavy lifting.
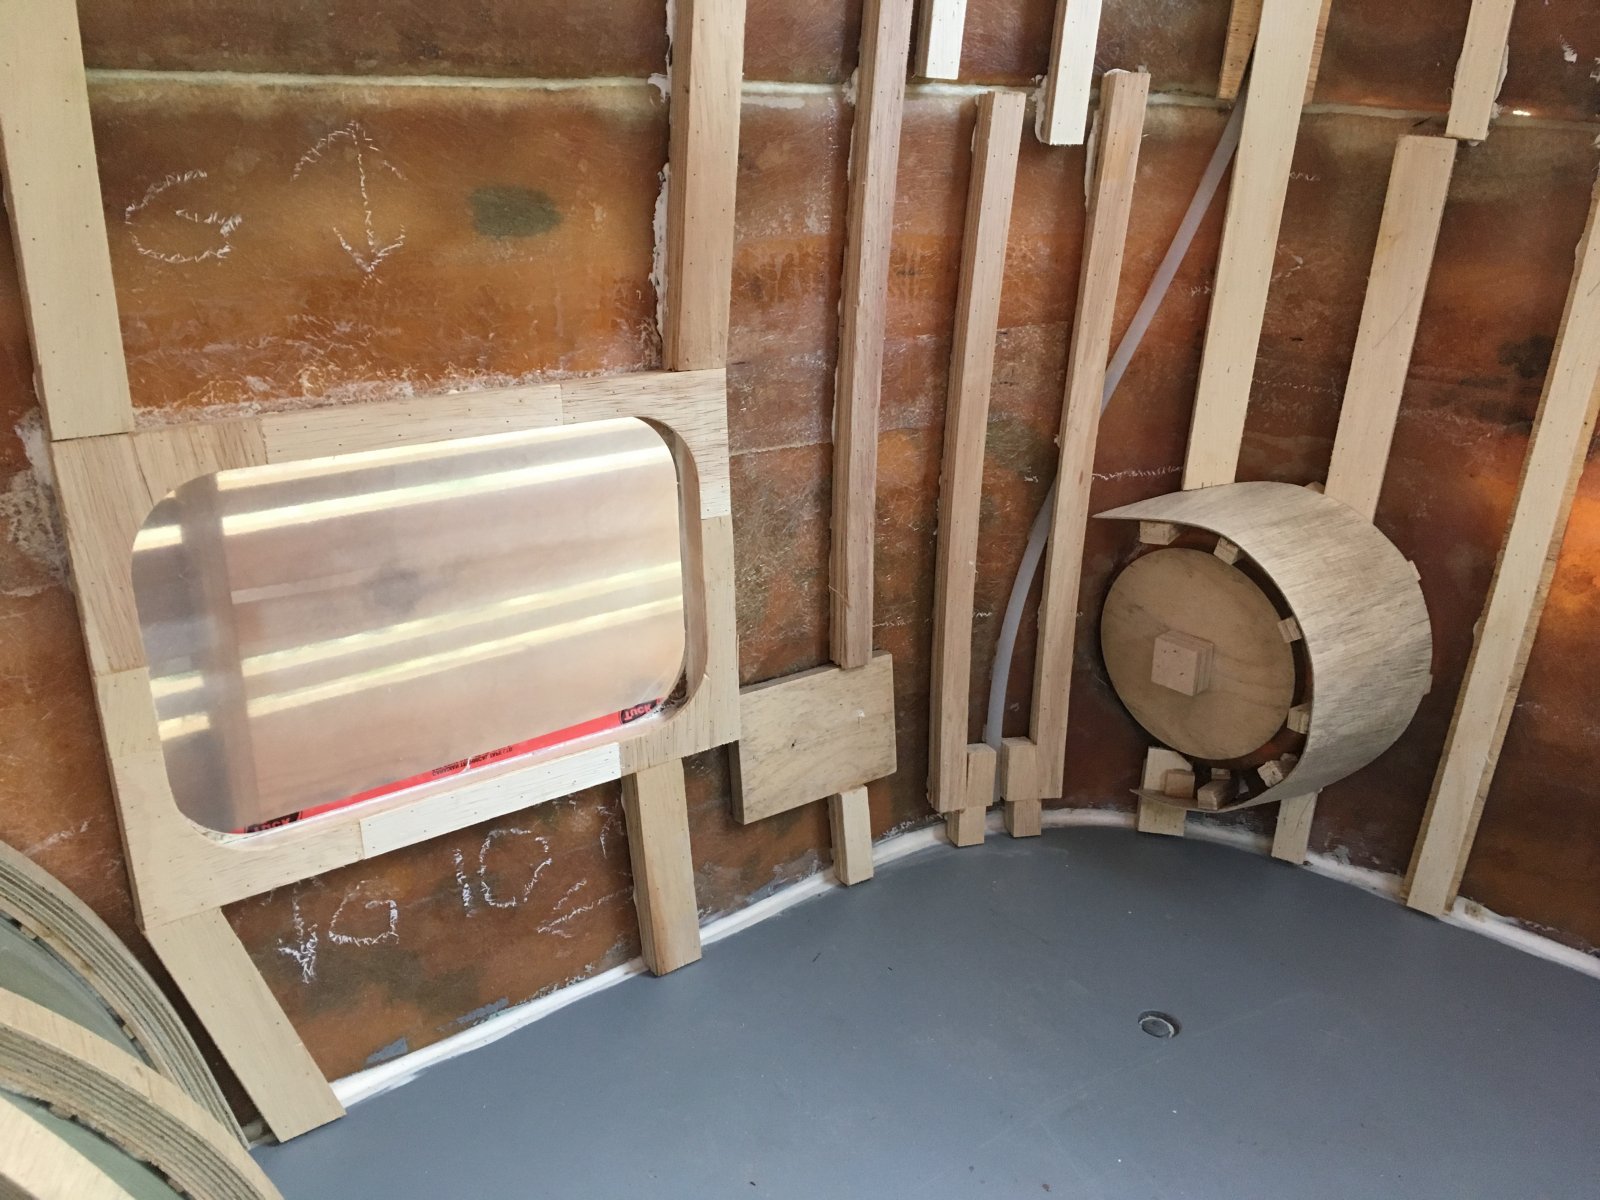
Storage door details. Small parts like this consume more time than you’d ever admit out loud.
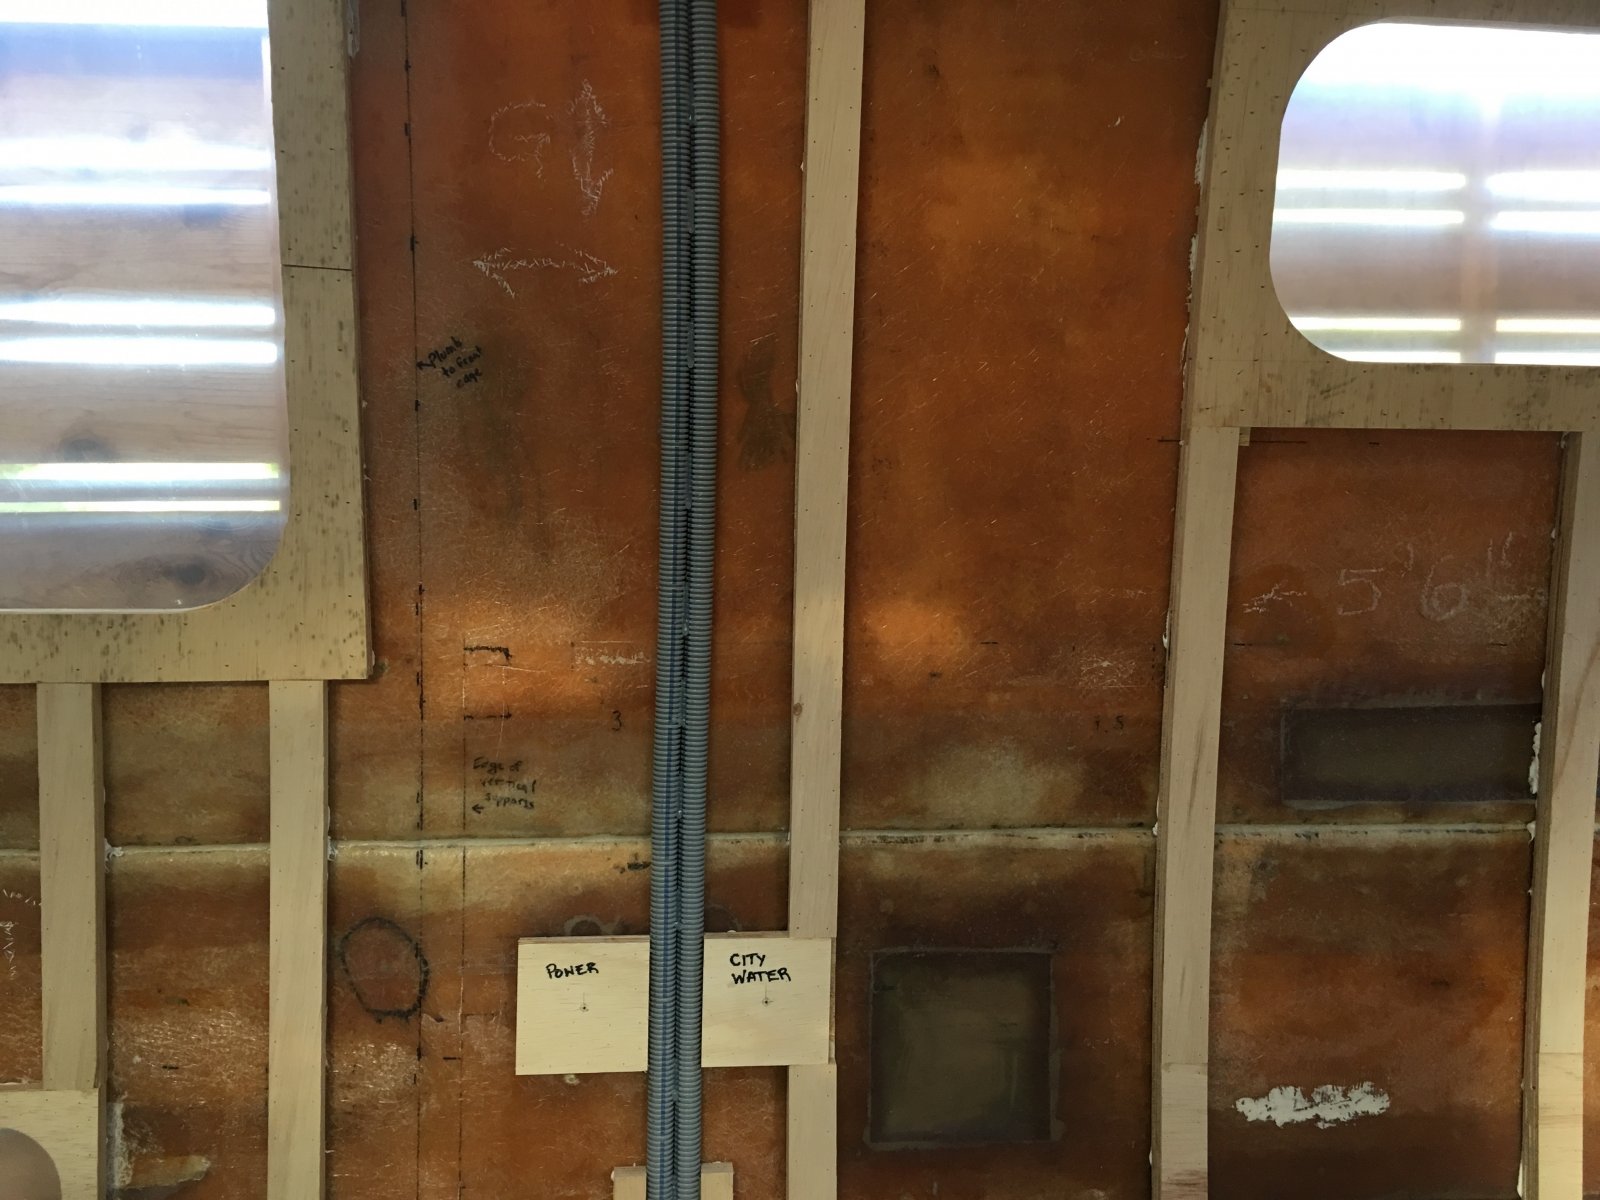
Backing for city water and power inlet. It’s not flashy, but it’s what makes it usable.
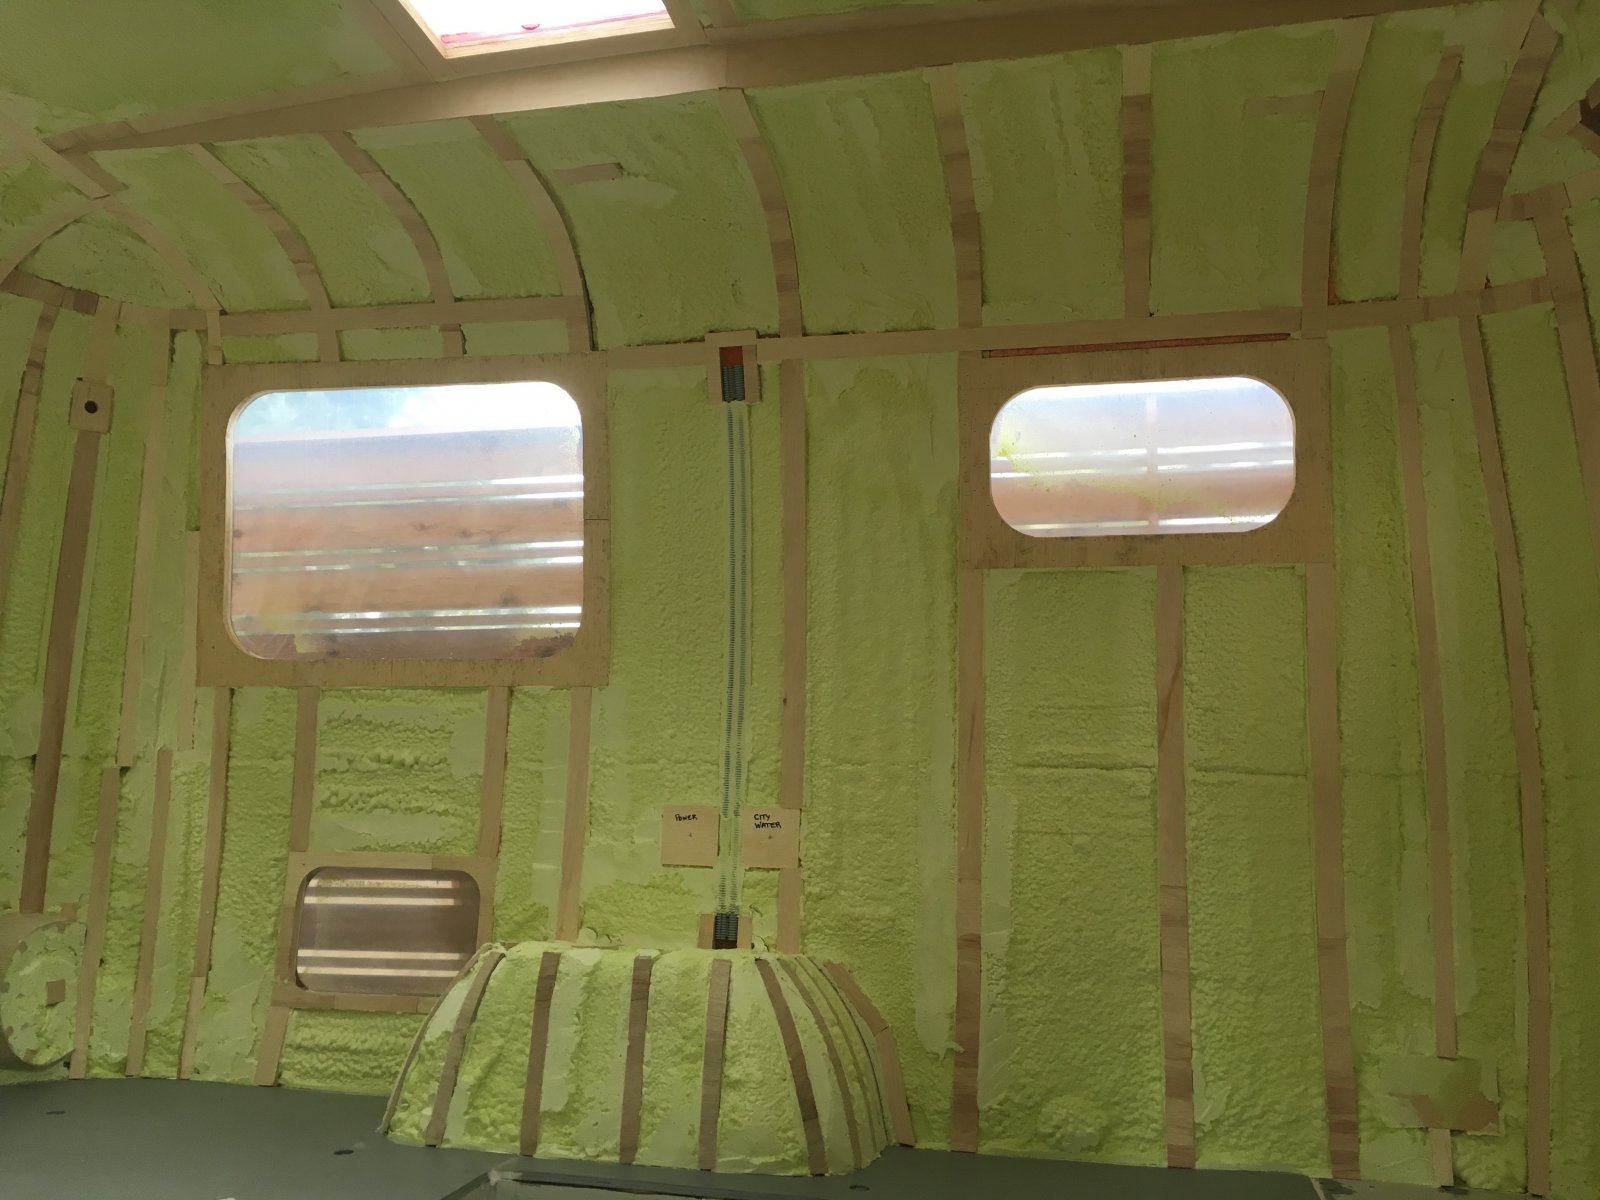
Insulated interior. Comfort on the road starts with the stuff you never see in the finished photos.
More insulation progress. Quiet, warmth, and less condensation. All wins.
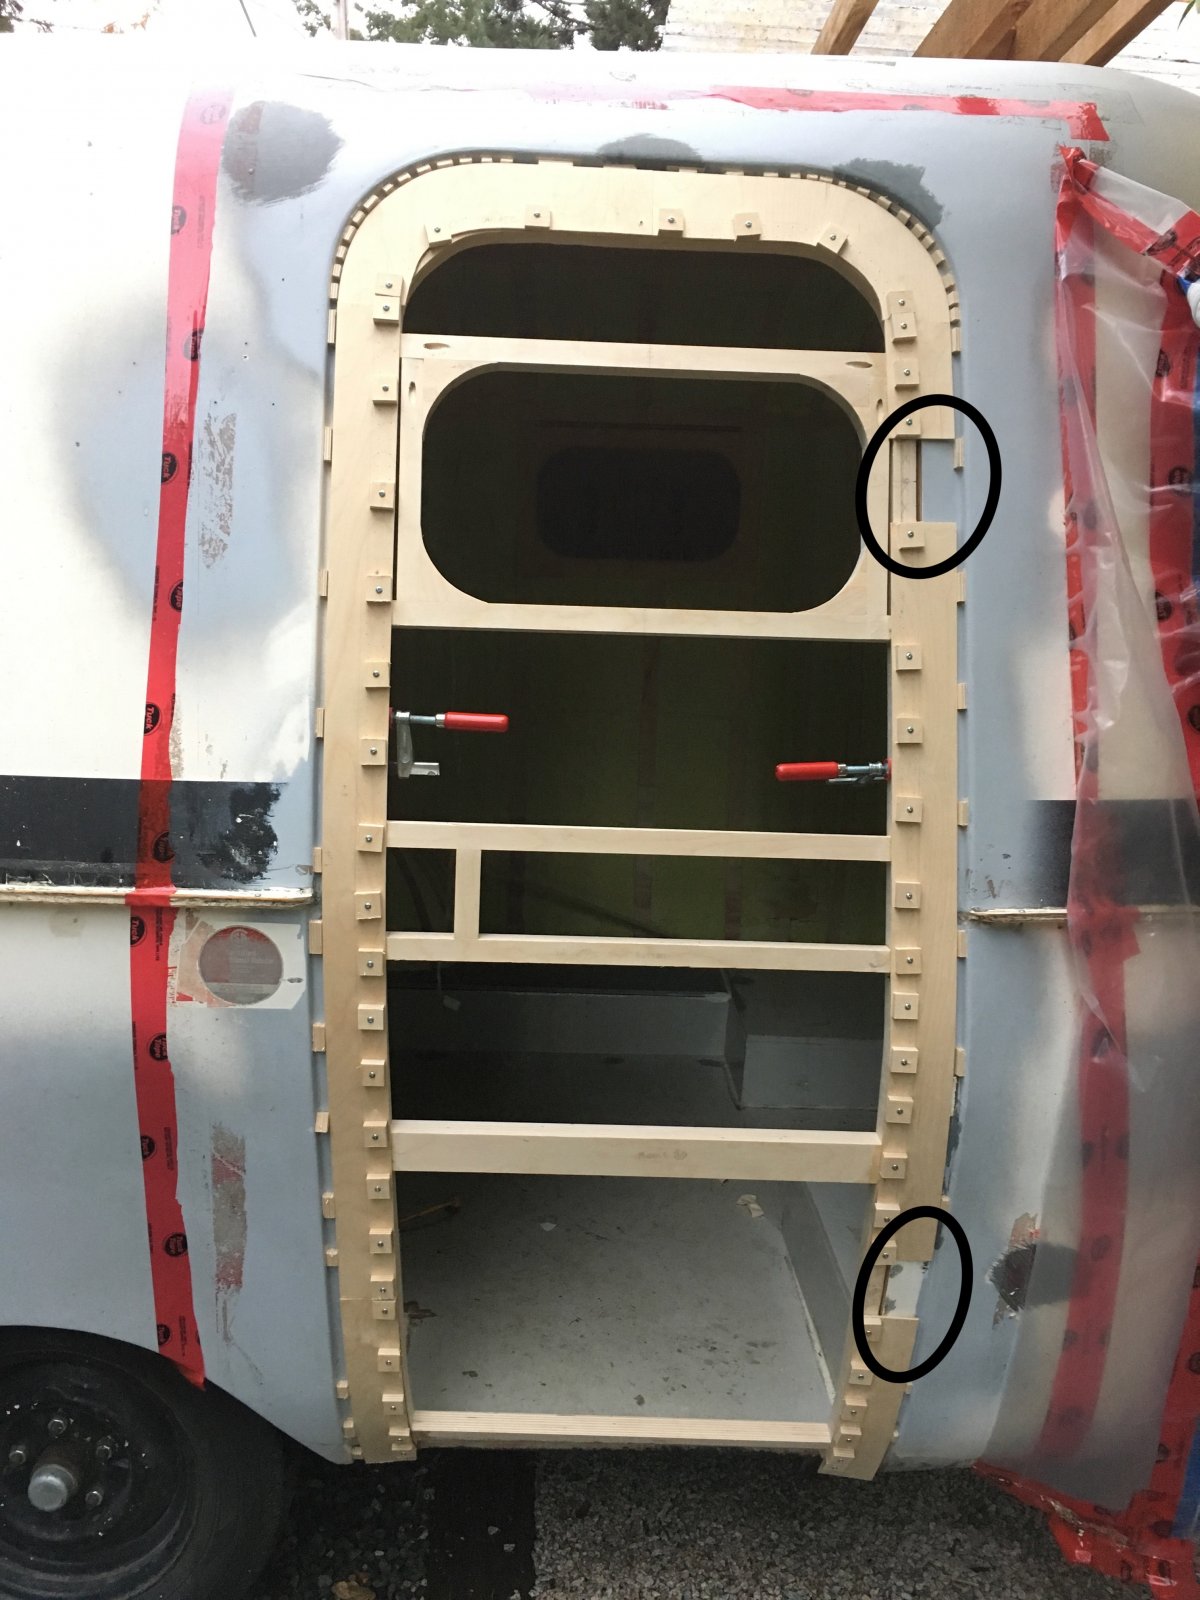
Making the door. This is where woodworking skills start paying rent.
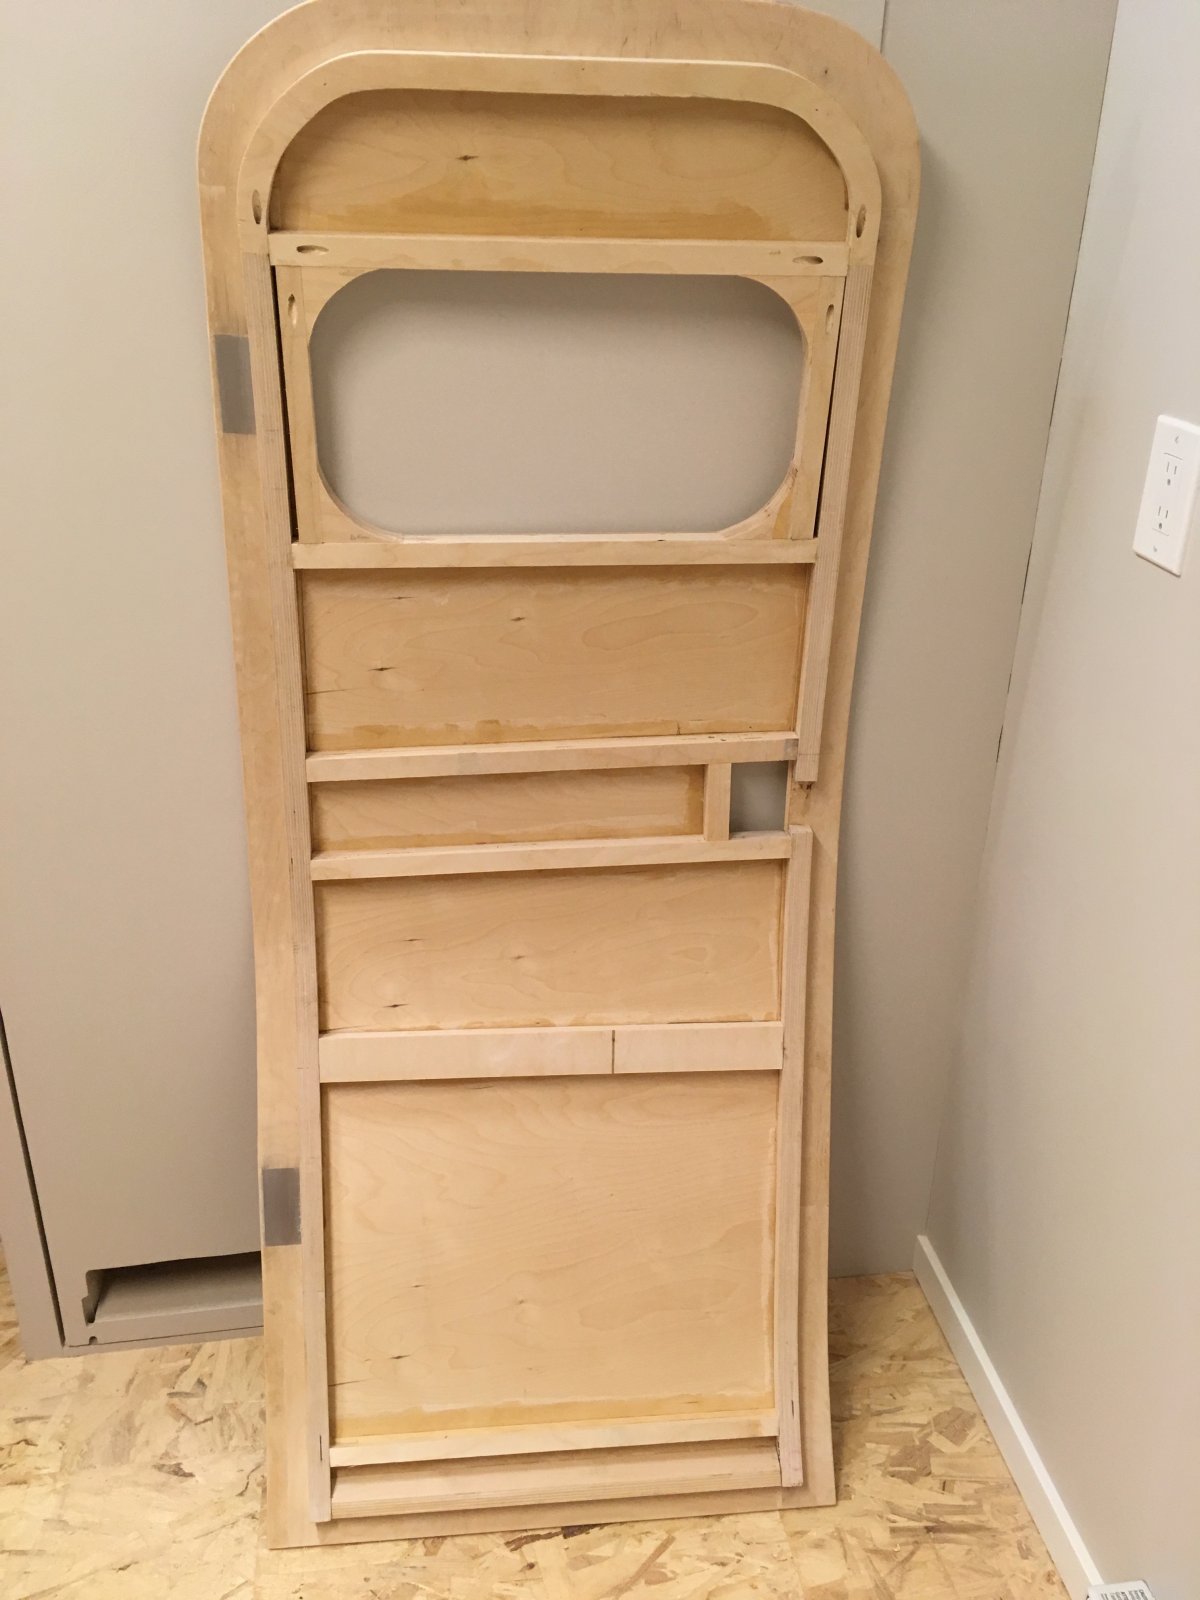
Completed door. A “small” piece that changes how the whole trailer feels.
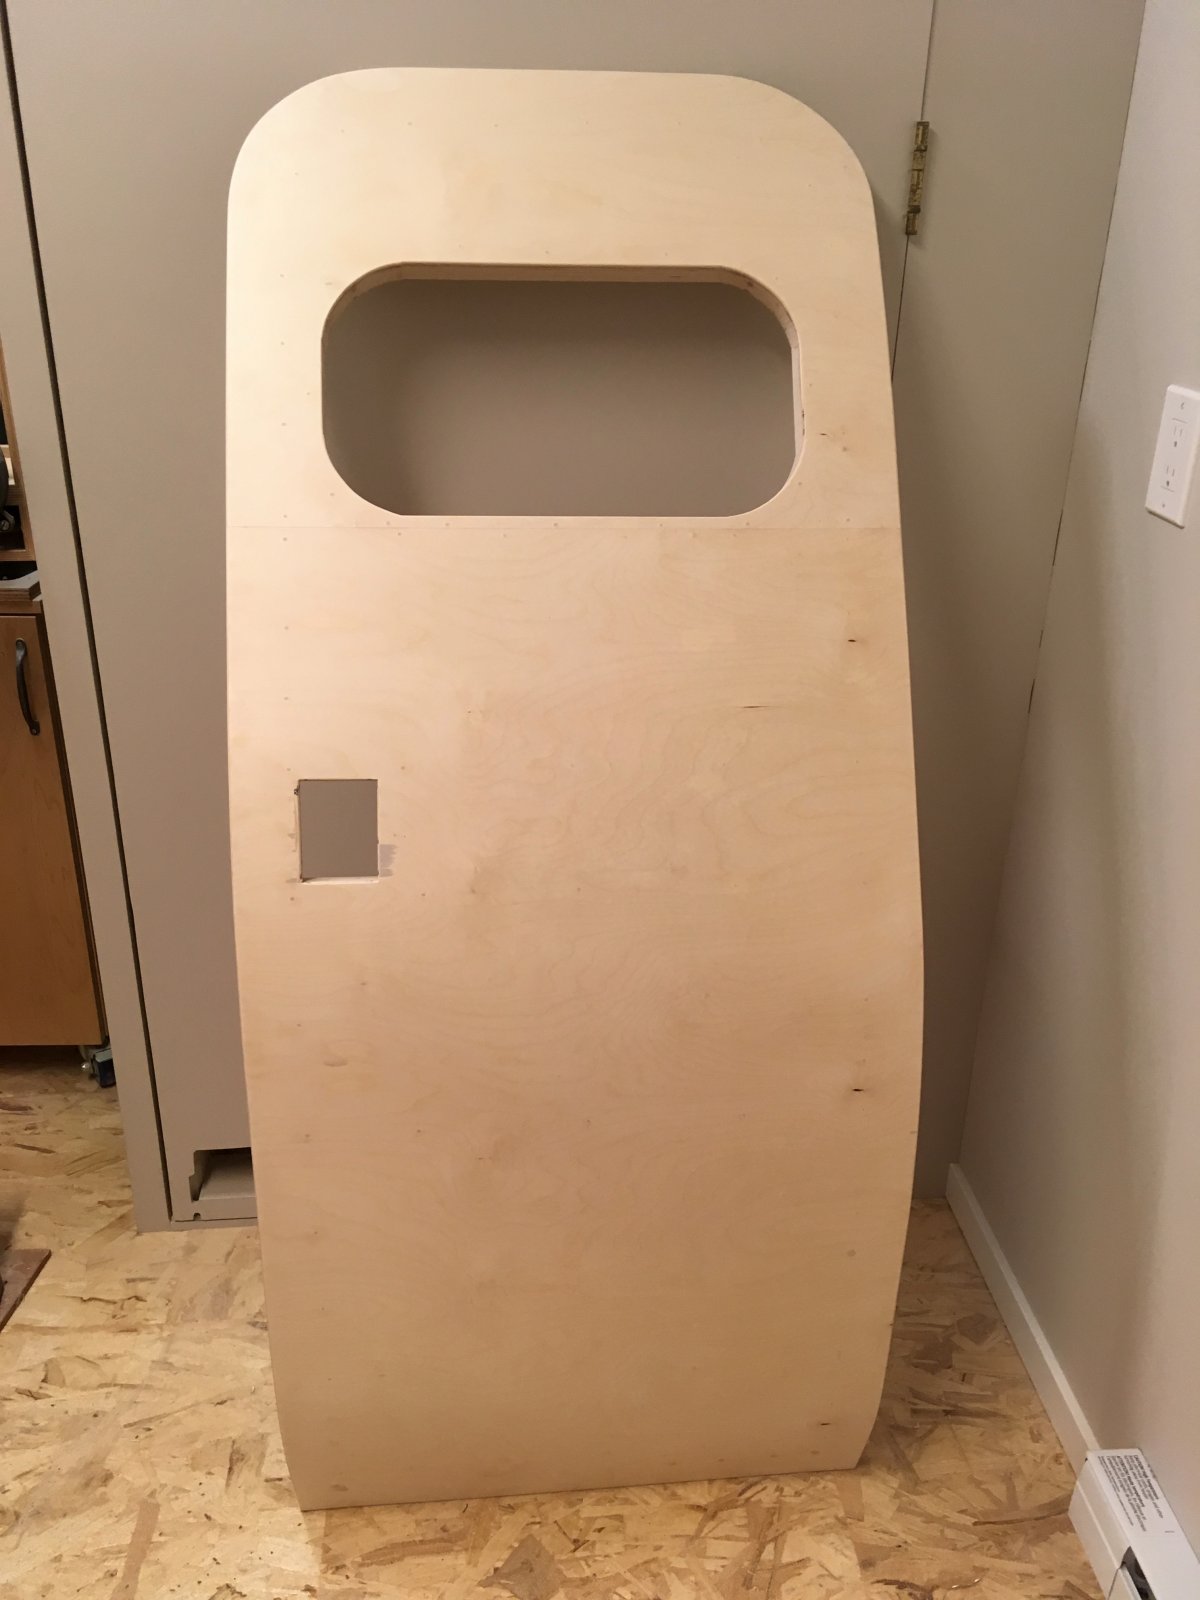
Door finished angle. Tight gaps and solid fit are what keep the weather out.
Exterior primed. The “it finally looks like progress” moment.
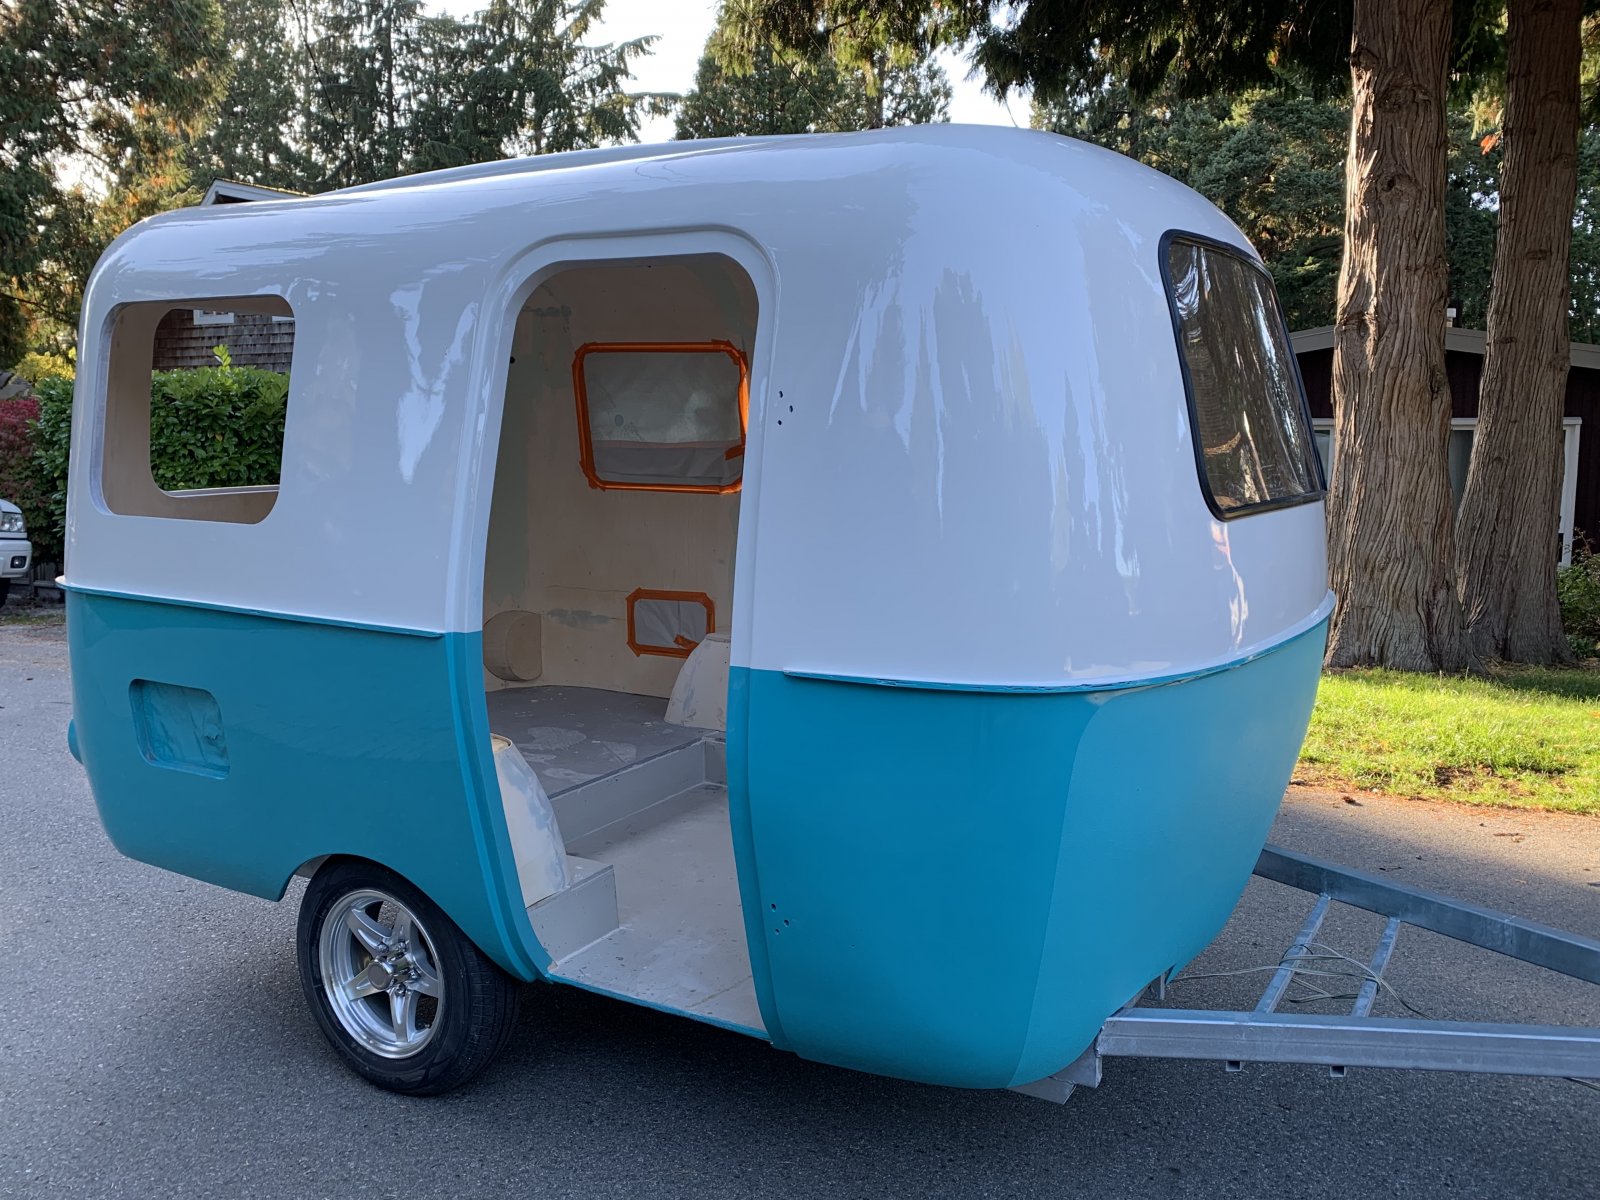
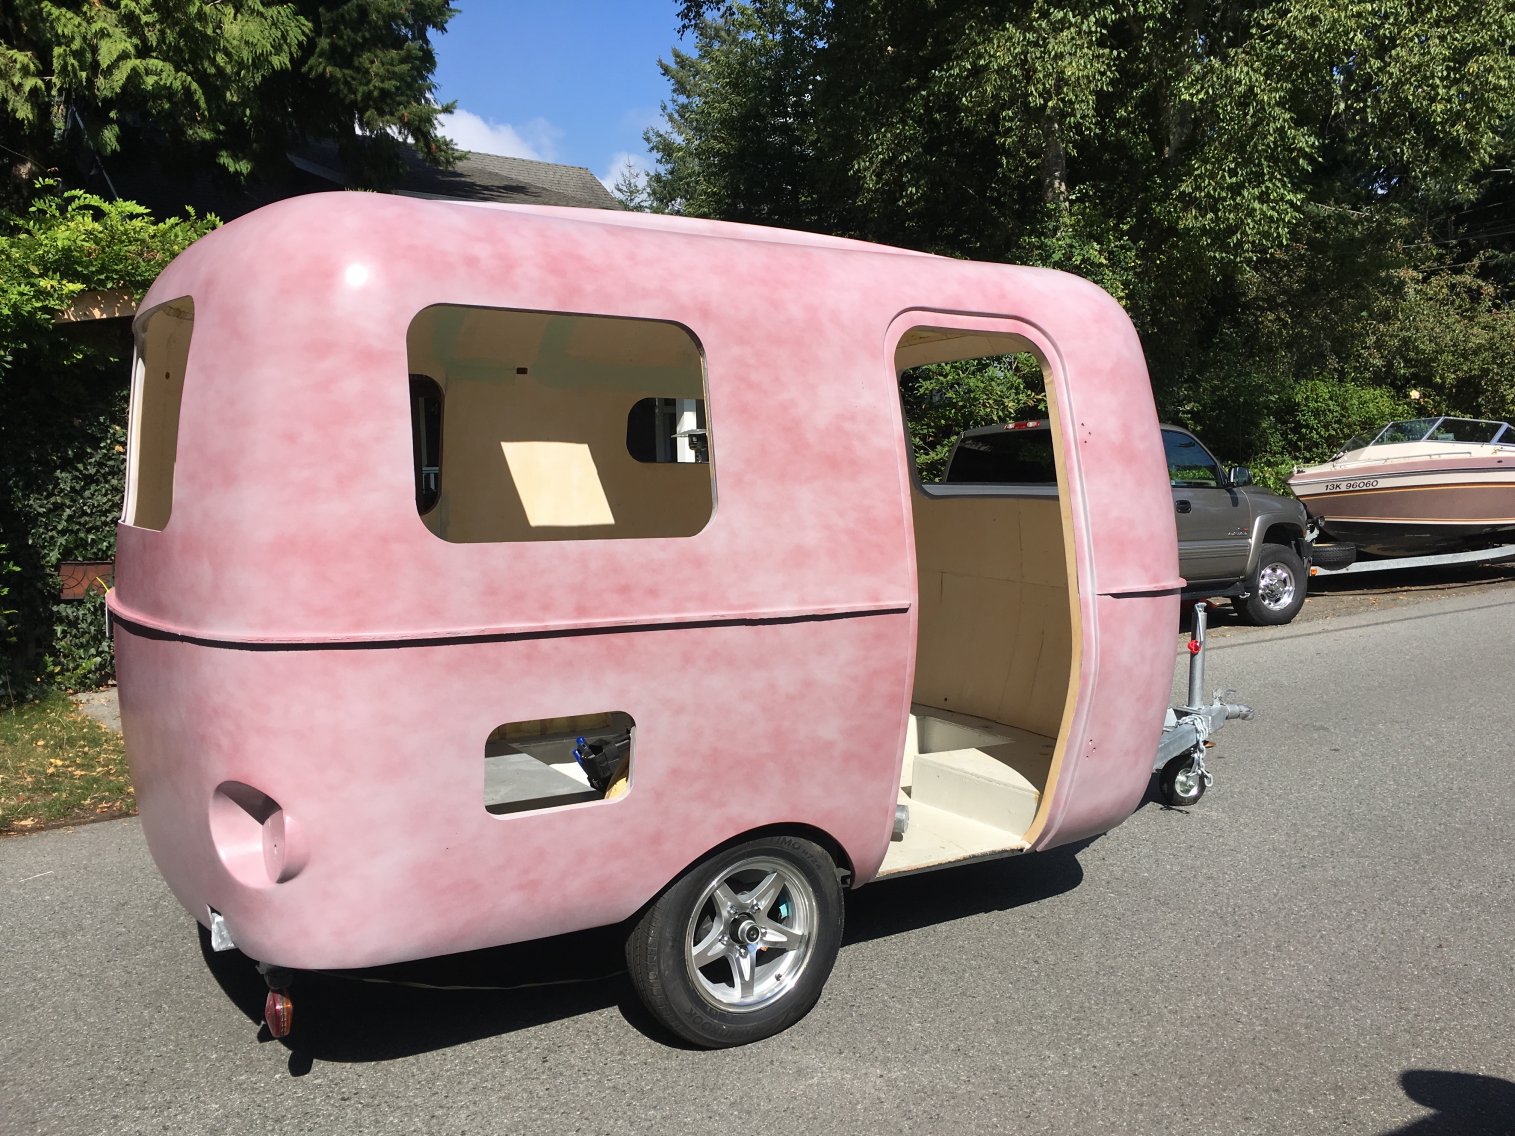
Exterior painted. This is the shot that makes every frustrating step feel worth it.
Another painted angle. The trailer gets its personality back right here.
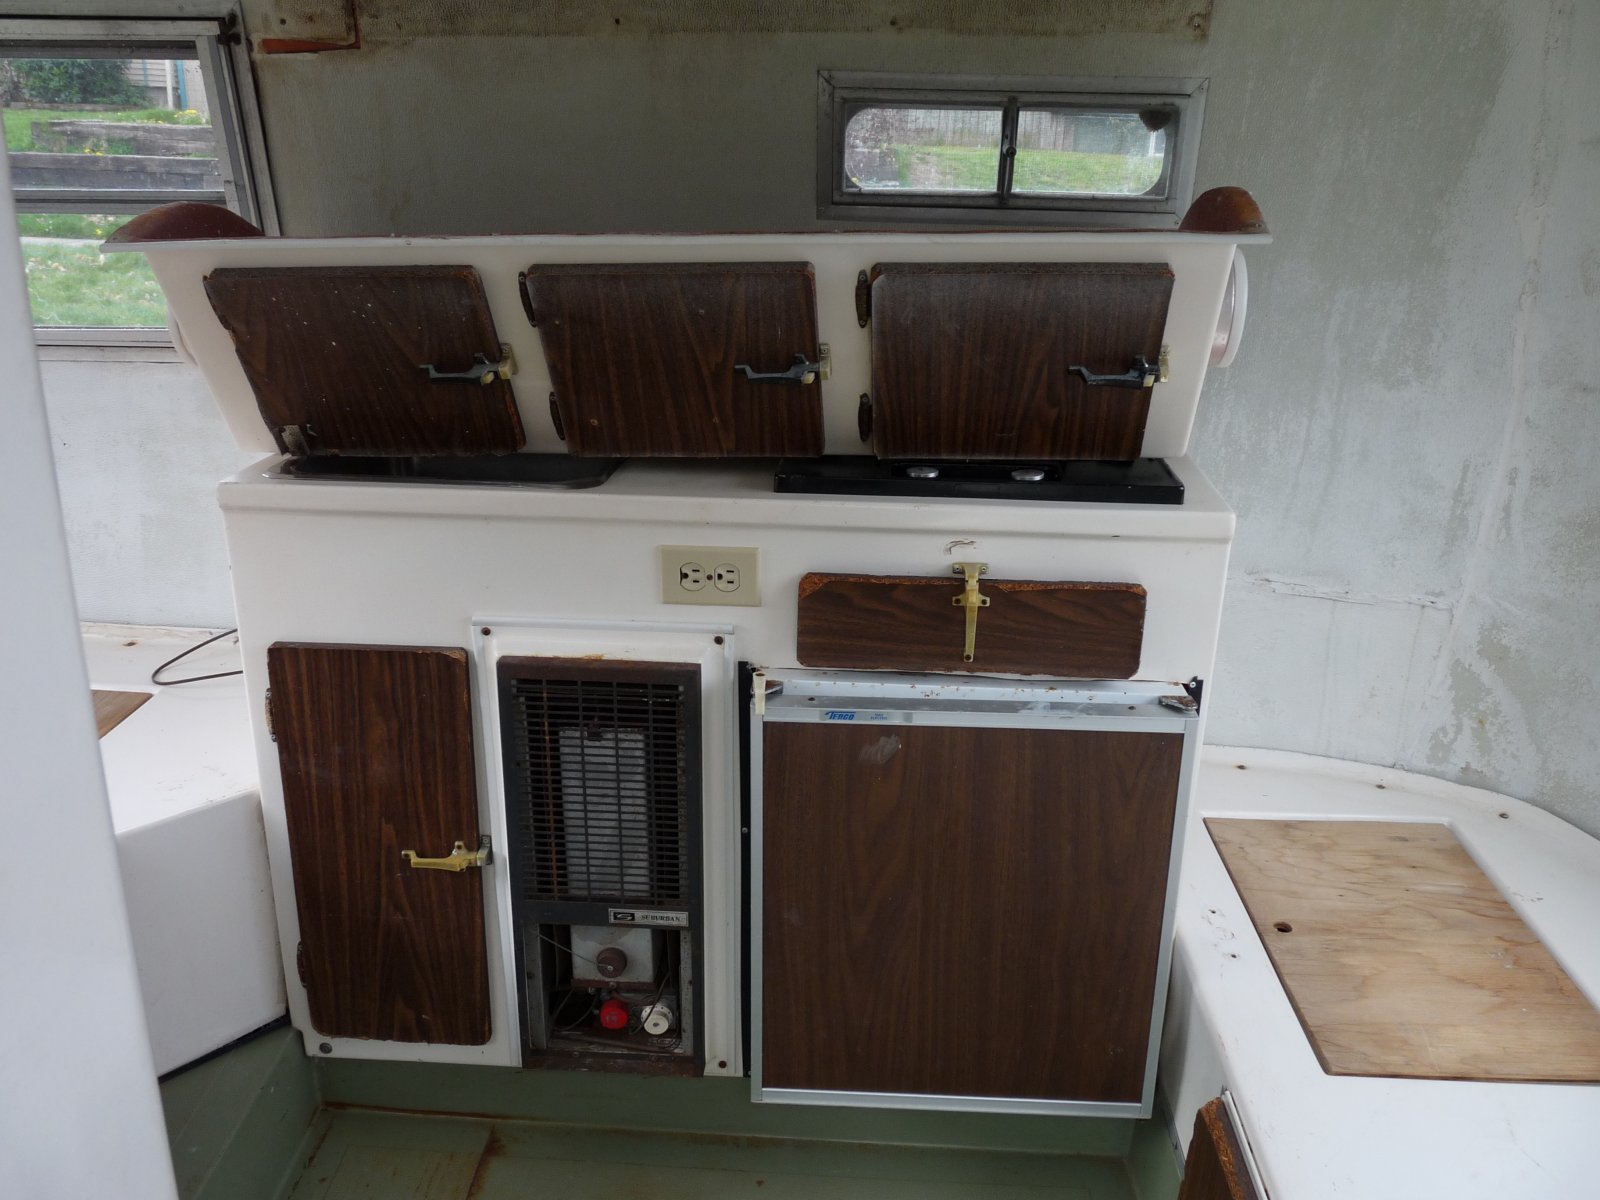
Finished stage. Clean, bright, functional, and still has that classic feel.

Finished interior photo I took. The kind of “cozy” you only get after a real rebuild.

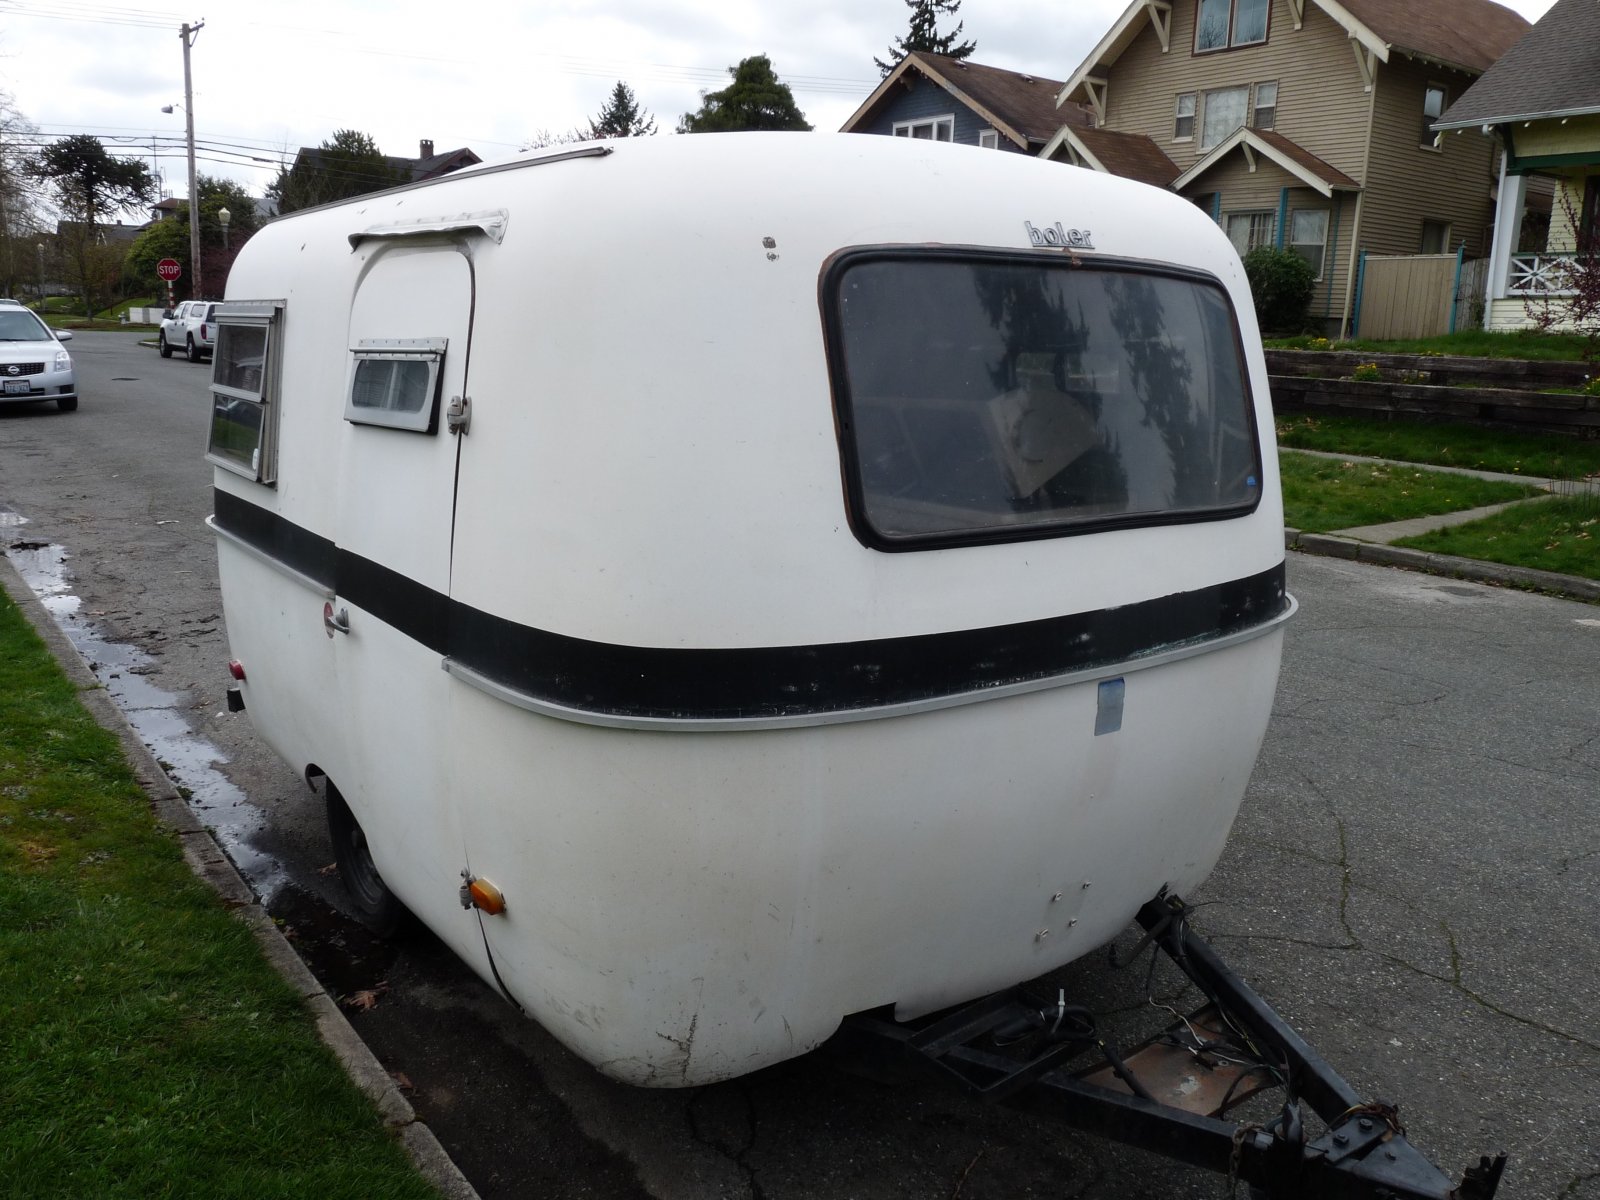
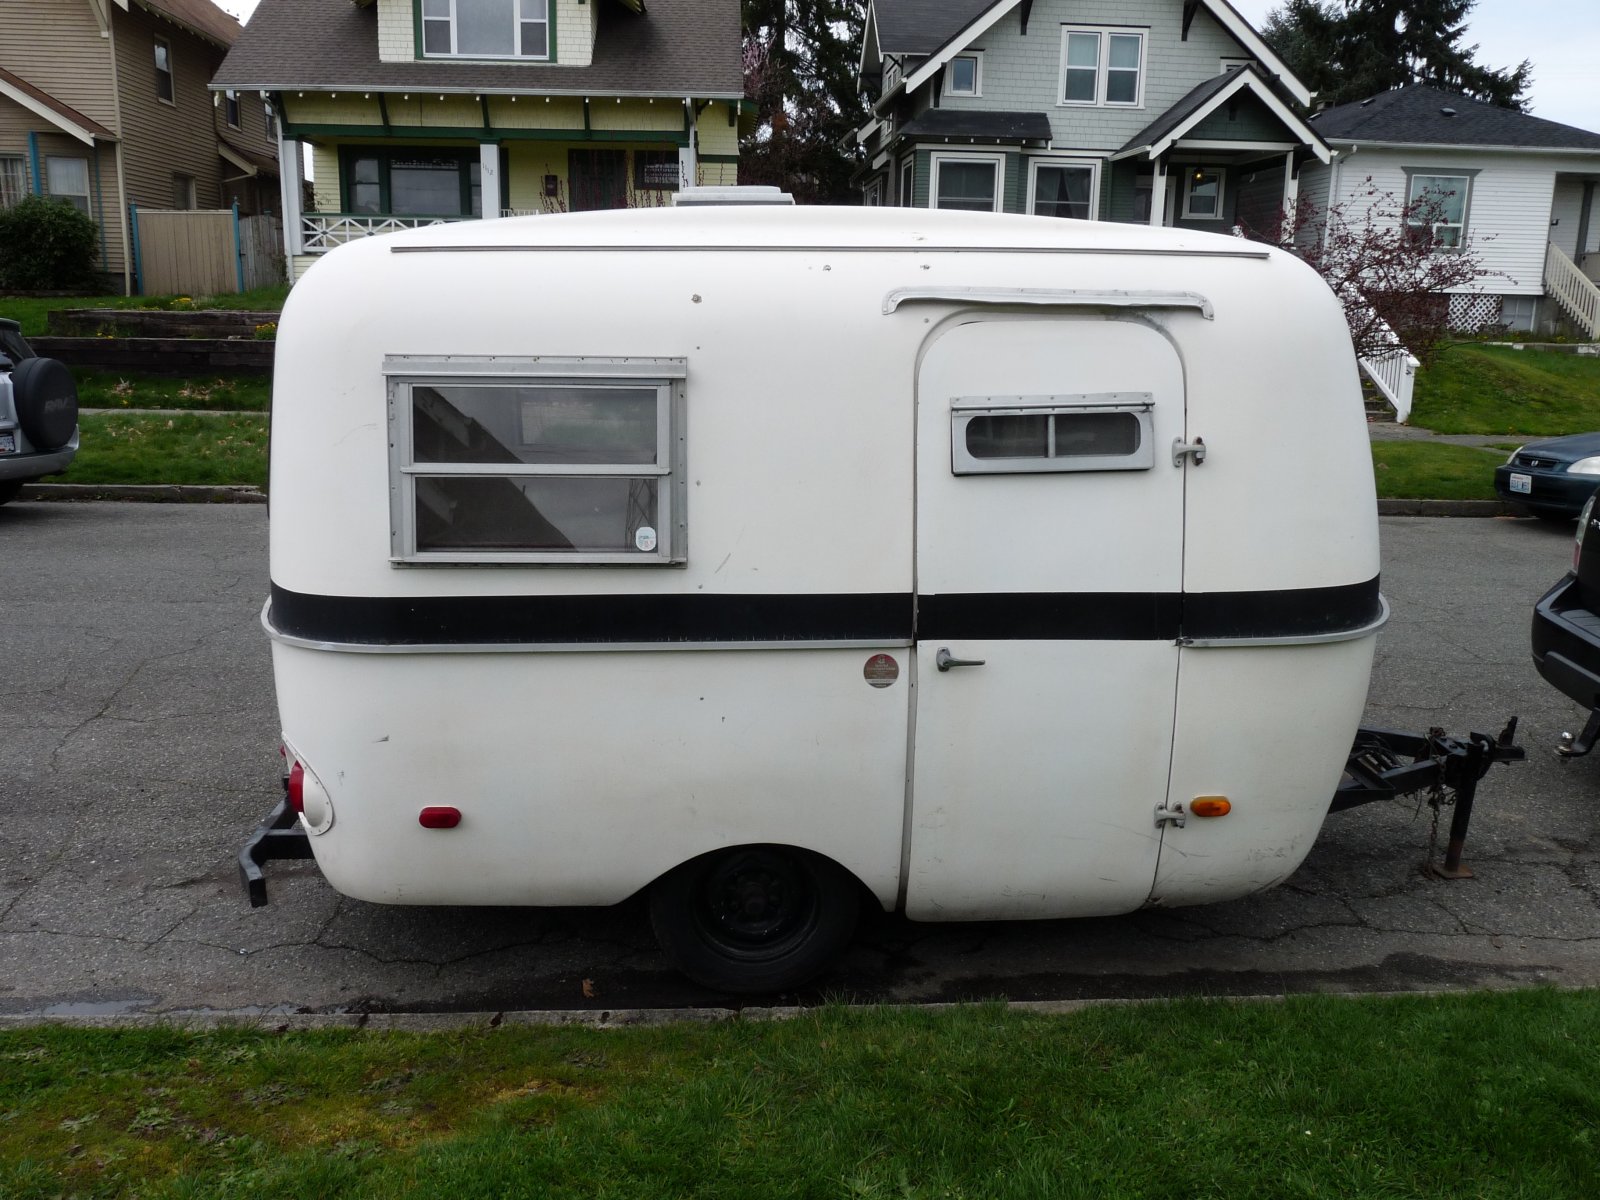
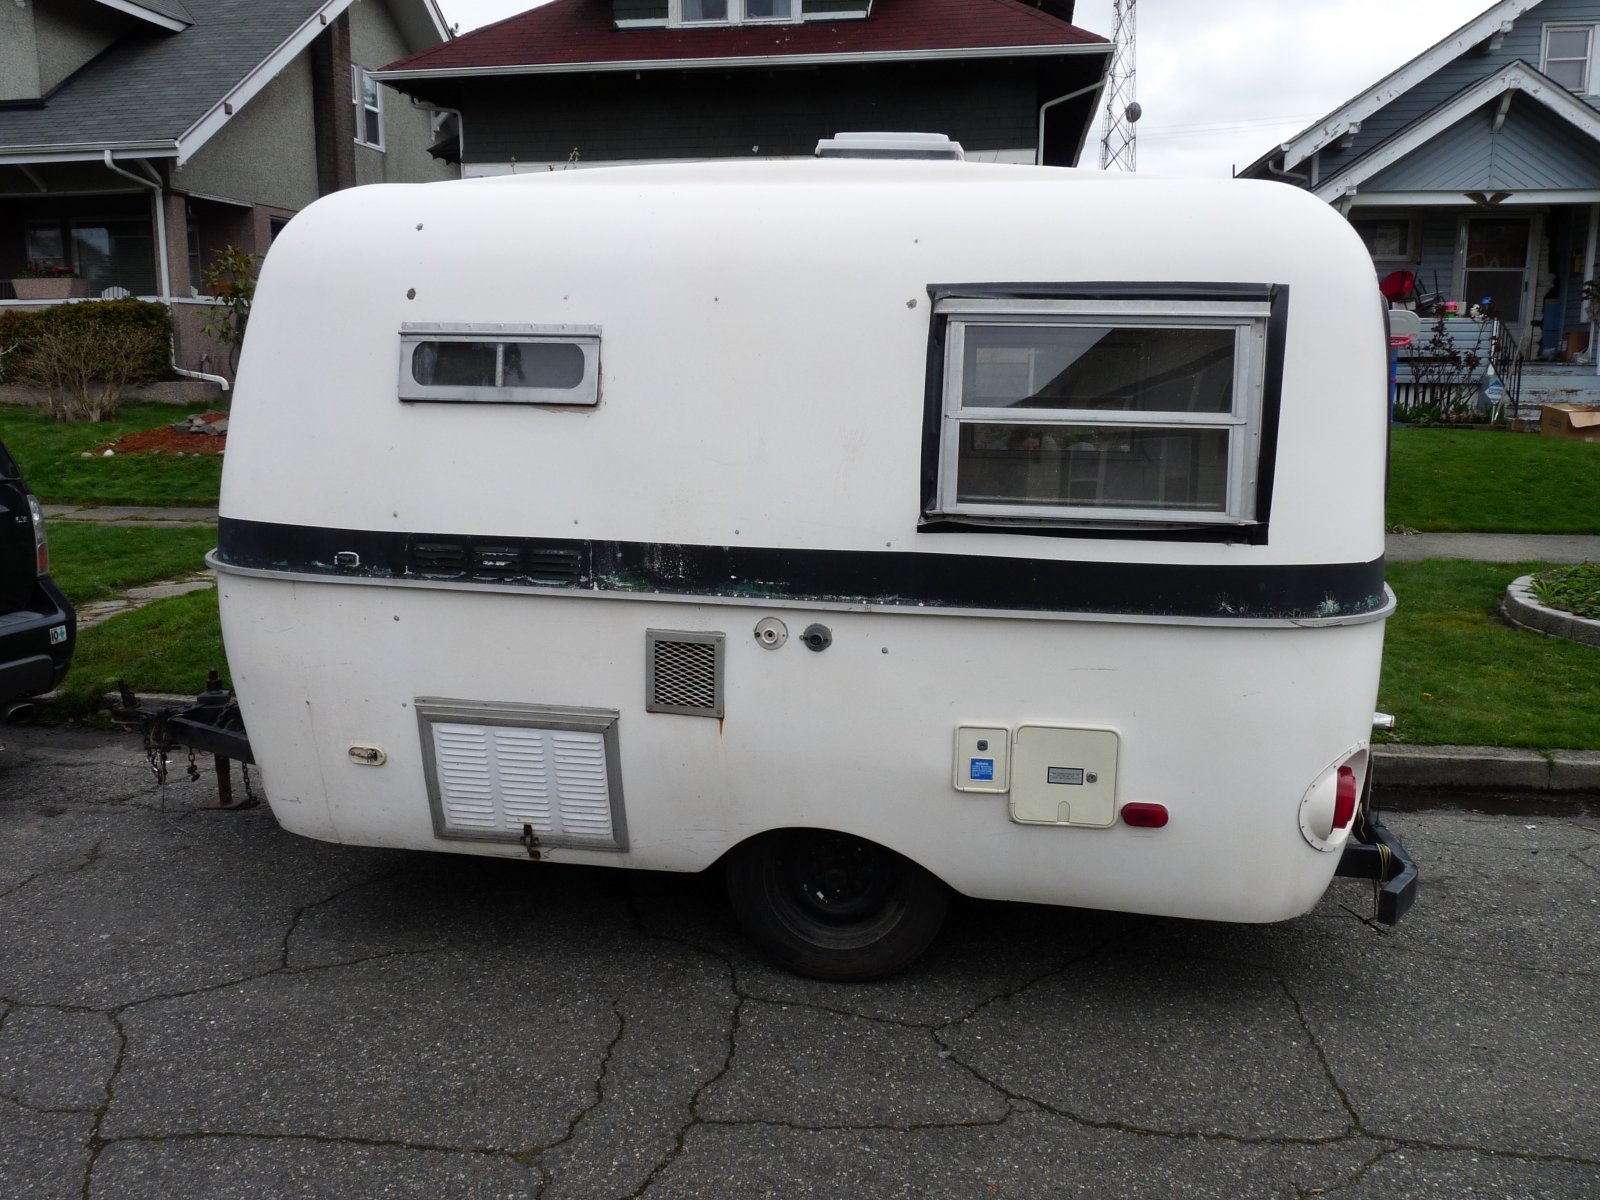
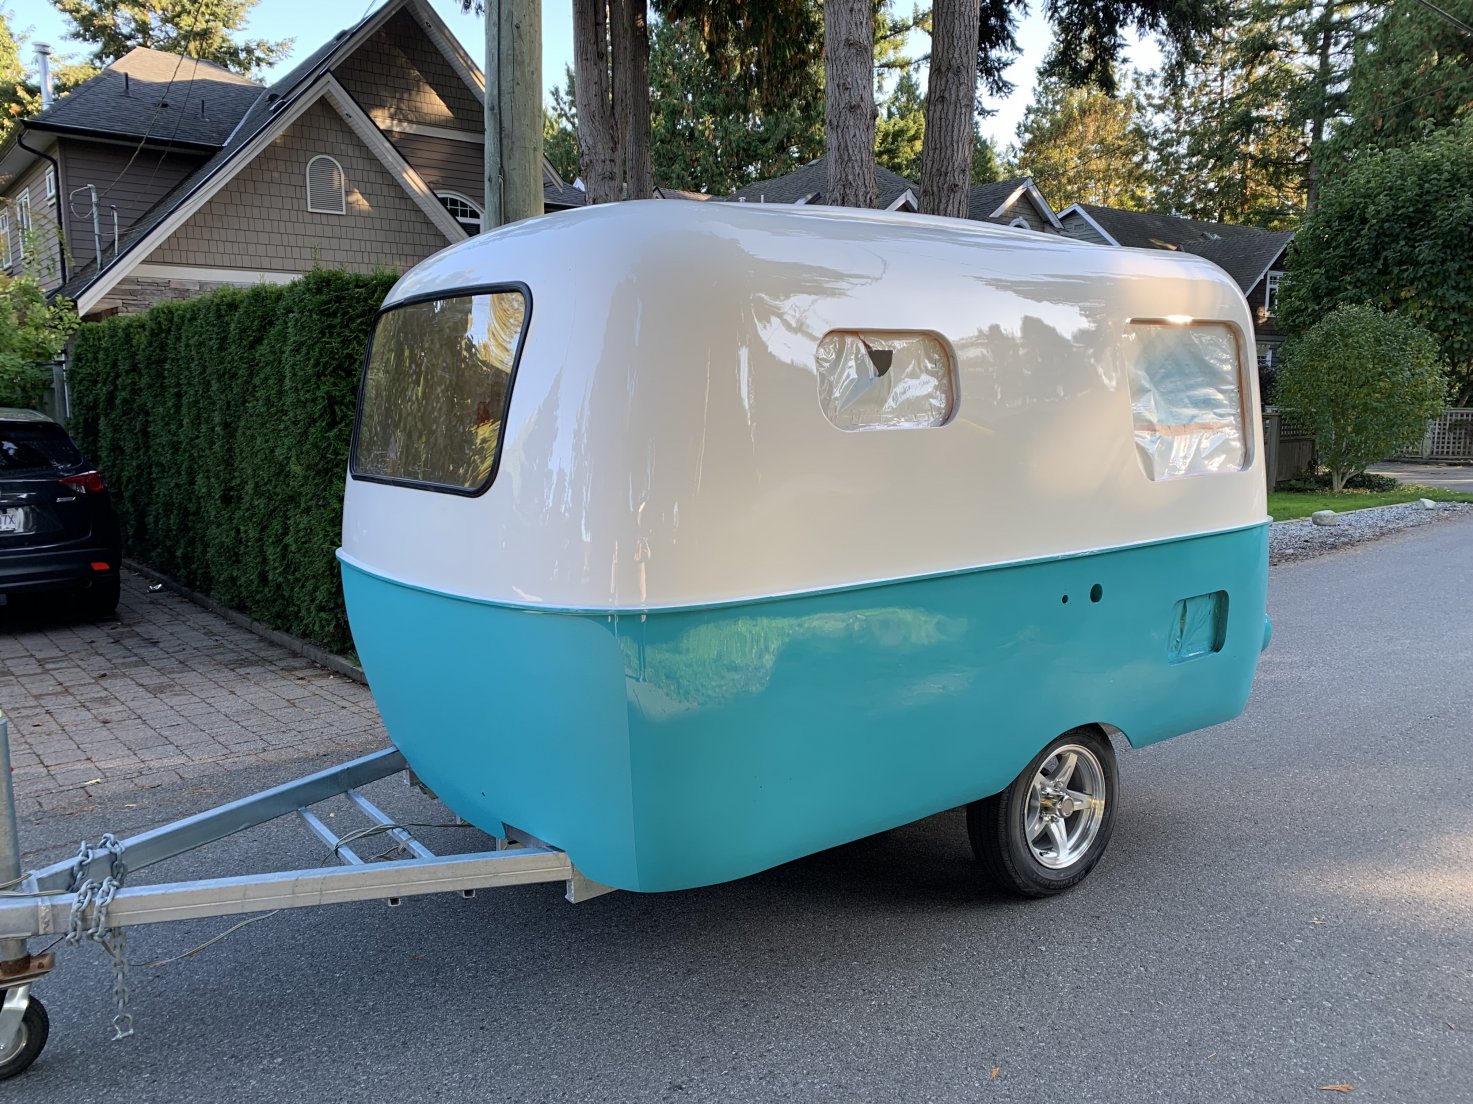
Finished exterior photo I took. Simple, clean, and unmistakably Boler.
The Story Behind the Boler
Shannon’s camping started the same way a lot of people start. Tent, tarp, and a stubborn belief that sleeping on the ground is “part of it.” Then comes the moment where comfort stops being optional.
Shannon found this Boler through a Craigslist listing in Tacoma, Washington. It was rough. It had problems. It did not arrive with a neat little checklist of what needed fixing. It arrived with potential and question marks.
The thing I remember most from talking to her was how normal she made it sound. Not easy. Just doable, one step at a time.
Planning the Renovation
The decision wasn’t “let’s build a show trailer.” It was practical. A trailer that could be towed easily, parked easily, and lived in comfortably. Still compact, but not miserable.
- Goal: a functional, comfortable, self-contained camper that still feels vintage.
- Approach: fix structure and systems first, then finish and style.
- Mindset: research, solve one problem, repeat.
The Renovation Process
This is where most restorations either become legends or become “free trailer, must haul.” The process starts messy, then slowly shifts into building. The photos above show it clearly, but here are the high-level stages that matter.
- Demolition: strip back to a clean foundation so you can see what you are really working with.
- Structural repairs: address the frame and the places that carry load or keep water out.
- Floor and shell work: rebuild the base so the interior is stable and dry.
- Systems: electrical, water, inlets, and any plumbing decisions that affect how you use the trailer.
- Walls and insulation: comfort upgrades that change how the trailer feels in real weather.
- Finish work: doors, cabinets, storage, and the “this is home now” stuff.
- Exterior: prime and paint, then the reveal.
If you want every detail, Shannon documented it all here: Full Restoration Project (FiberglassRV) .
Personal Touches and Custom Features
Restoration is not only repair. The best builds have personality. Shannon’s background in woodworking shows up in the details, especially in how the interior feels intentional rather than thrown together.
- Smart storage where it actually gets used.
- Materials that can handle real camping, not just a showroom photo.
- Finishes that stay bright without looking sterile.
Life After Renovation
The end result is the reason people take on a project like this. A trailer that tows easily, parks easily, and feels like a real space. Not a compromise. A choice.
It also changes how you travel. When your trailer is comfortable and self-contained, the trip feels lighter. Less scrambling. More enjoying.
Advice for Fellow Enthusiasts
Shannon’s advice was simple, and honestly, it applies to most DIY projects. Think outside the box. Be a problem solver. Take your time. Research, research, research.
Translation: you do not need to be perfect. You need to be consistent. That is how a “wreck” becomes a trailer you are proud to tow into a campground.
Resources and Parts Sourcing
Once you get into a vintage restoration, sourcing becomes half the job. The good news is you have options. General RV retailers work for functional parts. Specialist suppliers are often better when you need period-correct fit and vintage-style details.
- Vintage parts sourcing guide: Vintage RV Trailer Parts (Process Guide)
- Specialist supplier breakdown: Vintage Trailer Supply brand page
If you are restoring a fiberglass trailer like a Boler, pay extra attention to windows, seals, trim, and any exterior openings. Water gets in quietly, and it does not care how nice your cabinets are.
Conclusion
The reason this Boler stands out is not because it looks good. It does. The reason it stands out is because it proves what happens when someone keeps going through the messy middle.
If you like vintage restorations, this is one worth studying. Scroll the timeline again and notice how many stages are “not pretty” before it becomes beautiful. That is the part most people skip. Shannon didn’t.
What’s your favorite part of the transformation? The paint reveal, the interior, the layout, or the fact it exists at all? Drop a comment and tell me what you would do differently if it was your build.


.jpg/:/cr=t:5.56%25,l:0%25,w:100%25,h:88.89%25/rs=w:1240,h:620,cg:true)


Leave a Reply