
Affiliate Disclosure: I earn commissions if you shop through the links below at no additional cost to you.
Last Updated on April 3, 2024 by Jeremy
Introduction to RV Electrical Systems: Understanding Common Problems and Solutions
Today, we’re getting into the heart of RV living and learning about the common RV electrical problems and how to fix them. Now, I know it might not sound as thrilling as planning your next epic road trip, but trust me, grasping this knowledge is vital for ensuring your journey remains smooth and trouble-free.
Exploring the Basics
Alright, let’s start with the essentials. Your RV’s electrical system is the powerhouse behind your home on wheels. It’s what keeps your lights shining, your fridge cool, and your gadgets charged up for those unforgettable outdoor escapades.
Inside this electrical marvel, you’ll find a network of components working seamlessly together. We’re talking circuits, batteries, converters – all playing their part to ensure your RV feels like a cozy haven, no matter where your travels take you.
Maintenance Matters
Now, onto the maintenance side of things. Just like giving your RV a good clean after a dusty adventure, your electrical system needs regular attention too. Routine check-ups can catch potential issues before they escalate into major headaches.
So, carve out some time in your schedule to give your electrical system a once-over. Check for loose connections, inspect for any signs of wear and tear, and ensure everything is operating smoothly. Trust me, a little maintenance now can save you a world of trouble later on.

Signs of Trouble
Alright, let’s talk warning signs. These are the telltale indicators that something isn’t quite right with your electrical setup. Keep your eyes peeled for:
- Lights flickering or dimming unexpectedly, like they’re auditioning for a horror movie.
- Appliances behaving erratically or refusing to cooperate altogether.
- Strange odors or unusual sounds emanating from your outlets – definitely not music to your ears.
- Tripped breakers or blown fuses causing havoc in your electrical realm.
- Inconsistent power supply from your shore or generator, leaving you scratching your head in confusion.
Spotting these signs early can be a game-changer. So, stay vigilant and be prepared to tackle any electrical issues head-on. Alright, now that we’ve got the basics covered, let’s roll up our sleeves and dive into some common RV electrical problems and how to give ’em the ol’ one-two punch. Ready? Let’s do this!
Battery Issues: Power Source Problems
Alright, folks, let’s talk juice – RV batteries, that is. These powerhouses play a crucial role in keeping your RV running smoothly, so it’s essential to understand how they work and how to troubleshoot when things go awry.
Understanding the Role of RV Batteries
So, what’s the deal with RV batteries? Think of them as the lifeblood of your electrical system. They store energy from your generator or shore power and keep things running when you’re off the grid. Whether you’re powering lights, appliances, or gadgets, your batteries have your back.

Common Symptoms of a Failing Battery
Now, onto the red flags. How do you know if your battery’s on the fritz? Keep an eye out for these telltale signs:
- Lights dimming or flickering, signaling a lack of power.
- Appliances running sluggishly or not at all, indicating low voltage.
- Difficulty starting your RV, especially in cold weather – a classic sign of battery trouble.
- A sulfurous smell or bulging casing, suggesting the battery is on its last legs.
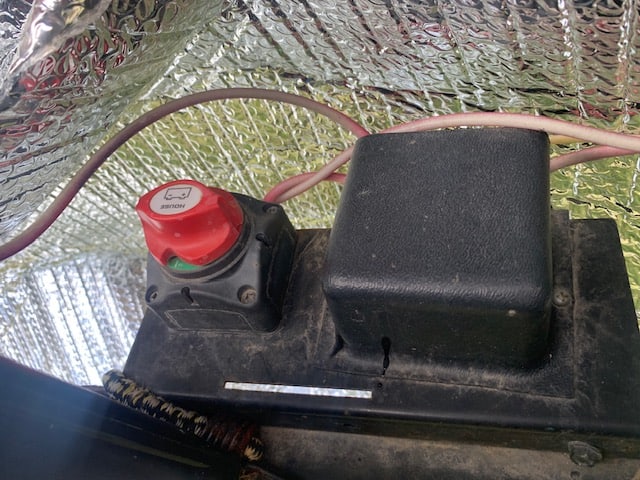
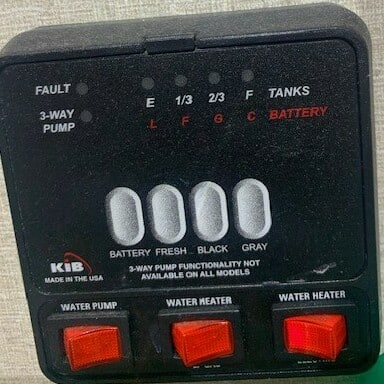
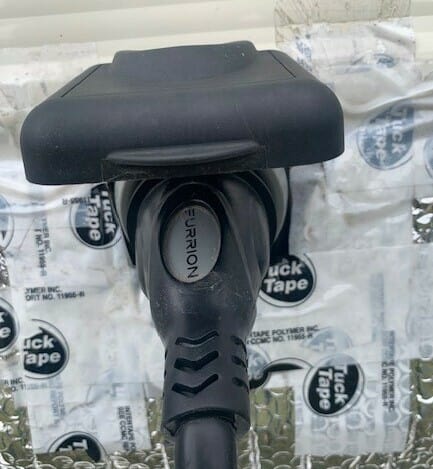
For travel trailers, 5th-wheels, and Toy Haulers, battery signs of failing are the same as above, but we could also add:
- Switch tells us how much “power” is left. It also let’s us know other things as well 😉
Steps to Diagnose and Replace a Faulty Battery
Alright, so you’ve spotted the warning signs – now what? Time to roll up your sleeves and get to work. Here’s a step-by-step guide to diagnosing and replacing a faulty battery:
- Inspect the Connections: Start by checking the battery terminals for corrosion or loose connections. Clean them with a wire brush and tighten any loose bolts.
- Test the Voltage: Use a multimeter to measure the voltage of your battery. A healthy battery should read around 12.6 volts. Anything significantly lower could indicate a problem.
- Load Test: If your voltage is low, perform a load test to see how the battery holds up under pressure. This will help determine if it needs to be replaced.
- Replace if Necessary: If your battery fails the load test or shows other signs of damage, it’s time for a replacement. Choose a high-quality battery that’s compatible with your RV’s electrical system.
- Proper Disposal: Be sure to dispose of your old battery properly. Many auto parts stores or recycling centers will take them off your hands.
Another usefull way of testing the battery is by purchasing one of these devices from Amazon. They are called a 12 V Battery tester, and this specific model has the built in features of performing a load test already. Check it out below:

Tips for Battery Maintenance and Longevity
Prevention is key when it comes to battery issues. Here are some tips to keep your batteries in tip-top shape:
- Regularly check and clean the terminals to prevent corrosion.
- Keep your batteries charged, especially during storage periods.
- Invest in a battery tender to maintain optimal charge levels.
- Avoid overcharging or deep discharging your batteries, as this can reduce their lifespan.
- Consider upgrading to maintenance-free AGM batteries for improved performance and durability.
By following these simple tips, you can extend the life of your RV batteries and minimize the risk of power problems on the road. Alright, now that we’ve shed some light on battery issues, let’s move on to the next electrical conundrum. Ready? Let’s power through!
Troubleshooting RV Power Outlets
Alright, fellow travelers, let’s talk about one of the most crucial aspects of RV living: power outlets. These little gems keep your gadgets charged, your appliances running, and your creature comforts in check. But what happens when they go on the fritz? Fear not, we’ve got the lowdown on troubleshooting RV power outlets like a seasoned pro.
Diagnosing Power Outlet Failures
First things first – when your power outlets go kaput, it’s time to put on your detective hat and get to the bottom of the mystery. Here’s how to tackle the case:
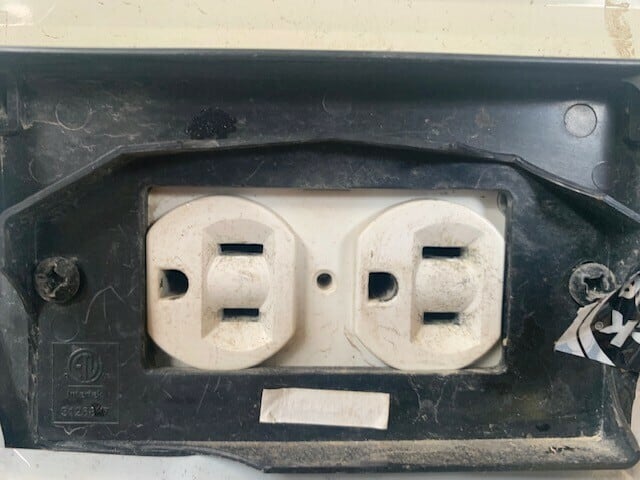
- Visual Inspection: Start by visually inspecting the outlet for any obvious signs of damage or wear. Look for cracks, discoloration, or loose connections.
- Test Other Outlets: Check other outlets in your RV to see if the problem is isolated or widespread. If multiple outlets are affected, the issue may be with your electrical system rather than individual outlets.
- Test with a Multimeter: Use a multimeter to test for voltage at the outlet. If there’s no voltage, the problem may lie with the wiring or circuitry.
- Check Appliances: Sometimes, the problem isn’t with the outlet itself but with the appliance you’re trying to use. Test the appliance in another outlet to rule out this possibility.
Safety Precautions When Dealing with Electrical Components
Now, a word on safety – dealing with electricity can be risky business, so it’s essential to take proper precautions:
- Always turn off the power supply before working on electrical components.
- Use insulated tools to avoid shocks or short circuits.
- Wear protective gear, such as gloves and safety goggles, when handling electrical equipment.
- Never attempt to repair or modify electrical components unless you’re properly trained and qualified.
Remember, safety first – no shortcuts allowed when it comes to electricity!
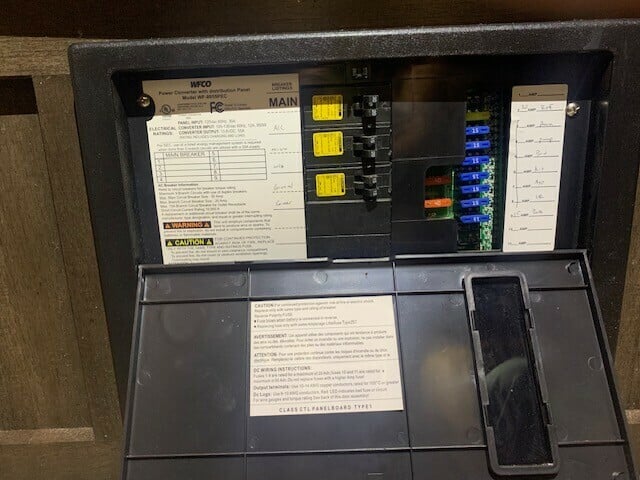
How to Reset GFCI Outlets and Check Circuit Breakers
Alright, let’s get down to brass tacks. Here’s how to reset a GFCI outlet and check circuit breakers like a pro:
- Resetting GFCI Outlets: GFCI outlets are equipped with a built-in circuit breaker that trips when it detects a fault. To reset the outlet, simply press the “reset” button located on the face of the outlet. If the outlet trips repeatedly, it may indicate a more serious problem that requires professional attention.
- Checking Circuit Breakers: If your outlets are dead as a doornail, it’s time to check the circuit breakers. Locate the breaker panel in your RV and look for any breakers that are in the “off” position or have tripped. Reset any tripped breakers by switching them to the “on” position.

When to Consult a Professional Electrician
Finally, know when to throw in the towel and call in the cavalry – aka, a professional electrician. Here are some scenarios where it’s best to leave it to the experts:
- If you’re dealing with complex electrical issues beyond your expertise.
- If you suspect wiring problems or other potential hazards.
- If you’ve attempted DIY repairs but the problem persists.
Remember, it’s better to be safe than sorry when it comes to electrical work. So, don’t hesitate to call in reinforcements if needed.
Alright, adventurers, now that we’ve covered the ins and outs of troubleshooting RV power outlets, let’s move on to our next electrifying topic
Inverter/Converter Issues and Solutions
OK, now let’s dive into another essential aspect of RV electrical systems: inverters and converters. These unsung heroes play a crucial role in keeping your gadgets charged and your appliances running smoothly. But what happens when they hit a snag? Fear not, we’ve got the scoop on troubleshooting inverter and converter issues like a seasoned pro.
Difference Between an Inverter and a Converter
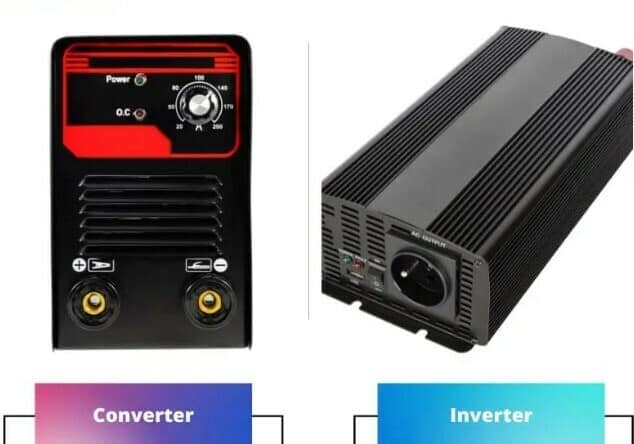
First things first – let’s clear up any confusion about inverters and converters:
- Inverter: This handy device takes DC (direct current) power from your batteries and converts it into AC (alternating current) power, allowing you to run household appliances and electronics when you’re off the grid.
- Converter: On the flip side, a converter does the opposite – it takes AC power from your shore or generator and converts it into DC power to charge your batteries and power your DC appliances.
In simple terms, think of an inverter as a power provider when you’re off the grid, and a converter as a power translator when you’re plugged in.
Typical Problems with Inverters and Converters
Now, let’s talk trouble. What are some common issues you might encounter with your inverter or converter? Here are a few:
- Overloading: Trying to power too many devices at once can overload your inverter, causing it to shut down or malfunction.
- Low Battery Voltage: If your batteries are running low, your inverter may struggle to provide enough power, leading to voltage drops or system failures.
- Faulty Connections: Loose or corroded connections can disrupt the flow of power, leading to poor performance or total failure.
- Component Failure: Like any electronic device, inverters and converters can experience component failure over time, especially if they’re not properly maintained.
How to Diagnose and Fix Common Issues
Alright, let’s roll up our sleeves and get to work. Here’s how to diagnose and fix common inverter and converter issues:
- Check for Overloading: If your inverter is acting up, start by reducing the number of devices connected to it. Overloading is a common cause of inverter failure, so lighten the load and see if that solves the problem.
- Inspect Connections: Next, inspect the connections to your inverter or converter for any signs of damage or corrosion. Tighten loose connections and clean off any corrosion using a wire brush or contact cleaner.
- Test Battery Voltage: Use a multimeter to test the voltage of your batteries. If they’re running low, it could be the culprit behind your inverter or converter woes. Make sure your batteries are fully charged and in good condition.
- Check for Component Failure: If all else fails, it may be time to dig deeper and check for component failure. This may require professional assistance, especially if you’re not comfortable working with electronics.
Periodic Inverter/Converter Inspections to Prevent Malfunctions
Last but not least, don’t forget about maintenance. Regular inspections can help prevent inverter and converter malfunctions before they occur. Here are a few tips:
- Inspect your inverter and converter regularly for signs of damage or wear.
- Clean and tighten connections as needed to ensure optimal performance.
- Test your batteries and charging system periodically to ensure they’re operating correctly.
- Consider investing in a surge protector or voltage regulator to protect your electronics from power surges.
By staying proactive with maintenance, you can keep your inverter and converter humming along smoothly and avoid unexpected breakdowns on the road.
Navigating Lighting and Appliance Faults
Moving forwatd, let’s shed some light on another crucial aspect of RV living: lighting and appliances. These are the little luxuries that make life on the road feel like home sweet home. But what happens when they start acting up? Don’t worry, we’ve got you covered with tips for navigating lighting and appliance faults like a pro.

Identifying Faulty Lighting and Appliance Wiring
Alright, let’s start with the basics – how do you know if your lighting or appliances are on the fritz? Keep an eye out for these telltale signs:
- Flickering Lights: If your lights are flickering or dimming unexpectedly, it could indicate a wiring problem or loose connection.
- Appliance Malfunctions: Appliances that refuse to turn on, run sluggishly, or make strange noises may be experiencing electrical issues.
- Burnt Smells: A burning odor near your lights or appliances could signal overheating or faulty wiring.
- Tripped Breakers: If your lights or appliances suddenly stop working, check your breaker panel for any tripped breakers or blown fuses.
Replacing Bulbs and Fuses
What about replacing bulbs and fuses? Let’s roll up our sleeves and get to work. Here’s how to tackle common lighting and appliance issues:
- Replacing Bulbs: If your lights are on the fritz, start by checking the bulbs. Sometimes, a simple bulb replacement is all it takes to brighten things up. Make sure to use bulbs that are compatible with your fixtures and wattage requirements.
- Checking Fuses: If your lights or appliances are still giving you grief, it’s time to check the fuses. Locate your RV’s fuse panel and look for any blown fuses. Replace any blown fuses with ones of the same amperage rating.
Signs of Appliance Electrical Problems and How to Address Them
How about talking appliances? These trusty companions can sometimes throw a wrench in your plans with electrical hiccups. Here’s what to watch out for:
- Strange Noises: If your appliances are making unusual noises, it could indicate motor or electrical issues. Unplug the appliance and inspect it for any signs of damage or wear.
- Failure to Start: Appliances that refuse to start may have electrical problems or faulty components. Check the power supply, wiring, and connections to diagnose the issue.
- Overheating: Appliances that feel excessively hot to the touch may be overheating due to electrical problems. Unplug the appliance and allow it to cool down before investigating further.
The Balance Between DIY Fixes and Professional Help
Finally, let’s talk about DIY versus professional help. While many lighting and appliance issues can be tackled with some basic DIY know-how, there are times when it’s best to call in the pros. Here’s how to strike the right balance:
- DIY Fixes: Simple tasks like replacing bulbs, checking fuses, and tightening connections can often be done yourself with a little guidance and know-how.
- Professional Help: For more complex issues or anything involving electrical wiring, it’s best to leave it to the experts. A licensed electrician can diagnose and repair electrical problems safely and effectively.
Remember, safety first – if you’re unsure about tackling a repair yourself, don’t hesitate to seek professional assistance.
Shore Power Complications: External Supply Concerns
Ah, shore power – the lifeline of many an RV enthusiast. But what happens when that connection isn’t as reliable as you’d hoped? Let’s dive into some common shore power complications and how to navigate them like a seasoned pro.
Risks and Symptoms of a Poor Shore Power Connection
First things first, let’s talk risks. A poor shore power connection can spell trouble for your RV’s electrical system.
Here are some red flags to watch out for:
- Intermittent Power Supply: If your shore power connection is flaky, you may experience intermittent power supply, causing lights to flicker and appliances to malfunction.
- Voltage Fluctuations: A dodgy shore power connection can lead to voltage fluctuations, which can damage sensitive electronics and appliances.
- Overheating: Loose or corroded shore power connections can generate heat, posing a fire hazard if left unchecked.
How to Properly Connect to Shore Power
Alright, now let’s get down to business. Here’s how to ensure a proper shore power connection:
- Inspect the Connection: Before plugging in, inspect the shore power outlet and cord for any signs of damage or wear.
- Use a Surge Protector: Invest in a high-quality surge protector to safeguard your RV’s electrical system from power surges and spikes.
Amazon have these on right now as their top-sellers. Check out pricing by clicking the image:
- Connect Securely: When plugging in, make sure the connection is secure and free of debris. A loose connection can lead to voltage drops and other issues.
- Monitor Voltage: Keep an eye on your RV’s voltage levels using a multimeter or voltage monitor. If you notice any fluctuations, it may be a sign of a poor shore power connection.
Strategies for Monitoring Voltage and Avoiding Overloads
Finally, let’s talk strategy. Here are some tips for monitoring voltage and avoiding overloads:
- Invest in a Voltage Monitor: A voltage monitor can alert you to any fluctuations in your RV’s electrical system, allowing you to take action before damage occurs.
- Limit Appliance Use: To prevent overloads, avoid running multiple high-power appliances simultaneously. This can put a strain on your RV’s electrical system and increase the risk of damage.
- Use an Energy Management System: Consider installing an energy management system to automatically regulate power usage and prevent overloads.
Developing a Regular Electrical Maintenance Routine
Regular electrical maintenance is crucial for ensuring your RV’s electrical system stays in tip-top shape. By staying proactive with upkeep, you can prevent problems before they occur and keep your RV running smoothly for years to come.
Creating a checklist for your electrical system checkups is a great way to ensure that no component goes overlooked. This checklist should include tasks such as checking connections, testing voltage levels, and inspecting components for signs of wear or damage.
Scheduled inspections are also essential for preventing problems. Make sure to set aside time regularly to inspect your RV’s electrical system and perform any necessary upkeep. This can help catch potential issues early and prevent them from escalating into major problems down the road.
While DIY maintenance is great for routine tasks, there are times when it’s best to call in the experts. If you encounter complex electrical issues or feel unsure about tackling a repair yourself, don’t hesitate to seek professional assistance. A licensed electrician can diagnose and repair electrical problems safely and effectively.
Make sure you have the essential tools and resources on hand for RV electrical maintenance. This includes items like multimeters, voltage monitors, surge protectors, and a trusted list of professional electricians for when you need expert help.
Don’t forget to check out the Amazon links provided throughout this post for handy tools and resources to help you with your RV electrical maintenance needs. By following these guidelines and staying proactive with maintenance, you can keep your RV’s electrical system in top shape and enjoy worry-free adventures on the road. So, make sure these common electrical problems are easy to fix by ensuring maintenance is a priority so you can hit the open road with confidence.
Safe travels, and may your journey be electrifying!
Cheers!


.jpg/:/cr=t:5.56%25,l:0%25,w:100%25,h:88.89%25/rs=w:1240,h:620,cg:true)


Leave a Reply