

Affiliate Disclosure: I earn commissions if you shop through the links below at no additional cost to you.
Last Updated on January 9, 2025 by Jeremy
Introduction:
Winter is approaching—“weather” we like it or not—and for RV enthusiasts like you, it’s time to prepare your home on wheels for the chilly months ahead. Whether you’re planning to store your RV or live in it during winter, winterizing is essential to protect your rig from harsh conditions that can wreak havoc on its systems and structure.
In this detailed guide, we’ll walk you through the process of winterizing your RV step by step, providing practical tips, pros and cons, and essential tools to help you prepare for the cold with confidence.
Let’s get started on ensuring your RV is ready for a stress-free winter season!

Step 1: Gather Your Winterizing Supplies
Before starting, gather all the necessary supplies. Having everything on hand will save time and ensure you don’t miss any critical steps.
Checklist of Supplies:
- RV Antifreeze (non-toxic) or Compressed Air
- Wrenches and Screwdrivers
- RV Water Pump Bypass Kit
- Water Heater Bypass Kit
- Sealant and Caulk
- Draft Stoppers for Windows and Doors
- RV Covers
- Non-Toxic RV Cleaner
- Battery Disconnect Tools
- Tire Pressure Gauge
Step 2: Pros and Cons of DIY vs. Professional Service
DIY Winterizing:
- Pros: Saves money, lets you learn more about your RV, and allows for a flexible schedule.
- Cons: Requires time, effort, and basic knowledge of RV systems.
Hiring a Professional:
- Pros: Ensures thorough winterization, especially for first-time RVers.
- Cons: Can be costly, depending on the service.
Tip: If you’re new to RV maintenance, start small—perhaps by winterizing the interior and leaving plumbing tasks to the pros.
Step 3: Preparing Your RV Interior
Creating a warm and cozy interior is key to surviving winter comfortably.
Cleaning and Decluttering
- Remove all perishable items to prevent freezing or spoilage.
- Clean carpets, upholstery, and surfaces thoroughly. Dust and dirt can impact insulation efficiency.
Pro Tip: If you need a vacuum cleaner for tight RV spaces, check out our guide: Best Vacuum Cleaner for RVs .
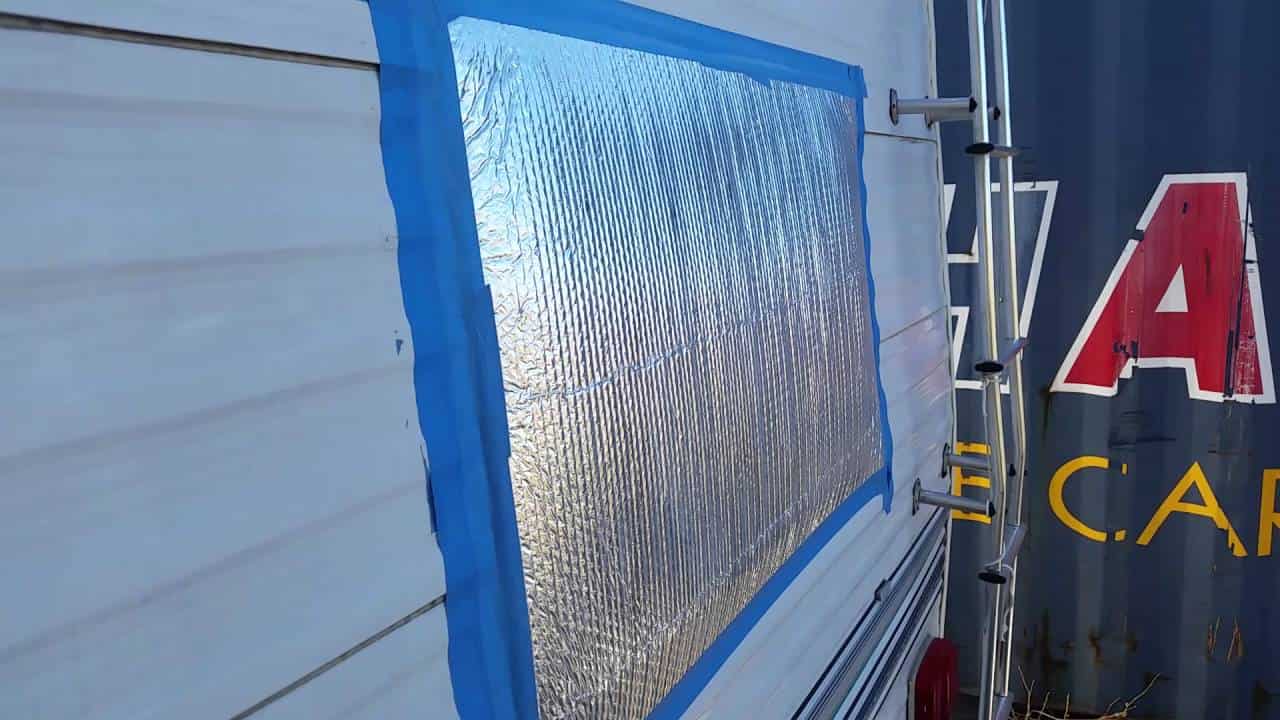
Insulating Windows and Doors
- Use Reflectix Insulation on windows for an extra thermal barrier. Cut pieces to fit your windows and secure them with Velcro strips or White Tucktape.
- Place draft stoppers, such as Twin Draft Guard, at door bases to block drafts effectively.
Sealing Cracks and Gaps
- Inspect for cracks or gaps around windows, vents, and doors.
- Apply Dicor Lap Sealant or Geocel Proflex RV Sealant to roof seams and other critical areas to prevent cold air and moisture entry.
Insulating Floors
- Lay foam board insulation or heavy rugs on the floor to keep your RV warmer.
- Use area rugs for added comfort and insulation.
Pro Tip: Sealing cracks also keeps rodents and pests from entering your RV during storage.
Step 4: Draining and Flushing Water Systems
Water expands when it freezes, which can damage pipes, tanks, and water heaters. Draining and protecting your water systems is critical.
Draining the Freshwater Tank
- Turn off the water pump and disconnect from any water source.
- Open all faucets and low-point drains, including at the bottom of the tank.
- Allow the water to drain completely.
- Close all drains and faucets once empty.
Pro Tip: Don’t worry about a few drops of water left in your freshwater tank. Significant damage only occurs if there’s a large volume of water that can freeze and expand.
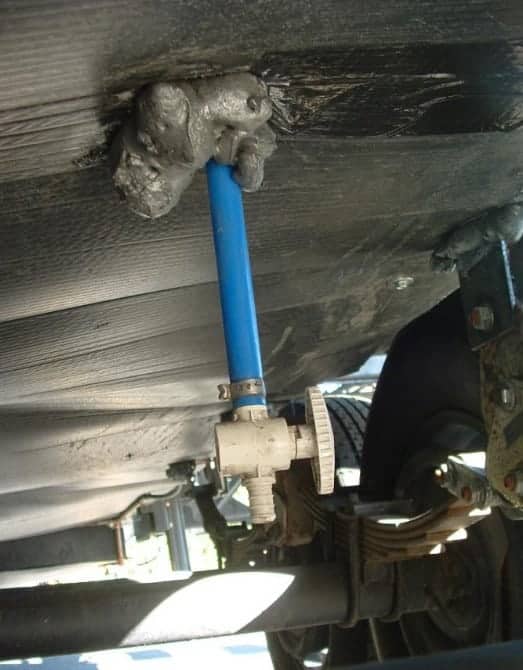
Draining the Water Heater
- Turn off the water heater and let it cool down completely.
- Open the pressure relief valve to release pressure.
- Remove the drain plug (use a socket wrench if needed).
- Let all the water drain out completely.
Pro Tip: Always ensure the water heater is powered off before draining to prevent damage to the heating element.
Flushing the Plumbing System with Compressed Air
- Connect a compressor to your water inlet using a blow-out plug (e.g., Camco Blow Out Plug).
- Set the compressor to 30-40 PSI to avoid damaging pipes.
- Open each faucet and fixture, starting with the one closest to the water inlet, and let compressed air blow out all the water.
Winterizing with Antifreeze
- Pour 2-3 gallons of non-toxic RV antifreeze into your freshwater tank.
- Turn on the water pump.
- Open each faucet and fixture until pink antifreeze flows out.
- Don’t forget to winterize the toilet, shower, and outdoor faucets.
Gray and Black Tank Protection
- Thoroughly flush gray and black tanks to remove debris.
- Add 1-2 cups of RV antifreeze to each tank after draining.
- Run water into sinks and showers until antifreeze appears in the tanks.
Step 5: Winterizing Appliances
Your appliances need protection from freezing temperatures to ensure they remain functional in the spring.
Refrigerator and Freezer
- Empty and clean thoroughly.
- Leave doors ajar to prevent mold growth.
Stove and Oven
- Clean to avoid food residue attracting pests.
Microwave
- Wipe clean and leave the door open to avoid trapped odors.
Washer/Dryer
- Follow the manufacturer’s instructions to winterize properly. Add antifreeze to any residual water in the system to prevent freezing.
Hot Water Heater Maintenance
- Check the anode rod for signs of corrosion or damage. Replace it if necessary to prevent tank damage.
–> Watch a 1-minute video on how to do this HERE <–
Step 6: RV Exterior Maintenance
Protecting your RV’s exterior is just as important as winterizing the interior.
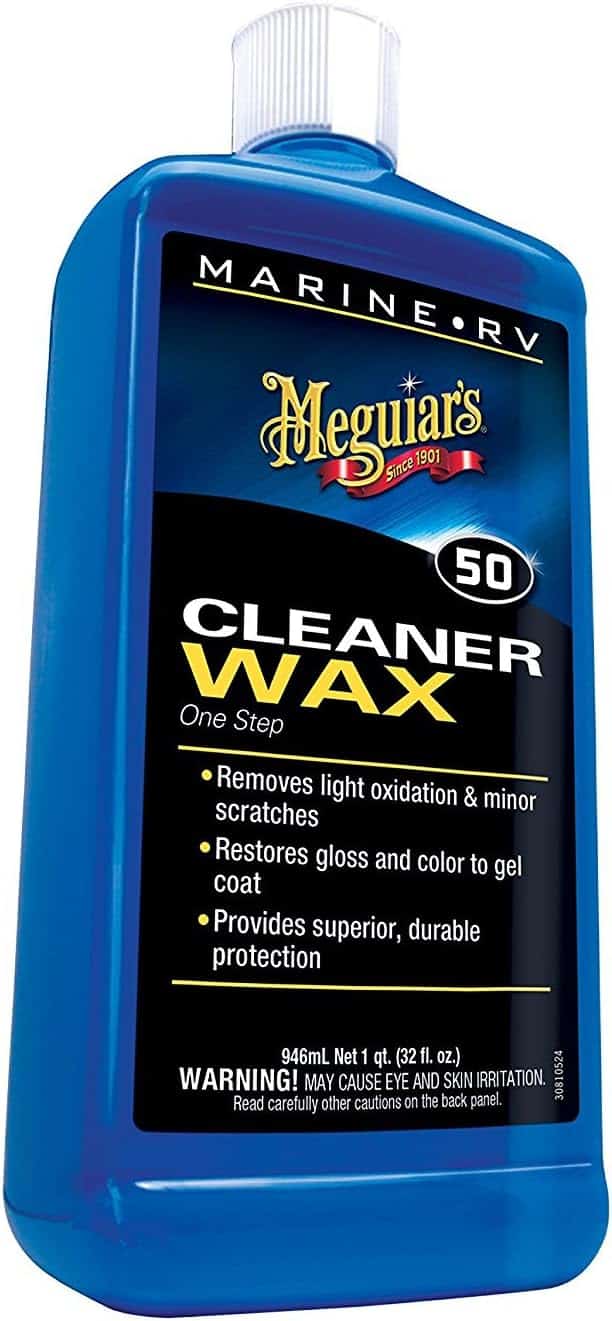
Cleaning and Protecting
- Wash your RV to remove dirt, grime, and road salt, which can cause corrosion.
- Apply a protective wax or sealant (e.g., Meguiar’s RV Wax) to prevent moisture damage.
Roof and Vents
- Inspect the roof for damage, cracks, or loose seals. Apply Dicor Lap Sealant to reseal problem areas.
- Use vent insulators like Camco Vent Insulators to reduce heat loss through roof vents.
- Check vent covers for cracks or wear and replace them if needed.
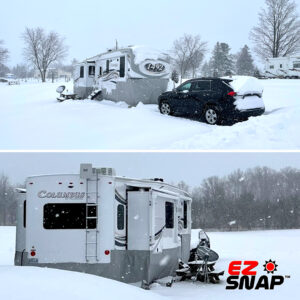
Skirting for RVs
If you plan to live in your RV through the winter, adding skirting is one of the most effective ways to keep your rig warm and protected. Skirting insulates the underside of your RV, reducing heat loss and preventing cold air from freezing your pipes and tanks.
- DIY Skirting Options: Foam board or heavy-duty tarps are budget-friendly options for insulating the RV’s underside.
- Pre-Made Skirting Solutions: For an easy and professional solution, consider EZ Snap RV Skirting. Their skirting kits are designed for fast installation without drilling, making them perfect for RV owners who want a hassle-free option.
- Exclusive Offer: Check out EZ Snap RV Skirting here: EZ Snap RV Skirting Affiliate Link.
Pro Tip: Skirting not only keeps your RV warmer but also helps reduce propane usage, saving you money in the long run.
Covering Your RV
- Invest in a high-quality RV cover (e.g., Classic Accessories OverDrive RV Cover) to shield your RV from snow, ice, and debris.
- Use a breathable cover to prevent moisture buildup and mold.
Step 7: Battery Care and Storage
RV batteries are susceptible to damage from freezing temperatures.
Disconnect Batteries
- Disconnect all batteries to prevent parasitic drain during storage.
- Store batteries in a cool, dry place, away from direct concrete contact (place them on a wooden pallet or rubber mat – this eliminates battery drain).
Using a Battery Tender
- Maintain charge levels with a battery tender or maintainer to prevent full discharge over the winter.
- For lithium batteries, store them at 40-60% charge for optimal longevity.
Pro Tip: Regularly check the battery’s voltage during storage to ensure it’s holding a charge.

Step 8: Tire Maintenance
Tires need special attention in cold weather to avoid cracking or deflation.
Checking Tire Pressure
- Inflate tires to the manufacturer’s recommended PSI to prevent flat spots or structural damage.
Using Tire Covers
- Protect tires from UV exposure, snow, and ice with tire covers.
Preventing Tire Dry Rot
- Clean tires with mild soap and water before covering them to prevent dry rot during storage.
Lifting RV Tires with Jacks
- If possible, use jack stands to lift the RV off its tires, reducing strain and preventing flat spots during long-term storage.
Pro Tip: Before spring, inspect tires for cracks or wear before hitting the road.
Step 9: Propane and Heating Systems
If you plan to live in your RV during winter, heating systems are essential for comfort and safety.
Inspecting Propane Systems
- Check propane tanks and lines for leaks using soapy water. Look for bubbling to detect leaks.
- Ensure propane tanks are filled before winter.
Testing the Furnace
- Test your furnace to ensure it’s working efficiently.
- Clean or replace the furnace filter if needed.
Supplemental Heat Sources
- Consider ceramic space heaters or electric fireplaces as supplemental heating options if you have access to shore power.
- Safety Tip: Always use heaters with tip-over protection and never leave them unattended.
Pro Tip: Troubleshoot common furnace issues by watching the below 16-Minute Furnace Maintenance Video.
Step 10: Storage and Regular Maintenance
Where and how you store your RV impacts its condition come springtime.
Choosing the Right Storage Location
- Indoor storage is ideal for protection from the elements.
- If outdoor storage is your only option, ensure your RV is covered and elevated to prevent moisture damage.
Preventing Rodent Infestation
- Plug small openings with steel wool or copper mesh to block entry points.
- Use natural repellents like peppermint oil or commercial options like Fresh Cab Rodent Repellent in storage areas.
Regular Inspections
- Check monthly for signs of leaks, pests, or other damage.
- Remove snow buildup from the roof with a soft-bristle broom or snow rake to prevent damage.
Solar Panel Maintenance
- If your RV has solar panels, clear snow regularly and check connections for corrosion.
Pro Tip: Use a soft cloth or brush to clean solar panels to avoid scratches.

Winter Travel Tips
If you’re planning to travel in your RV during the winter instead of storing it, keep these tips in mind:
- Pack an Emergency Kit: Include extra blankets, non-perishable food, water, and a portable heater in case of unexpected delays.
- Bring Snow Removal Tools: A shovel and ice scraper can be lifesavers in snowy regions.
- Install Chains if Needed: Be prepared for icy roads by carrying tire chains if traveling through mountainous or snowy areas.
Pro Tip: Keep a weather app handy to monitor changing conditions during your travels.
Conclusion
Winterizing your RV is an investment in its longevity and your peace of mind. By following these comprehensive steps, you’ll protect your rig from the harsh effects of winter and ensure it’s ready for your next adventure.
Now it’s your turn—share your favorite winterizing tips in the comments below! Do you have questions or unique methods to prepare your RV for winter? Let us know, and let’s build a community of well-prepared RVers.
Also, don’t forget to check out our guide on Best RV Generators for powering through cold weather. Here’s to a safe, warm, and memorable winter season. Cheers and happy travels!


.jpg/:/cr=t:5.56%25,l:0%25,w:100%25,h:88.89%25/rs=w:1240,h:620,cg:true)


Leave a Reply